How to Fit iPhone Screen Protector: Step-by-Step Guide
Master the art of fitting an iPhone screen protector with dust-free prep, precise alignment, and bubble-free results. Compare glass vs film, learn clean-room techniques, and ensure lasting display protection.

Learn how to fit an iPhone screen protector cleanly and bubble-free. This guide covers choosing the right protector, prepping your workspace, and a precise, repeatable application process for a flawless finish. It explains glass vs film options, dust-free steps, precise alignment, and how to handle edge bubbles for long-lasting protection.
Why a Clean Setup Matters
According to Phone Tips Pro, the success of fitting an iPhone screen protector begins long before you touch the device. A clean, dust-free workspace, proper lighting, and a calm, patient approach dramatically reduce airborne dust and micro-scratches that can trap air or create specks under the glass. Start by clearing your desk, turning off fans or AC that blow dust, and laying out your tools within arm's reach. Work on a dry, static-free surface, and consider using a microfiber mat that reduces lint. In practice, the clean setup is your first line of defense against bubbles and edge lifting. A restless environment invites particles that ruin alignment, so take 2-3 minutes to prepare before you even open the package. Phone Tips Pro's team notes that most bubble issues originate from dust landing on the screen during alignment, not from the adhesive itself. By investing a little time upfront you set yourself up for a smooth, long-lasting result.
A well-organized workspace also reduces the risk of accidentally touching the screen with dirty fingers. Keep your hands clean, avoid touching the adhesive side of the protector, and resist the urge to rush. The result is a cleaner, crisper install with fewer interruptions. Finally, verify your model compatibility before starting; wrong sizing is a common source of misalignment that undermines even the best technique.
Choosing the Right Screen Protector
When selecting a screen protector for your iPhone, you’ll choose between glass and film (polymer) options. Glass protectors offer the best scratch resistance and edge clarity, but are slightly thicker. Film protectors are thinner, often cheaper, and more forgiving on curved screens. Consider your priorities: maximum touch sensation and protection vs. ultra-thin aesthetics. Pay attention to features like oleophobic coating (oil resistance), anti-smudge properties, and whether the protector has a built-in alignment frame or micro-tabs for precise positioning. Thickness matters too; common options range from about 0.2 mm to 0.4 mm. If you frequently use your device in wet or dusty environments, a high-quality glass protector with a strong edge seal can reduce micro-bubbles. For most users, a mid-range glass protector balances feel, durability, and install ease. Always buy a protector designed for your exact iPhone model to ensure accurate cutouts for the camera and sensors.
Prep the Device: Cleaning and Dry Time
A dust-free screen is the cornerstone of a successful fit. Start by washing your hands, then prepare your cleaning kit: microfiber cloth, alcohol wipe (or isopropyl alcohol pad), and a dust removal sticker. Power down the phone and disconnect any accessories to prevent accidental touches. Gently wipe the screen in circular motions with the alcohol pad to remove oils and fingerprint residue. Allow the screen to dry completely; even a small amount of moisture can cause adhesion problems. Use the dust removal sticker to pick up any remaining particles. Finally, inspect the surface under good lighting. If you see fibers or lint, repeat cleaning. Phone Tips Pro Analysis, 2026 notes that misalignment often stems from residual dust rather than adhesive issues, so take your time with this step. A clean screen combined with a dry surface dramatically improves the chance of a bubble-free installation.
Proper Alignment Techniques
Aligning the protector correctly is the key to a flawless finish. If your kit includes an alignment frame or tabs, position them along the edges to guide placement. If not, use a light source to help you center the cutouts with the camera and home button. Hold the protector by its edges to avoid fingerprints; place the adhesive side down near the top edge, leaving a small tab to grip. Slowly bring the protector down to the screen, stopping just before contact so you can fine-tune alignment. Tip: keep your wrists steady and move the protector with gentle, short taps rather than dragging. A precise pre-alignment prevents the need for expensive readjustments once the adhesive begins to bond. For curved displays, ensure the protector’s curvature matches your iPhone model to avoid edge lifting. A quick final peek from multiple angles helps confirm symmetry before adhesion begins.
Applying the Protector: Step-by-Step Actions
Once aligned, peel back the protective film slightly to expose the adhesive side, then gently lower the protector onto the screen. Start at the top edge and slowly lay it down, avoiding air pockets. Use a soft card or the supplied squeegee to press from the center outward, pushing any trapped air toward the edges. Work slowly and steadily; rushing increases the chance of bubbles near the corners. If a bubble remains, gently lift the protector at the nearest edge and reapply, then re-smooth with the card. Image references can help visualize the center-out pressure method. Do not press too hard; excessive force can crack the protector and damage the edge seal. A minor amount of edge lift is common during the first minute as the adhesive begins to settle. Keep a calm, patient pace to avoid creating new air pockets.
Handling Common Issues: Bubbles, Misalignment, Edges
Bubbles are usually trapped dust or moisture under the adhesive. For tiny bubbles, press from the center outward toward the edge using a clean, soft card. If misalignment occurs, lift the protector gently from the nearest edge and realign, then re-press as before. Edge lifting can happen if the edge is not fully seated; reapply from the center toward the edges and ensure the protector lies flat along the entire periphery. If you’re dealing with stubborn bubbles near the corners, use a fine-point tool lightly to nudge air toward the edge, but avoid scratching or lifting the protector. Regular practice reduces these issues over time, and following the steps above minimizes wasted protectors and returns you to normal usage quickly.
Finishing Touches and Testing Touch Responsiveness
After adhesion, wipe the surface once more with a microfiber cloth to remove any fingerprints from the outer surface. Power on the device and test touch sensitivity by swiping across all areas of the screen and typing in a few apps. Check that the camera and sensors are unobstructed by the protector. If you notice any glare or misalignment, a gentle readjustment within the first few minutes can fix it. Allow the adhesive to cure for a few minutes before putting the device in your pocket or case. Phone Tips Pro recommends a brief period of normal use to verify long-term comfort and responsiveness before continuing with daily activities.
Maintenance and Replacement Tips
To maximize longevity, clean the screen regularly with a microfiber cloth and avoid using abrasive cleaners that could scratch the surface. When it’s time to replace, remove the old protector carefully from an edge and replace it with a new one that matches your iPhone model. If you frequently switch cases, ensure the protector edge is flush with the screen to prevent edge peeling. Store spare protectors in their original packaging to avoid dust buildup. Routine care helps preserve clarity and touch sensitivity over time.
Tools & Materials
- Screen protector (glass or film)(Ensure it's for your exact iPhone model)
- Microfiber cloth(Lint-free and clean)
- Alcohol prep pad or isopropyl alcohol(70%+ isopropyl recommended)
- Dust removal sticker(Kept handy for dust particles)
- Plastic card or squeegee(Use gently to smooth out air)
- Optional tack cloth(Extra dust removal)
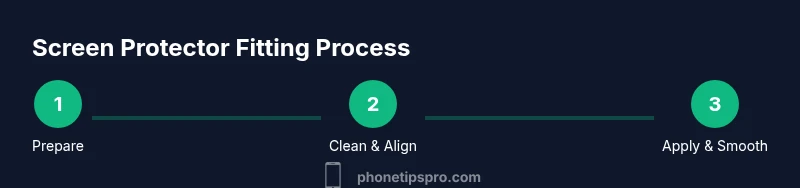
Steps
Estimated time: 15-25 minutes
- 1
Prepare workspace
Clear a clean, well-lit surface. Gather all tools and disable distractions to avoid accidents. A calm setup reduces dust exposure and speeds up the process.
Tip: Pro tip: Keep tools within arm's reach and avoid fans that blow dust around. - 2
Clean the screen thoroughly
Wash your hands, wipe the screen with an alcohol pad, then dry with microfiber. Inspect for any smudges or fibers; re-clean if needed.
Tip: Pro tip: Use a dust removal sticker after cleaning to catch remaining particles. - 3
Dry and inspect surface
Let the screen air-dry for 30-60 seconds. Hold the device under good lighting and look for stray fibers or moisture before proceeding.
Tip: Pro tip: If you see dust, pause and re-clean to prevent bubbles. - 4
Align the protector
Position the protector using guide tabs or a centered manual alignment. Center the cutouts with camera and speaker areas, then hold steady.
Tip: Pro tip: Use a light source to verify symmetry; tiny misalignments are easier to fix now. - 5
Apply the protector
Gently lower the adhesive side onto the screen from top to bottom. Leave a small edge tab if available. Press slowly to avoid trapping air.
Tip: Pro tip: Start at the top edge and work downward to minimize air pockets. - 6
Smooth out air
Use a soft card to push air from the center toward the edges. If a bubble remains, lift near the closest edge and re-press.
Tip: Pro tip: Do not press too hard; excess force can crack the protector or damage seals. - 7
Final check and cure
Wipe the surface again and test touch responsiveness. Ensure there’s no edge lift and that sensors stay clear.
Tip: Pro tip: Allow a brief curing period before heavy use; check in different lighting for any missed dust. - 8
Maintenance and replacement
Store extras in their packaging. Replace when scratched or cloudy. Clean regularly with a microfiber cloth and avoid harsh chemicals.
Tip: Pro tip: Keep a backup protector handy for quick, clean swaps.
FAQ
Do I need to remove an existing screen protector before applying a new one?
Yes. If the existing protector is damaged, peeling or lifting, remove it before applying a new one to ensure proper adhesion and alignment.
Yes—remove any old protector before starting so the new one can adhere evenly.
Can I apply a screen protector without cleaning the screen?
No. A dirty screen traps dust and oils under the adhesive, causing bubbles and poor adhesion. Always clean and dry the surface first.
No. Clean and dry the screen before applying for best results.
What types of screen protectors work best for iPhone?
Glass protectors offer durability and clarity, while film protectors are thinner and more affordable. Choose based on priority: clarity and feel vs. thickness and ease of alignment.
Glass is generally best for feel and durability, film for cost and minimal thickness.
How can I fix bubbles after applying?
Identify the bubble, push from center to edge with a card, or gently lift the nearest edge to release trapped air, then re-press.
Push bubbles toward the edge with a soft card, or re-align if necessary.
Will a screen protector affect touch sensitivity?
A high-quality protector should preserve touch sensitivity. If you notice lag, ensure the protector is properly aligned and fully seated.
Quality protectors usually maintain touch, but misalignment can cause issues.
Is it necessary to use a case with a screen protector?
A good case can help protect the edges but ensure the case doesn’t press against the protector’s edges, which could cause lifting.
Cases protect the edges, but pick ones that don’t lift the protector.
Watch Video
Quick Summary
- Prepare a clean, dust-free workspace
- Choose the right protector for your needs
- Align carefully before applying
- Smooth center-out to avoid bubbles
- Test touch and seal edges after application