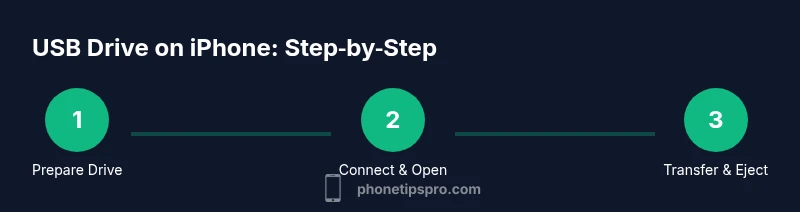
Using a USB Flash Drive with iPhone: A Practical Guide
Learn how to connect and use a USB flash drive with your iPhone, including adapter options, formatting, Files app steps, and tips for security, backups, and cross‑platform transfers.

Compatibility and formats for iPhone USB drives
iPhone users can access files stored on a USB flash drive through the built‑in Files app, provided the drive is connected with a compatible adapter and is formatted in a compatible filesystem. For broad compatibility, format the drive as FAT32 or exFAT. FAT32 handles small files well but has a 4 GB file size limit, while exFAT supports larger files and is widely recommended for modern usage. iOS devices from iOS 13 onward support external storage via the Files app, but some drives may require a powered USB hub or a specific adapter. Always test with a small file first to confirm access and transfer stability.
Tip: If you’re keeping multiple drives, label them clearly and create a standard folder structure to simplify navigation when you’re on the go.
Choosing the right adapter and cables
The key to success is a compatible adapter. For iPhone models with Lightning ports, use a Lightning to USB 3 Camera Adapter or a dedicated iOS‑compatible USB adapter. For iPhone models with USB‑C ports, use a USB‑C to USB adapter or a direct USB‑C drive if supported. Ensure the adapter is certified by Apple or the device manufacturer, and avoid third‑party cables that don’t explicitly state compatibility with iOS. Consider a powered USB hub if you plan to connect larger drives or use multiple peripherals at once. Power delivery is important; some drives draw too much power from the iPhone and won’t mount reliably without external power.
Pro tip: Start with a small, portable drive (16–64 GB) to validate your setup before moving larger libraries like photo backups.
File management: using the Files app to transfer
Once connected, open the Files app and navigate to the external drive in the Browse tab. You can copy, move, or paste items between your iPhone and the drive. Create folders to organize documents, photos, or PDFs, and use the “New Folder” option to keep your content tidy. If you’re collaborating with others, you can share files directly from the drive via Messages or Mail. Remember to periodically back up important data to another location to avoid data loss.
Tip: Use the Quick Actions (long press on a file) to duplicate, rename, or compress files for easier transfer. This keeps your workflow smooth when handling large media collections.
Data organization and file types
Consistency matters. Establish a simple folder scheme, such as Photos, Documents, and Projects. Keep file names short and descriptive, avoiding special characters that might confuse different operating systems. If you frequently transfer large photo or video batches, group them by date or event, then label folders clearly for fast retrieval. Be mindful that some apps on iPhone may not read certain file types; in those cases, export or convert to broadly supported formats before transferring.
For backups, consider exporting important data (not just app data) to the USB drive when offline. This provides a portable data copy that you can carry or store offsite if needed.
Common issues and troubleshooting
If the drive doesn’t appear in Files, verify power, connection, and format compatibility. Try a different adapter or USB port on the hub, and ensure the drive isn’t mounted as read‑only. If the drive is recognized but files won’t transfer, check for file system restrictions or file size limits. Some drives reserve space for the manufacturer’s software, which can cause formatting issues. Reformatting to exFAT (after backing up) often resolves such problems. If you’re on an older iPhone, ensure your iOS version supports external storage and that the Files app has permission to access the drive.
Pro tip: If you still see issues, test with a second drive to determine whether the problem lies with the drive or the iPhone setup.
Security, privacy, and backup considerations
Treat USB drives as portable storage and consider encrypting sensitive data before transferring it to a drive. Keep drives physically secure, especially in shared environments. Safely eject the drive from the iPhone before unplugging to prevent data corruption. Remember that not all USB drives are encrypted by default, so use encryption tools or armored files for confidential information. If you’re using the drive for backups, maintain multiple copies in different locations to reduce risk of data loss.
For added peace of mind, maintain a routine where you verify the integrity of copied files after each transfer. This helps catch incomplete copies or corrupted data early and avoids wasted time during critical tasks.
Accessories and ecosystem: reading and saving across apps
In addition to the Files app, some third‑party apps offer direct access to USB drives for specific file types (e.g., documents, PDFs, music). Before committing to an app, verify its access permissions and data handling policies. If you use cloud storage alongside USB transfers, you can create hybrid workflows that move files from the drive to cloud storage for long‑term preservation. Finally, maintain a small but robust toolkit: a compact drive, a few adapters, and a simple folder structure to keep your on‑the‑go workflow efficient and error‑free.
Future-proofing your USB iPhone workflow
As iPhones evolve, Apple may expand native support for external storage formats and faster data transfer protocols. Stay updated with iOS release notes and official support articles to take advantage of new features. Consider adopting drives with higher durability and better power efficiency if you regularly work offline or while traveling. By maintaining clean, organized storage practices, you’ll ensure seamless cross‑device file management for years to come.