Top iPhone Video Editing Apps for 2026
Discover the best iPhone edit video apps for 2026. Learn how to choose, compare features, and follow a practical workflow to edit high-quality videos directly on your iPhone.

With the right iphone edit video app, you can turn raw clips into polished videos entirely on your iPhone. This guide will help you pick the best app for your needs, compare core features, and outline a simple workflow you can start today. Whether you shoot with your iPhone camera, import from another device, or need quick social-media exports, the steps stay the same.
Choosing the right iPhone edit video app
Choosing the right iphone edit video app is the most important first step for mobile editors. The ideal app balances intuitive controls, robust performance, and a flexible export workflow. This is especially important on iPhone, where screen size and battery life can influence your editing pace. According to Phone Tips Pro, your choice should align with your typical projects—short social clips, polished narratives, or longer vlogs. Start by listing your goals: Do you need advanced color tools, layered audio, or fast sharing to social platforms? Then evaluate apps against those criteria, paying attention to how quickly you can import media, trim clips, and apply effects without draining battery or causing lag.
Consider your hardware: older iPhone models may struggle with heavy effects, while newer models handle 4K timelines more smoothly. Look at organizational features: media bins, keyword tagging, and project templates can save you time on recurring tasks. Finally, confirm privacy and storage behavior: does the app keep raw files on-device, or cloud-sync? On iPhone, keeping data on-device is often faster and safer for sensitive clips. By starting with a clear list of needs and testing two or three candidates, you can decide quickly and start editing with confidence.
Core features to look for in an editor
When evaluating an iPhone video editor, focus on features that directly impact your workflow and output quality. A good app should offer a responsive timeline editor, precise trimming, and non-destructive editing so you can revert changes. Look for real-time playback without rendering delays, which saves you time on longer projects. Color tools matter too: white balance, exposure, and LUT support help you achieve a consistent look across clips. Audio deserves equal priority—check for keyframe-based volume control, noise reduction, and the ability to import background music with auto-ducking. Export options are essential: 4K or 1080p delivery, various frame rates, and direct sharing to social platforms. Finally, assess stability and storage behavior: does the app handle media offline, or rely on cloud storage that could slow you down in low-bandwidth areas? A solid app balances all these elements while keeping the interface approachable for your skill level.
A quick feature comparison: iMovie, LumaFusion, CapCut, InShot
- iMovie: Extremely beginner-friendly, reliable for simple projects, and tightly integrated with macOS/iOS. Pros include a clean interface and solid performance; cons include limited advanced features and fewer customization options.
- LumaFusion: A powerhouse for mobile motion graphics, multi-track editing, and professional-grade color tools. Pros include extensive control and export options; cons include a steeper learning curve.
- CapCut: Free, fast, and social-friendly with built-in templates and effects. Pros include quick results for social media; cons include occasional quality trade-offs on complex projects.
- InShot: Great all-around editor for quick cuts and social-ready formats. Pros include ease of use and wide format support; cons include less precise color and audio control.
Choose based on your project type: simple clips? iMovie or CapCut may suffice. Complex timelines and professional color work? LumaFusion shines. For social media speed and templates, CapCut is hard to beat.
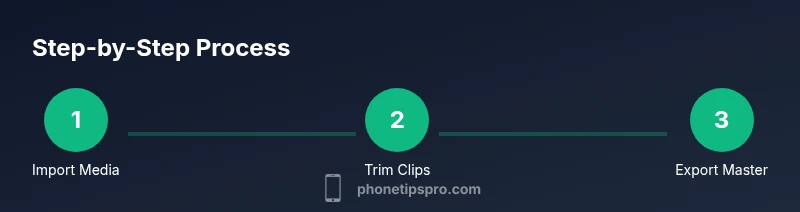
Step-by-step workflow overview
A practical editing workflow on iPhone typically follows import → organize → rough cut → refine → audio → color → export → share. Start by importing all media into your project, then organize clips into folders or bins for quick access. Create a rough sequence by placing clips in order and trimming to essential moments. Refine by tightening transitions, balancing audio levels, and adding background music with appropriate ducking. Adjust color and exposure to achieve a cohesive look, apply any necessary LUTs or presets, and finalize with a high-quality export. Finally, review on different devices to ensure consistency across screens, then share directly to your target platform or save a master copy for archiving.
Performance, storage, and export quality
On iPhone, performance hinges on both hardware and software efficiency. Free up storage before large edits by moving media to external storage or cloud storage with offline access, and consider temporarily disabling background apps to free up RAM. Some editors offer proxy workflows for 4K editing on lower-end devices; enabling proxies can reduce lag during timeline scrubbing. Export settings matter: for social media, 1080p often suffices for faster uploads, but if you need the best quality for a portfolio, export at 4K with the highest bitrate your device supports. Always test export with a short clip to verify color accuracy and audio fidelity before committing to a longer project.
Privacy, permissions, and data management
Editing on mobile involves a lot of media access. Review app permissions to control which files the editor can access and ensure you understand where your originals are stored. Prefer apps that process edits on-device to minimize cloud exposure and potential data breaches. When using cloud features, encrypt sensitive clips and enable two-factor authentication for any accounts linked to your editing apps. Regularly back up projects and exported videos to a secure location, avoiding automatic sync of raw footage to public cloud networks. By staying mindful of data handling, you protect your creative work and personal information.
Practical tips for beginners and pros
Whether you’re just starting or stepping up your editing game, consistent practice beats sporadic bursts of activity. Start with a small project and a short timeline to learn the interface, then gradually add complexity like advanced color grading and multi-track audio. Use keyboard shortcuts on iPadOS when available to speed up your workflow, and keep a reusable project template for recurring formats. For social creators, create a habit of exporting variations (different aspect ratios, captions, and thumbnail styles) to maximize reach. Finally, review your edits on multiple devices to ensure your finished video looks great everywhere, not just on one screen.
Final note from Phone Tips Pro
This guide reflects practical, real-world approaches that iPhone editors use daily. The focus is on reliable workflows, safe data handling, and efficient decisions that save time without compromising quality. The Phone Tips Pro team emphasizes starting with a clear goal, testing a couple of apps, and building a personal editing routine that grows with your skills.
Tools & Materials
- iPhone with latest iOS(Ensure at least 20GB free storage; update recommended)
- Official video editing apps installed(Examples include iMovie, LumaFusion, CapCut, InShot)
- Headphones or external speakers(For accurate audio monitoring during editing)
- Portable power bank(Useful for long editing sessions away from power)
- Cables for media transfer(USB-C to Lightning or appropriate adapters)
Steps
Estimated time: 25-40 minutes
- 1
Define project goal
Clarify the primary purpose of your video (education, entertainment, promo) and target audience. This guides tone, pacing, and export settings.
Tip: Write down a one-sentence objective before editing begins. - 2
Import and organize media
Bring in clips from Camera Roll or files, then label or group them by scene, shot type, or quality. Organizing saves time during edits.
Tip: Create folders for raw footage, B-roll, and audio separately. - 3
Create rough cut
Place clips in sequence and trim to essential moments. Don’t worry about perfection yet—focus on structure and pace.
Tip: Use cut-only edits first to establish the storyline. - 4
Refine audio and add music
Balance dialogue, music, and ambient sound. Apply keyframes where necessary and enable ducking for dialogue clarity.
Tip: Keep music at a level that never overwhelms spoken parts. - 5
Polish color and effects
Adjust exposure, white balance, and contrast. Use LUTs or built-in presets sparingly to maintain natural skin tones.
Tip: Make small, incremental color tweaks and compare with the original clip. - 6
Export and review
Choose the target resolution and frame rate, export a draft, and review on multiple devices. Finalize with a high-quality export for delivery.
Tip: Export a 1080p social version and a separate master 4K file if possible.
FAQ
What is the easiest iPhone video editing app for beginners?
iMovie is the most beginner-friendly option due to its simple interface and solid basic features. CapCut can also be a good starting point for quick social videos. As you grow, you can explore more advanced tools like LumaFusion.
For beginners, start with iMovie or CapCut to learn the basics before moving to more advanced editors.
Can I edit 4K video on iPhone without lag?
Yes, on newer iPhone models and with optimized editors, 4K editing is feasible. To minimize lag, trim heavy effects, close background apps, and use proxy or lower-resolution previews when available.
Yes, if you have a recent iPhone and keep projects lean. Close other apps to reduce lag.
Do these apps export high-quality videos?
Most popular editors offer high-quality exports, including 4K. Always choose the correct resolution, bitrate, and frame rate for your delivery platform.
Yes, you can export high-quality videos; pick the right resolution and bitrate.
Is CapCut safe to use for editing and sharing videos?
CapCut is widely used and generally considered safe. Review app permissions and avoid uploading sensitive media to cloud services unless you trust the provider.
It’s commonly used safely; just check permissions and privacy settings.
How do I transfer edited videos to a computer?
Export from your iPhone to iCloud Drive, Files, or a connected computer, then move the file using AirDrop or a USB connection. Ensure you export in a compatible format for your computer.
Export to cloud or Files, then transfer to your computer via AirDrop or USB.
What file formats are most common for export?
MP4 is the most widely supported format for edited videos. Use H.264 or H.265 codecs when available for good quality with reasonable file sizes.
MP4 is standard; use the supported codecs for balance of quality and size.
Watch Video
Quick Summary
- Choose an app that fits your goals
- Plan a simple workflow before editing
- Export high-quality master files
- Back up projects and media