Why Is My iPhone Not Charging? Quick Troubleshooting Guide
Discover why your iPhone won’t charge and how to fix it quickly. This Phone Tips Pro guide covers common causes, practical checks, safety tips, and when to seek professional help.

Most iPhone charging issues start with a simple fault: a dirty Lightning port, a frayed cable, or a loose connection. First, try a known-good charger and inspect the port. If it still won’t charge, perform a soft restart and update iOS. If problems persist, consider professional service. Avoid moisture and check for water damage indicators on the device.
Why charging issues happen on iPhone
Charging problems on iPhone can be caused by a mix of hardware, software, and environmental factors. In most cases, the culprit is a simple one that you can fix at home: a dirty Lightning port, a worn or incompatible cable, or a charger that isn’t delivering enough power. Software glitches or iOS settings can also temporarily interfere with charging, while exposure to moisture or physical damage can create longer-lasting problems. The Phone Tips Pro team emphasizes a structured approach: start with easy, safe checks, then escalate only if needed. Understanding the charging process helps you identify which step to take first and what to avoid, reducing the risk of further damage.
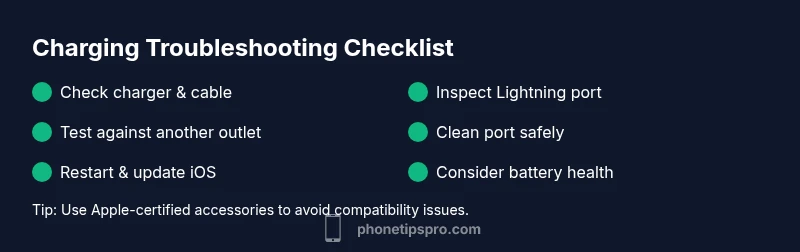
Quick checks you can do today
- Use a charger and cable you know are working (prefer Apple-certified accessories).
- Inspect the Lightning port for lint, dust, or lint that may block the connection.
- Look for a charging icon or battery indicator on the screen after plugging in.
- Try a different power outlet or USB port to rule out a faulty adapter.
- Remove any case that might obstruct the cable or port.
- If you have wireless charging, test that method as well to compare results.
- Ensure the device isn’t overheated, which can temporarily disable charging.
These quick checks can resolve most basic charging issues within minutes and reduce the need for service. Always unplug before inspecting hardware, and avoid using force or metal tools near the ports.
Inspect hardware: cable, adapter, and port
A faulty charger or damaged cable is one of the most common causes of charging failure. Examine the cable for frays, kinks, or bent connectors. If you see any damage, replace it with a known-good accessory. Check the power adapter for sign of wear or overheating; Apple recommends using the official charger or a certified equivalent. The Lightning port should be clean and free of debris; use a soft brush or dry compressed air to gently clear lint, never insert metal objects. If the port appears visibly damaged, you should stop attempting to charge and seek professional help to avoid electrical hazards.
If you’re using a cable that has one of those magnetic adapters or third-party dongles, remove them to see if charging improves. Some accessories can create resistance or interrupt the charging circuit, leading to slower charging or failure to charge. Keep an eye on whether charging is faster when connected directly to the wall outlet rather than through a computer USB port, which often provides less power.
Software and charging behavior
Software issues can mimic hardware problems. Ensure your iPhone is up to date; Apple frequently releases fixes for charging inconsistencies. A misbehaving app or a setting such as Low Power Mode might affect charging indicators or battery behavior. Try a soft restart (press and hold the power button and either volume button, then slide to power off) and then plug back in. If the device still won’t charge, reset all settings (Settings > General > Transfer or Reset iPhone > Reset > Reset All Settings) without erasing data. If you rely on third-party battery optimization apps, disable them to see if charging returns to normal. Remember that prolonged heat or moisture exposure can degrade battery performance over time, so monitor temperature during charging.
When water or moisture is involved
Water exposure increases the risk of charging faults. If the device got wet, power off immediately and let it dry completely in a warm, ventilated area. Do not charge a wet iPhone, as this can cause short circuits. Use a dry, soft cloth to remove surface moisture and wait at least several hours before attempting to charge again. If indicators show water intrusion (some iPhones have a moisture indicator near the SIM tray), or if you notice corrosion or abnormal behavior after drying, seek professional evaluation. In these cases, moisture can corrode the charging port and internal components, increasing the likelihood of a longer-term problem.
Step-by-step fixes you can follow safely
This section walks you through a practical remediation path that covers the most common causes, from quick checks to more thorough steps. Always start with the simplest fix and proceed to more involved actions only if necessary. If at any point you feel unsure, take a break and consult a professional to avoid accidental damage. Safety first: unplug devices before inspecting, and avoid using metal tools near ports. Remember, some fixes may void warranties if performed incorrectly, so weigh the risk and act within your comfort level.
What not to do and safety precautions
- Do not insert metal objects (pins, paperclips, or other metal tools) into the Lightning port.
- Avoid charging in extremely hot or wet conditions; heat can accelerate battery wear and reduce charging efficiency.
- Do not use counterfeit accessories; they may not meet electrical standards and can damage the iPhone.
- Do not attempt a DIY battery replacement unless you are trained; this involves high risk and may void warranties.
- If you smell burning or notice smoke, stop charging immediately and seek assistance.
Long-term prevention and maintenance
To minimize future charging problems, adopt a regular maintenance routine. Use Apple-certified accessories and keep cables protected from bending at the connector. Clean the port gently every few weeks to avoid lint buildup. Store the device in a cool, dry place and avoid leaving it plugged in at full brightness for long periods. Consider checking battery health periodically (Settings > Battery > Battery Health) and replacing the battery when capacity drops significantly. Periodic professional checkups can catch issues early, extending device life.
Steps
Estimated time: 30-45 minutes
- 1
Verify the power source
Inspect the charger and cable for signs of wear. Try a different outlet and a known-good charger to rule out a faulty power source. If you use a USB port on a computer, switch to a wall outlet to ensure you’re getting sufficient current.
Tip: Always use Apple-certified accessories to avoid compatibility issues. - 2
Inspect the Lightning port
Carefully look inside the port for lint or debris. Use a soft brush or dry compressed air to clear obstructions. Do not use metal objects as they can bend pins or cause short circuits.
Tip: Work in a well-lit area and power off the device before cleaning. - 3
Test with alternate hardware
Connect a different charger and cable. If the device charges with another setup, the original cable or adapter is likely defective.
Tip: Check for frayed cables near the connector—replace immediately if damaged. - 4
Restart and update
Perform a soft restart to refresh hardware and software handling of charging. Then check Settings > General > Software Update and install any available iOS updates to fix known bugs.
Tip: A delayed update can fix charge recognition issues. - 5
Check battery health and settings
Go to Settings > Battery > Battery Health to assess capacity. If Peak Performance Capability is not available, consider a battery service or replacement. Ensure Low Power Mode is not negatively impacting charging in unexpected ways.
Tip: Battery health above 80% is generally good for typical use. - 6
Advanced recovery if needed
If charging still fails, back up your data and perform a full restore via iTunes/Finder or contact Apple Support for diagnostic testing. This can repair deeper software or hardware issues that simple fixes can’t address.
Tip: Professional help can identify motherboard or port damage that isn’t user-serviceable.
Diagnosis: iPhone won't charge or shows no charging indicator
Possible Causes
- highFaulty charging cable or adapter
- highDust, lint, or debris in the Lightning port
- mediumSoftware glitch or iOS bug
- lowWater damage or hardware failure
Fixes
- easyTest with a known-good charger and cable, and a different power outlet
- easyGently clean the Lightning port and remove any debris
- easyPerform a soft restart and check for iOS updates
- mediumIf issues persist, back up and restore iPhone or seek professional service
FAQ
Why is my iPhone not charging when it shows the battery icon but won't power on?
This can indicate a battery health issue or a temporary software glitch. Try: a soft reset, updating iOS, and testing with a different charger. If the problem persists, it may require battery service.
If the iPhone shows a battery icon but won’t turn on, try restarting and updating iOS, and consider battery service if it continues.
Can debris in the port prevent charging?
Yes. Lint and dust can block the connector making poor contact. Clean the port gently with a soft brush and test again with a known-good charger.
Yes, debris in the port can stop charging; clean it gently and re-test.
Should I use wireless charging if the Lightning port is damaged?
If the Lightning port is damaged, wireless charging can be a temporary alternative. However, the device may still require port repair to restore full charging options.
Wireless might work briefly, but port repair may be necessary for full charging capability.
When should I see a professional?
If you’ve tried safe at-home fixes and it still won’t charge, or you notice heat, burning smells, or physical damage, seek professional service promptly.
If basic fixes don’t help or you notice any damage or heat, see a professional.
How often should I replace my charging cable?
Replace cables showing wear or fraying. Using a damaged cable can harm the device and reduce charging efficiency.
Replace worn cables right away to avoid charging problems.
Watch Video
Quick Summary
- Start with simple checks and safe cleaning.
- Swap in known-good accessories to identify faulty parts.
- Software updates can fix charging bugs quickly.
- Avoid moisture and heat during charging for longevity.
- Professional help is advised for hardware damage.