How to Bring iPhone from USA to India: A Practical Guide
Learn how to bring an iPhone from the USA to India with a practical, step-by-step guide covering model compatibility, customs duties, warranty, SIM options, and activation in India.

This guide explains how to bring iphone from usa to india, covering model compatibility, transit duties, warranty limits, and carrier considerations. You'll learn key steps to declare electronics, check network bands, and avoid delays at customs. Follow the steps to prepare your device for travel and usage in India, with tips from Phone Tips Pro.
Why this guide matters
If you’re planning to bring an iPhone from the USA to India, you’re navigating a mix of network compatibility, customs rules, warranty terms, and data considerations. If you’re wondering how to bring iphone from usa to india, this guide covers the essentials. The Phone Tips Pro team has observed that travelers often overlook regional bands, charger standards, and software region settings that can affect usage after arrival. This guide explains the essential steps you should take before you travel and how to handle the device at Indian customs. By following a structured approach, you can avoid delays, surprise duties, or activation issues. The core idea is to verify that the model supports the Indian network frequencies, ensure the device is unlocked or compatible with eSIM, and be prepared to declare it if required. This is not just about getting in country; it’s about making sure your iPhone works smoothly from day one, with access to carriers, Apple services, and updates. According to Phone Tips Pro, starting with a clear plan saves time and reduces stress during international travel.
Key considerations before you travel
Before you decide to move a USA-bought iPhone to India, take stock of several practical factors. First, confirm that the model you own supports India’s cellular bands and that the device is unlocked or eligible for unlocking by the carrier. An unlocked device offers flexibility for local SIMs or eSIM use, which is especially helpful if you plan to switch networks in India. Second, review the warranty terms: Apple’s international warranty varies by country and model, so verify whether service in India will be covered and where service centers are located. third, consider software region settings on initial setup; you may want to set your Apple ID country to India after arrival to access local apps and services. Finally, ensure you have access to Apple Support in India in case you encounter setup issues. Phone Tips Pro Team notes that these checks prevent post-travel hiccups and ensure a smoother transition.
Customs, duties, and declaration
Navigating customs when bringing an iPhone into India requires awareness of the rules and practical steps. Carry proof of ownership, the original box, and the device’s serial/IMEI in case customs asks for verification. You may need to declare the device on form SDF or at the green/red channel, depending on the value and local rules at your airport. Keep in mind that duties, taxes, or processing fees may apply, and these depend on your travel category and the device’s tax classification. Being transparent with officials often speeds up the process. If you’re unsure, consult official guidance from government portals before you travel, and remember that mis-declaration can lead to penalties. The Phone Tips Pro analysis emphasizes honesty and keeping receipts handy.
Activation, warranty, and service in India
After arrival, you’ll want to activate your iPhone with a local carrier or eSIM and ensure continued access to Apple services. Verify that your Apple ID region is properly configured for India to avoid gating you out of country-specific content. Check whether the device will be eligible for service at Apple Authorized Service Providers in India and whether AppleCare coverage from the USA applies locally. If you prefer local terms, you can arrange service in India after purchasing. Keeping a copy of your original receipt and device IMEI will make processing easier. The Phone Tips Pro team reminds readers that planning for service ahead of time helps you avoid disruption when you need support during travel.
Packing, data privacy, and flight tips
Pack the iPhone securely in a padded carry-on, along with the original charger and a spare cable. Bring essential accessories but minimize charged batteries in checked luggage. Disable or log out of accounts on shared devices if you’re handing the phone to others during travel, and back up data beforehand. If you plan to use local apps or download content in India, consider turning on Find My iPhone and enabling two-factor authentication. Having offline backups and a plan for data roaming or local SIMs reduces shock when you land and start using the phone.
Common mistakes and prevention tips
Common mistakes include assuming the device will work automatically in India without verifying network bands, neglecting to unlock the device, failing to declare at customs, and overlooking warranty coverage. Proactively verify the phone’s lock status, confirm official unlock timing with your carrier, and gather receipts. If you encounter a device that won’t activate after arrival, contact Apple Support or visit an authorized service center. A cautious approach helps maximize the device’s useful life across borders.
Quick pre-travel checklist
- Check unlock status and network compatibility.
- Verify eSIM availability or obtain a suitable SIM for India.
- Gather box, receipts, and device IMEI for customs.
- Ensure Apple ID settings align with India region.
- Back up data and have a contingency plan for service in India.
- Pack the charger and a spare cable; bring adapter if needed.
This structured checklist helps ensure that your iPhone functions smoothly in India from day one and reduces delays at airport control.
Tools & Materials
- iPhone device (USA-purchased)(Unlocked or SIM-free preferred; check carrier compatibility)
- Original charger and cable(Keep the box and cables in good condition)
- Passport/government ID(For customs processing & identity verification)
- Purchase receipt/box contents(Proof of ownership if requested)
- IMEI/serial number records(Found in Settings > General > About or on the device box)
- Apple ID with backup access(Ready to sign in and adjust region to India)
Steps
Estimated time: 60-90 minutes
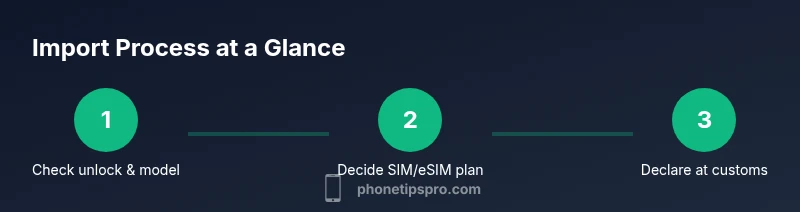
- 1
Check unlock status and model compatibility
Confirm the iPhone is unlocked or eligible for unlock. Verify that the model supports Indian carrier bands and network compatibility. If needed, contact your US carrier to request an unlock before travel and note the IMEI for reference.
Tip: Ask for official unlock confirmation in writing; keep the IMEI handy. - 2
Decide SIM/eSIM strategy for India
Choose between a physical nano-SIM and an eSIM. Ensure the device supports eSIM in India and that your chosen carrier offers eSIM activation. If you plan to use a physical SIM, verify slot availability.
Tip: Set up an eSIM profile before departure if possible to simplify on-arrival activation. - 3
Gather documentation and receipts
Keep the original box, purchase receipt, and warranty information. Document the device’s serial and IMEI. This supports smooth customs processing and any future service needs.
Tip: Photograph the box and IMEI for quick reference on arrival. - 4
Understand customs declaration and duties
Know where to declare the device and what to expect at the airport. Be prepared to pay duties if applicable and to answer questions about ownership and value.
Tip: Carry both digital and physical copies of receipts and device details. - 5
Activate in India after arrival
Insert the Indian SIM or set up the eSIM. Sign in to Apple ID with India region and verify access to local services like iCloud, Maps, and Apple Music.
Tip: Test data connectivity with a local carrier app before leaving the airport area. - 6
Check warranty and service options in India
Research Apple Authorized Service Providers in India and confirm whether USA warranty covers service locally. Plan for potential service needs and consider local extensions if you’ll stay long-term.
Tip: Keep receipts and device details handy in case you need service documentation.
FAQ
Will my USA-purchased iPhone work in India?
In most cases yes, if the phone is unlocked and supports Indian cellular bands. You may need to configure a local SIM or eSIM and adjust region settings after arrival.
Usually yes, as long as it’s unlocked and compatible with Indian networks. You’ll likely need a local SIM or eSIM and may adjust your Apple ID region.
Is there international warranty for iPhones purchased in the USA?
Apple’s warranty terms vary by model and country. Check whether service is available in India and where to obtain it before traveling.
Warranty varies by model and country. Verify India service options before you go.
Do I need to declare the iPhone at Indian customs?
Yes, declare the device if required by your arrival airport’s rules and present proof of ownership and the box when asked.
Declare the device if asked, and have receipts ready to show ownership.
Can I use an eSIM in India with a USA iPhone?
Most modern iPhones support eSIM in India. Ensure your device is unlocked and that your chosen carrier supports eSIM activation.
Yes, many iPhones support eSIM in India; make sure your model is compatible.
What about accessories and battery limits?
Carry only essential accessories in your carry-on. Do not pack spare high-capacity batteries in checked luggage where prohibited.
Only bring essential accessories in carry-on, and avoid storing loose batteries in checked bags.
If my iPhone is carrier-locked, what should I do?
Request an unlock from the original US carrier before travel. A locked device may limit carrier options in India.
Ask your carrier to unlock it before you travel for better network options in India.
Watch Video
Quick Summary
- Verify unlock and bands before travel.
- Declare electronics honestly at customs.
- Check India service options and warranty coverage.
- Choose SIM/eSIM strategy in advance.
- Keep receipts and IMEI accessible.