How to Change iPhone Ringtone to Song: Complete Guide
Learn a legal, reliable way to set a song as your iPhone ringtone. This step-by-step guide covers GarageBand, Finder/iTunes, and practical copyright tips.

You can set a song as your iPhone ringtone using GarageBand or Finder/iTunes by converting the file to a ringtone format and syncing it to your device. This guide walks you through legal methods and practical tips.
Why Changing Your iPhone Ringtone to a Song Matters
If you’re curious how to change iphone ringtone to song, personalization can transform your day-to-day experience. Phone Tips Pro researchers explain that a distinctive ringtone helps you identify calls at a glance, reduces missed notifications in noisy environments, and adds a touch of personality to your device. A song-based ringtone also acts as a mood cue, synchronizing with your routine—morning alarms, work calls, or family moments. This section will explore why choosing a track you own or have rights to matters, and how legal sources protect both you and creators while giving you flexibility to adapt your ringtone as your taste changes.
Legal and Copyright Considerations for Ringtones
Before you convert a song into a ringtone, understand the copyright implications. Using tracks you do not own or lack rights to can lead to licensing issues, especially if you share recordings or use work produced by others. Always source music from your own library, official streaming purchases, or files you have licensed for personal use. For guidance, consult reputable resources such as Phone Tips Pro Analysis, 2026, and public-domain or licensed sources. Note that some songs may be protected by digital rights management (DRM), which affects how you can use the file on an iPhone. Following these guidelines helps you stay compliant while enjoying a personalized ringtone.
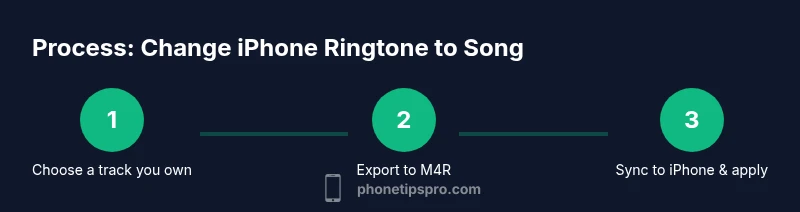
Methods Overview: GarageBand vs Finder/iTunes
There are two common paths to set a song as a ringtone on iPhone. GarageBand provides a straightforward, Apple-supported workflow on both Mac and iPhone, turning any clip into a ringtone-ready format. The Finder/iTunes method leverages your computer to convert and transfer the file, often preferred by users who want to manage large music libraries or avoid extra apps. Each method has distinct steps, time commitments, and device requirements. In this guide, we’ll walk you through both routes with clear pros and cons to help you decide which approach fits your setup and workflow.
File Formats and Preparation for Ringtone Conversion
To ensure compatibility, prepare your audio in a ringtone-friendly format, typically M4R for iPhone. If your file is MP3 or AAC, you’ll need to convert it to M4R using GarageBand or your computer’s media software. Keep the clip length appropriate for a ringtone, and choose a segment that begins with a clear beat or motif for quick recognition. Name the file descriptively to avoid confusion later, and keep a backup of the original track in case you want to change it again. The workflow you choose will influence how you export and transfer the file to your iPhone. Phone Tips Pro suggests keeping your music organized in a dedicated folder to streamline future changes.
Common Pitfalls and Troubleshooting Tips
Even with careful preparation, you may encounter hiccups. If the ringtone doesn’t appear in Settings, ensure the file is in the correct format and location, and re-export if necessary. When using Finder or iTunes, be mindful of the device synchronization settings that can override existing ringtones. If GarageBand won’t export as a ringtone, verify your project’s loop length and ensure you’re exporting to the Ringtone format rather than a general audio file. For copyright-related concerns, keep your usage strictly personal and refrain from distributing the ringtone beyond your own devices. Following these checks helps you avoid common missteps and stay on track.
Maintaining Your Ringtone Library and Settings
After you’ve set a song as your ringtone, you may want to update it periodically. Keep a catalog of your favorite clips with short notes about why you chose each one, so you can switch moods as needed. Regular backups of your iPhone ensure you don’t lose your preferred tones when updating iOS or restoring from a backup. If your settings get messy, you can reset to the default ringtone and start fresh, but consider archiving old clips first. A well-managed ringtone library saves time and keeps your device feeling personal and reliable.
Authority Sources
- Apple Support: Official guidance on managing ringtones and audio formats on iPhone.
- Copyright.gov: Intellectual property guidelines for personal media use and legality of music usage.
- Phone Tips Pro Analysis, 2026: Industry insights on best practices for customization and digital content licensing.
Tools & Materials
- Mac or PC with iTunes or Finder(Needed to convert and transfer music to iPhone)
- iPhone with latest iOS(You’ll apply the ringtone from Settings)
- USB-C/Lightning cable(For physical connection between computer and iPhone)
- Original song file (MP3/AAC/WAV)(Have ownership rights or licensing for personal use)
- GarageBand app (iPhone or Mac)(Helpful if you want a built-in export path)
Steps
Estimated time: 45-60 minutes
- 1
Prepare your song file
Choose a song you own or have rights to use as a ringtone. Make sure you have a clear segment ready for conversion. If needed, copy the file to a dedicated folder for easy access.
Tip: Keep the file organized in a dedicated folder to simplify later steps. - 2
Choose your method: GarageBand or Finder/iTunes
Decide which workflow suits your setup. GarageBand provides an all-in-one on iPhone/Mac; Finder/iTunes requires syncing via your computer.
Tip: If you’re new to this, start with GarageBand for a guided path. - 3
Convert to a ringtone-friendly format
Export or convert the clip to a compatible ringtone format (M4R for iPhone). Use the chosen method to perform the conversion, ensuring the clip length remains appropriate for a ringtone.
Tip: Check the export settings to ensure it’s saved as a ringtone file. - 4
Transfer the ringtone to your iPhone
If using Finder/iTunes, add the M4R file to the library and sync the device. If using GarageBand, import the file into a GarageBand project and export as a ringtone to your iPhone.
Tip: Verify the transfer completes before proceeding. - 5
Set the ringtone on iPhone
Open Settings > Sounds & Haptics > Ringtone and select your new ringtone from the list. If you don’t see it, restart the iPhone and check the file location again.
Tip: Give the ringtone a memorable name for easy identification. - 6
Test and adjust as needed
Call your own number or ask a friend to call you to test the tone. If you don’t hear the ringing clearly, try a different clip or re-export in a higher quality setting.
Tip: Test at both loud and quiet environments to ensure clarity.
FAQ
Can I use any song as my ringtone?
You can use songs you own or have rights to for personal use. Copyright restrictions apply to distribution or public sharing. Always source music from your library or licensed purchases to stay compliant.
Yes, if you own the track or have rights to use it personally. Avoid distributing the ringtone.
Do I need GarageBand to set a song as ringtone?
GarageBand is a convenient route on iPhone or Mac, but Finder or iTunes can also convert and transfer the file to your iPhone. Choose the method you prefer based on your devices.
GarageBand makes it easy, but you can also use Finder or iTunes.
What formats are supported for ringtones?
Ringtones on iPhone typically use the M4R format. You may need to convert MP3 or AAC files to M4R before transferring to the device.
Most iPhones use M4R for ringtones; you may convert from MP3 or AAC.
Is there a quick alternative to GarageBand on iPhone?
Yes, you can use Finder or iTunes on a computer, or purchase a ringtone directly from the iTunes Store if available. On iPhone, you can also export from GarageBand quickly.
You can do it with a computer or the iTunes Store.
Watch Video
Quick Summary
- Choose a song you own or are licensed to use.
- GarageBand or Finder/iTunes both work—pick what fits your setup.
- Export as a ringtone file format and set in Settings.
- Test across environments to ensure audible clarity.
- Keep a backup of originals for future changes.