How to Remove Background from Picture on iPhone
Learn how to remove backgrounds from photos on iPhone using built-in tools and trusted apps. This step-by-step guide covers quick methods, tips, and best practices for crisp PNG results without price estimates or external prompts.

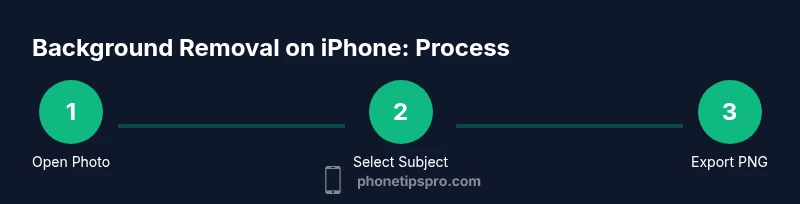
In this guide, you’ll learn how to remove the background from a picture on iPhone using built-in tools and trusted apps. You’ll use Copy Subject in Photos, Shortcuts for transparency, and optional third-party apps for tricky backgrounds. By the end, you’ll save PNGs with transparent backgrounds ready for reuse.
Why removing background matters
According to Phone Tips Pro, removing backgrounds from photos on iPhone can streamline design, improve product images, and make it easier to reuse pictures across messages, websites, or presentations. When you delete the background, you create a versatile PNG that can be layered on any background. This capability is especially useful for small business demos, social media posts, and personal projects. In 2026, Phone Tips Pro Analysis, 2026 notes that many iPhone users rely on built-in features for quick background removal before turning to more advanced tools. The goal is to achieve a clean edge with minimal fuss. Throughout this guide, you’ll see practical steps, comparisons, and safe best practices so you can decide when to keep it simple and when to go pro.
Quick overview of methods on iPhone
There are several effective approaches to removing a background on iPhone, depending on your needs and the complexity of the image. For simple subjects against clean backgrounds, built-in iPhone tools often suffice. For intricate edges, textures, or when you need a ready-to-use PNG across apps, third-party apps or automation via Shortcuts can save time. This section compares built-in methods, shortcuts, and third-party options so you can choose the path that fits your workflow.
Built-in options
- Copy Subject from Photos for quick extractions
- Paste or share as PNG in compatible apps
Automation and shortcuts
- Shortcuts can streamline the process and reduce manual steps
- Suitable for batch processing if you have multiple images
Third-party apps
- Apps focused on background removal can handle complex edges
- Some offer cloud processing for very large images
Copy Subject in Photos: built-in option
The easiest way to grab a subject on iPhone is through the Photos app. Open the photo, then press and hold the subject until a selection halo appears and options like Copy or Share pop up. Copying the subject creates a transparent background PNG that you can paste into Messages, Notes, or your favorite design app. This method works best with high-contrast subjects against a simple backdrop. If the edge is jagged, you can refine the selection by zooming in and repeating the press-and-hold until the edge looks clean. This built-in feature minimizes the need for extra tools and keeps your data offline on the device. According to Phone Tips Pro Analysis, 2026, many users achieve satisfactory results using only Photos, especially for quick social media posts or product previews.
Shortcuts to automate background removal
Shortcuts offers a way to automate parts of the background removal process. Create a new shortcut and add actions such as "Get Latest Photos," "Remove Background" (where available), and "Save to Photos". If your device or iOS version includes a dedicated background-removal shortcut, enable it and tailor settings for edge refinement. A practical setup runs the background removal on a selected image, previews the result, and saves the PNG with transparency back to your library. This approach is particularly useful for creators who handle multiple images and want consistent results without repeating manual steps. Remember to test the shortcut on different subjects to understand how edge details respond to the algorithm and adjust accordingly.
Third-party apps for complex backgrounds
When subjects have fine hair, wispy edges, or busy complex backgrounds, third-party apps can deliver cleaner results than basic tools. Popular options include Photoshop Express, Can’t specify a particular app, and dedicated background-removal tools that offer more aggressive edge detection and feathering. Many of these apps let you fine-tune edge fidelity, smoothness, and transparency. Before using any app, review its privacy policy and permissions to ensure your images stay private. If you’re working on professional imagery, consider exporting at high resolution and saving as PNG-24 to preserve transparency and color fidelity. Always compare a few apps on the same image to identify which one consistently gives you the cleanest cut.
Exporting and saving as PNG with transparency
Exporting as PNG is the standard when you need a transparent background. After removing the background, choose PNG as the format and keep transparency enabled. If you’re sharing to a website or design tool, verify that the platform respects PNG transparency and doesn’t automatically flatten layers. When possible, save a copy with the layers intact so you can re-edit later. If your workflow involves multiple backgrounds, save a baseline PNG and then reuse it against different backdrops, reducing the time spent on re-processing every image. This option is particularly useful for product catalogs, social media templates, and presentations.
Common pitfalls and troubleshooting
Even experienced users encounter edge artifacts or uneven backgrounds. Common issues include jagged edges around fine strands, invisible shadows, or inconsistent transparency. To troubleshoot, start with the subject on a high-contrast background, work at higher zoom levels, and refine edges with feathering or smoothing tools. If the tool consistently produces rough edges, try a different method or app, and compare results side-by-side. For Live Photos or motion-heavy images, convert to a still frame before attempting removal, as motion can complicate edge detection. Finally, always check your PNG after exporting by placing it over various backdrops to confirm the transparency holds across contexts. These steps help you avoid surprises when you insert the image into documents, slides, or shop listings.
Tools & Materials
- iPhone with iOS 16 or later(Ensure Copy Subject and related features are available)
- Photos app(Use long-press to grab the subject or copy as PNG)
- Notes app or basic image editor(Helpful for quick paste-and-edit workflows)
- Shortcuts app (optional)(Automation for repeated background removal tasks)
- Third-party background removal apps (optional)(For complex edges or batch processing)
- Stable internet connection (optional)(Some apps require online processing)
Steps
Estimated time: 20-40 minutes
- 1
Prepare your iPhone
Ensure your iPhone is updated to iOS 16 or later and that you have the Photos app ready. This setup ensures you can access Copy Subject and any Shortcut actions later in the flow. Close unnecessary apps to keep the device responsive during processing.
Tip: Check for updates in Settings > General > Software Update to ensure the latest background-removal features are available. - 2
Select a photo with a clear subject
Open Photos and choose an image with a well-defined subject against a relatively clean background. Images with strong contrast between subject and background yield cleaner edges when removing the background.
Tip: If possible, choose a high-resolution image to preserve detail after editing. - 3
Use Copy Subject (Photos)
Long-press on the subject until the selection activates, then choose Copy. Paste the result into a new document or app that supports transparent backgrounds to test the PNG. This creates an instant transparent background without exporting steps.
Tip: If the edge isn’t clean, re-try with a slightly different pressing area or zoom in before selecting. - 4
Try Shortcuts for automation
If you’ve set up a Shortcut for background removal, run it on the chosen image. The shortcut should output a PNG with transparency, then save or share it directly from the Shortcuts results.
Tip: Test on 1–2 images first to ensure consistency before batch-processing. - 5
Experiment with third-party apps for tough edges
If the built-in tools struggle, open a third-party background removal app and process the same image. Compare edge fidelity, noise, and transparency with your initial result to decide which method you’ll keep for future edits.
Tip: Review app permissions and privacy policies before processing sensitive images. - 6
Export and verify PNG transparency
Save the final result as PNG with transparency in Photos or Files. Verify by placing the PNG over a variety of backdrops to ensure the background remains transparent in different contexts.
Tip: Export at high resolution to preserve edge quality on large displays.
FAQ
What is the easiest way to remove the background on iPhone?
The easiest method is often Copy Subject in Photos, which creates a transparent PNG you can paste into other apps. For more control, use Shortcuts or a dedicated background-removal app.
Use Copy Subject in Photos for a quick result, or try Shortcuts for repetitive tasks.
Can I remove backgrounds from Live Photos on iPhone?
Yes, but you usually need to convert the Live Photo to a still image first, or use an app that supports Live Photo background removal. The result can be saved as a transparent PNG.
You can, but start with converting to a still photo for best results.
Do I need internet connectivity to remove backgrounds?
Built-in tools work offline. Some third-party apps may require internet access for processing or cloud-based features.
Most built-in options work offline; some apps require internet for advanced processing.
Which method yields the best edges for complex backgrounds?
For complex edges, dedicated background removal apps or Photoshop Express often produce cleaner results than basic tools. Compare a couple of options on the same image.
Try a dedicated background-removal app for challenging edges.
What export format should I use to preserve transparency?
PNG is the standard format for preserving transparency. Avoid JPEG when you need a transparent background.
PNG preserves transparency; avoid JPEG for transparent graphics.
Are there privacy concerns with third-party apps?
Yes. Review app permissions and privacy practices before uploading images, especially if they are sensitive or personal.
Be mindful of permissions and data handling when using third-party apps.
Watch Video
Quick Summary
- Start with built-in tools for quick results
- Copy Subject in Photos is a fast first pass
- Shortcuts can automate repetitive tasks
- Third-party apps help with complex edges
- Export as PNG to preserve transparency