Where to Find and Use the iPhone SIM Card: A Practical Guide
Learn where the iPhone SIM card sits, how to insert or replace it, and when to use eSIM for flexible carrier setups. A clear, step-by-step guide for all iPhone models.

Learn where the iPhone SIM card is located, how to safely remove or insert it, and what to do if you’re switching carriers or moving to eSIM. This guide covers iPhone models from the iPhone 8 onward, including how to identify nano-SIM trays and verify carrier settings. Whether you’re troubleshooting connection issues or traveling abroad, this quick answer gets you started.
Understanding SIM Cards on iPhone
In smartphones, a SIM card (Subscriber Identity Module) identifies your account to a mobile network. On many current iPhone models, you may use a physical nano-SIM card or an embedded eSIM, which is activated digitally and does not require a physical card. Understanding when to use a SIM vs eSIM helps with carrier changes, travel, and device unlocking. According to Phone Tips Pro, planning ahead for SIM card changes can save you time at checkout or abroad. The key is to know whether your model supports a physical nano-SIM tray or relies on eSIM only. If you are unsure, consult Apple Support or your carrier's setup guide. For many users, the simplest path is to confirm whether your iPhone can hold a nano-SIM and whether your carrier supports eSIM; this determines the steps you will take to activate service.
Beyond the hardware, you should familiarize yourself with a few core terms. A nano-SIM is the smallest version available for most iPhone models sold since 2014. An eSIM is not a physical card; it’s a programmable chip embedded in the phone that can host one or more cellular plans. Some travelers prefer keeping a physical SIM for local service, while others switch completely to eSIM for convenience. Carriers differ in how they provision service: some offer instant activation via a QR code, while others require a simple phone call or an app login. In practice, most iPhone users today move between SIM types depending on their needs, carrier support, and the devices they own. Always verify that your device and carrier compatibility match before removing or inserting anything into your SIM tray. This helps prevent damage to the card or tray and avoids accidental ejection of other components.
This section sets the stage for practical steps that follow. If you have an older iPhone model that still relies on a physical SIM, you’ll still benefit from knowing the tray location, how to handle the card safely, and what to expect when your iPhone transitions to an eSIM plan. From a troubleshooting perspective, the most common issue isn’t the card itself but incorrect activation status or misconfigured settings. Take a moment to review your device’s current cellular plan, whether the SIM is active, and the latest carrier settings installed on your iPhone. Keeping these basics in mind will prevent frustrating delays when you need reliable service, whether at home or on the road.
Understanding the Difference Between SIM and eSIM
A nano-SIM is a physical card that slides into the tray, while an eSIM is embedded digitally. The choice affects how you activate service, switch carriers, and travel internationally. Phone Tips Pro notes that eSIM provisioning can simplify switching between plans without swapping physical cards. Always confirm with your carrier which options are supported on your specific iPhone model and iOS version to avoid activation delays or service gaps.
Practical Considerations for Carriers and Models
Carrier support varies by region and device. Some carriers offer instant activation via QR codes, while others require you to download an eSIM profile through an app. Your iPhone model also determines whether you can use one physical SIM, one eSIM, or dual SIM configurations. Keeping a record of your carrier’s steps and codes helps you complete provisioning quickly when you need service in a new location. For travelers, knowing whether you can maintain two lines (home and local) on your iPhone can save roaming costs and simplify communications.
Practical Guidance for Safety and Longevity
When handling SIM hardware, always power off the device first, avoid touching contacts, and work on a clean, flat surface. If you drop or bend the tray or SIM card, replace it rather than attempting a risky repair. Store unused SIM cards in a safe, labeled container to prevent loss. If you suspect moisture exposure or corrosion, do not insert a damaged card—contact your carrier or Apple Support for guidance and possible replacements.
How to Plan for Future Transitions (Physical SIM to eSIM)
If you plan to move to eSIM, check that your iPhone, iOS version, and carrier support the transition. Gather your QR code or provisioning details ahead of time and ensure your device has a stable internet connection when provisioning. Keeping a backup of the QR code in a secure location helps you recover quickly if you ever need to re-provision. Device management apps and carrier portals often provide status indicators that help verify the active line and data plan.
A Quick Reference Checklist for Beginners
- Confirm whether your iPhone supports nano-SIM or eSIM on your model.
- Locate the SIM tray (usually on the right edge) and have a SIM ejector tool ready.
- Power off before removing or inserting a SIM card.
- Align the card correctly with the tray’s notch and contacts facing down.
- Reinsert the tray and power on; verify carrier settings and signal.
Quick Summary for the Curious
This section helps you understand the two main pathways—physical nano-SIM and eSIM—and how to approach activation, switching carriers, and future-proofing your iPhone for evolving connectivity options.
Tools & Materials
- SIM ejector tool or paperclip(Essential for opening the SIM tray)
- Nano-SIM card (if using physical SIM)(Check carrier compatibility and size; nano-SIM is standard on most recent iPhones)
- Soft, lint-free cloth(Clean handling surface and contact edges)
- Small tray or case for spare SIM cards(Keep extras organized and protected)
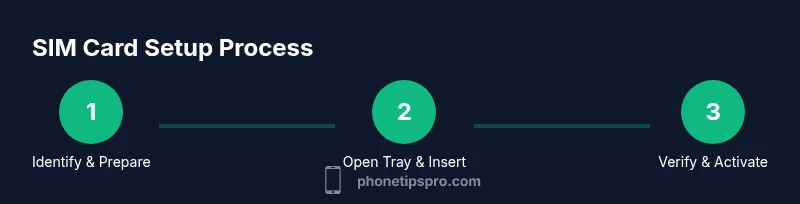
Steps
Estimated time: 5-15 minutes
- 1
Identify SIM type and model
Check your iPhone model and iOS version to determine whether you use a nano-SIM tray or rely on an eSIM. If unsure, consult Apple Support or your carrier’s guidance. This step prevents choosing the wrong activation path and avoids potential damage during handling.
Tip: Know your model number and carrier support before starting. - 2
Power off the device
Turn off your iPhone before touching the SIM tray to reduce the risk of electrical issues or accidental damage. A powered-down state also minimizes the chance of misalignment when reinserting the tray.
Tip: If you’re in a hurry, take a quiet moment to ensure the device is completely off. - 3
Open the SIM tray
Insert the SIM ejector into the tray’s hole and apply a gentle push to release it. Remove the tray slowly and inspect for any debris or damage on the tray and SIM card.
Tip: Do not force the tray; if it sticks, power off and try again or seek support. - 4
Insert or replace the SIM
If using a nano-SIM, place it into the tray with the gold contacts facing down and the notch aligned. If transitioning to eSIM, skip the physical SIM insert and proceed to Settings to add a cellular plan.
Tip: Ensure proper orientation to prevent bent cards or mis-seating. - 5
Reinsert the tray
Slide the tray back into the iPhone until it sits flush. Power on the device and wait for the UI to recognize the SIM or eSIM activation prompt.
Tip: Observe the screen for activation messages or carrier prompts. - 6
Verify activation
Open Settings > Cellular and confirm the active line. Make a short test call or use mobile data to ensure the service is functioning correctly.
Tip: If there’s no service, review carrier settings and consider a quick device restart.
FAQ
What is the difference between a SIM card and an eSIM on iPhone?
A nano-SIM is a physical card that fits into the tray, while an eSIM is embedded digitally in the device. eSIM allows provisioning without a physical card, which can simplify switching carriers. Not all carriers or regions support eSIM on every model.
A nano-SIM is a physical card; an eSIM is digital and can be activated without a card. Availability depends on your carrier and iPhone model.
Can I use multiple SIMs on iPhone?
Many iPhone models support Dual SIM, typically one physical nano-SIM plus one eSIM. Availability varies by region and carrier. Verify both the hardware and plan support before attempting dual-SIM setup.
Yes, many iPhones support one SIM and one eSIM, but check your model and carrier.
How can I tell if my iPhone uses eSIM only?
If Settings shows Add Cellular Plan and you don’t see a physical SIM option, you may be on eSIM or dual-SIM with eSIM. Check Settings > Cellular to confirm available provisioning methods.
Look in Settings > Cellular to see if you can add a Cellular Plan via QR or an app.
What if the SIM tray is stuck?
Power off, gently reinsert the ejector tool, and try again. If it remains stuck, stop and contact Apple Support or an authorized service provider to avoid damage.
If the tray won’t eject, power off and seek professional help to prevent harm.
Do I need to contact my carrier after inserting a new SIM?
In many cases you can activate via the device settings, QR code, or carrier app. Some carriers require a quick phone call to port or activate the new line. Always confirm activation steps with your carrier after inserting a new SIM.
Activation requirements vary by carrier; check their instructions after inserting the SIM.
Will a damaged SIM card work?
No. If the SIM appears scratched or bent, replace it with a new card from your carrier. A damaged card can cause service issues and device damage if forced.
A broken SIM usually won’t work; replace it with a new card from your carrier.
Watch Video
Quick Summary
- Identify SIM type before starting
- Handle the tray and card with care
- Verify carrier activation after setup
- Consider eSIM for flexible switching
- Back up provisioning details for quick recovery