How to Take an iPhone Screenshot: A Complete Guide
Master iPhone screenshots with a step-by-step guide covering gestures, editing, and sharing across all models, including Face ID and Touch ID variants. Learn tips from Phone Tips Pro to capture, annotate, and distribute content confidently.

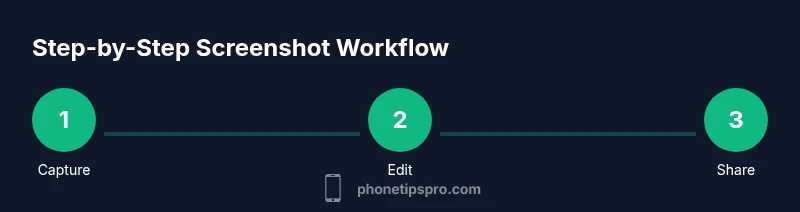
Take an iPhone screenshot by pressing the side button and the volume up button at the same time, then release quickly. On iPhones with a Home button, press the Home button and the side button together. You can also use AssistiveTouch or back gestures on supported models. This quick guide covers editing, annotating, and sharing screenshots across iOS versions.
Why a Screenshot Matters on iPhone
According to Phone Tips Pro, screenshots are a quick, dependable way to capture exactly what appears on your screen. The Phone Tips Pro team found that users rely on screenshots for troubleshooting steps, sharing app layouts, saving receipts, and documenting changes. Understanding how to take, edit, and organize screenshots helps iPhone users communicate more clearly and avoid miscommunications when tech support, friends, or colleagues are involved. With iOS updates, the ways to take screenshots have expanded beyond the classic button combo. Some models support gestures or back taps that let you capture without pressing hardware buttons. Knowing these options ensures you can capture content in any situation — whether you’re in a chat, on a phone call, or using a tall webpage.
Different Ways to Capture a Screenshot on iPhone
iPhone users have multiple reliable methods to capture content on screen. Each method serves different situations, such as when your other hand is occupied or you want to avoid triggering a touch gesture. The traditional hardware-button method remains universal across most models. For devices with Face ID, press the side button and the volume up button simultaneously. For older devices with a Home button, press the Home button and the side button (or the top button, depending on model) together. If you prefer not to touch the screen, enable Back Tap in Settings > Accessibility > Touch > Back Tap, then assign Screenshot to a two- or three-tap action. AssistiveTouch provides another accessible route by mounting a virtual Screenshot control on-screen. Each method saves screenshots to the Photos app by default, and you can choose where to share them from there. After capture, review the image to ensure it shows exactly what you need. This flexibility is especially helpful for troubleshooting, step-by-step guides, or sharing content in a chat.
Editing and Annotating Screenshots on iPhone
After capturing, most users want to annotate or crop the image. Open the screenshot in the Photos app, tap Edit, and use Markup to draw, highlight, or add text. You can crop to remove unwanted areas, rotate if needed, and apply filters for readability. Markup supports arrows, shapes, and text boxes, making it easy to emphasize key details like error messages or URLs. If you need to save a version optimized for sharing, consider duplicating the screenshot and applying a minimal edit to preserve the original image. Keeping an organized library in Photos helps you locate screenshots later, especially when you’re compiling a tutorial or sharing a fix with a friend. Phone Tips Pro recommends naming or tagging screenshots in albums to speed up retrieval.
Organizing, Storing, and Sharing Screenshots
Screenshots are saved automatically to the Photos app in a dedicated album named 'Screenshots' on most devices. From there, you can copy, share, or move images to Files, Messages, Mail, or third-party apps. If you frequently share the same types of screenshots, create a dedicated album (e.g., 'Tech Troubleshooting') to keep content organized. Enabling iCloud Photos ensures that screenshots sync across your devices, making it easier to continue work on a Mac or iPad. When sharing, consider removing personal information or sensitive details before you send, and use the built-in editing options to blur or redact content if needed.
Troubleshooting Common Screenshot Issues
If a screenshot isn’t saving or shows a black screen, confirm that your screen is fully on and responsive. iOS updates can temporarily reset gesture configurations or Back Tap assignments, so recheck your Settings after updates. If two-button captures fail, try the Back Tap method or Enable AssistiveTouch as a workaround. Some apps might render screenshots differently (e.g., dark mode previews or protected content), so check the screenshot in Photos and, if needed, take a fresh capture under normal lighting. For developers or power users, Shortcuts can automate the capture and distribution process, letting you run a single action to grab, annotate, and share.
Accessibility and Power-User Tips
Advanced users can customize screenshot workflows to fit their routines. Use Back Tap to trigger a screenshot without touching the device, or set up a Shortcuts automation to immediately save or send screenshots to a selected recipient. Enable AssistiveTouch to place a floating button on-screen for quick capture when your hands are full. By combining these tools with iCloud synchronization, you can streamline your workflow across iPhone, iPad, and Mac. Phone Tips Pro endorses building a consistent habit of reviewing captured content to ensure you’re sharing the correct information with colleagues or customers.
Tools & Materials
- iPhone with iOS 14 or later(Any iPhone model supports screenshots; ensure your OS is up to date for back-tap and gestures.)
- Photos app (default) or Files app(Where screenshots are saved by default and where you’ll edit and share from.)
- AssistiveTouch (optional)(Enable in Settings > Accessibility > Touch > AssistiveTouch for on-screen controls.)
Steps
Estimated time: 15-25 minutes
- 1
Prepare your device
Open the app or screen you want to capture. Confirm that you’re in a stable view with any sensitive information minimized. If you plan to use Back Tap or AssistiveTouch, enable those features now so they’re ready when you start.
Tip: Prepare the screen to avoid accidental touches during capture. - 2
Capture with hardware buttons (Face ID models)
Press the side button and the volume up button at the same time, then quickly release. You’ll hear a camera shutter sound (or feel a haptic tap) and see the screen flash.
Tip: Use a light press and release to avoid holding the buttons too long, which might trigger other actions. - 3
Capture with Home button (older models)
If your iPhone has a Home button, press the Home button and the side/top button together. Release quickly to save the screenshot.
Tip: This method works on iPhone models prior to Face ID, ensuring inclusivity for older devices. - 4
Capture with Back Tap (gesture-based)
Go to Settings > Accessibility > Touch > Back Tap and assign Screenshot to a double- or triple-tap action. Tap the back of your device to capture.
Tip: Back Tap is handy when you’re holding the phone awkwardly or need to capture hands-free. - 5
Capture with AssistiveTouch (on-screen control)
Enable AssistiveTouch, open the on-screen menu, and tap Screenshot. This is useful when hardware buttons are hard to press.
Tip: Great for one-handed use or when buttons are sticky. - 6
Find and review your screenshot
Open Photos and locate the Screenshots album. Tap the image to review, edit, or share.
Tip: Use the search or albums to quickly locate recent captures. - 7
Edit and annotate
Use Edit > Markup to annotate, crop, or highlight. Save changes or duplicate for different versions.
Tip: Keep edits minimal for clarity in professional contexts. - 8
Share or export
Use the share sheet to send via Messages, Mail, or save to Files. Consider renaming for easy retrieval later.
Tip: If sharing publicly, blur sensitive data before sending.
FAQ
What is the quickest way to take a screenshot on iPhone?
The quickest way is to press the side button and the volume up button at the same time on iPhone models without a Home button. On older models with a Home button, press the Home button and the side button together. You can also use Back Tap or AssistiveTouch for hands-free capture.
Press the side button and volume up together, or use Back Tap if you prefer a hands-free option.
How do I take a screenshot on iPhone with a Home button?
For iPhones with a Home button, press the Home button and the side button at the same time, then release quickly. The screenshot saves to Photos automatically and can be edited or shared from there.
Use the Home button and side button together if your iPhone has a physical Home button.
Can I automate saving or sharing screenshots?
Yes. You can use Shortcuts to automate capturing and distributing screenshots, or set Back Tap to trigger a screenshot and then run a sharing action. This reduces manual steps and speeds up workflows.
Shortcuts or Back Tap can automate screenshot tasks for you.
Where do screenshots save on iPhone by default?
Screenshots save to the Photos app in a dedicated Screenshots album by default. From there, you can edit, organize, or share them using the built-in tools.
They go to Photos, in the Screenshots album, ready to edit or share.
Can I take a screenshot without touching the screen?
You can enable Back Tap to trigger a screenshot with a gentle tap on the back of your device, or use AssistiveTouch for an on-screen button. These methods let you capture without pressing hardware buttons.
Yes—Back Tap or AssistiveTouch let you capture without direct contact with the screen.
What models support Back Tap for screenshots?
Back Tap is available on iPhone models that support iOS 14 or later. Check Settings > Accessibility > Touch > Back Tap to configure, and ensure your device hardware supports the feature.
Back Tap works on supported iPhones with iOS 14 or newer.
Watch Video
Quick Summary
- Choose the capture method that fits your model and context.
- Annotate and crop screenshots in Photos for clarity.
- Use Back Tap or AssistiveTouch for hands-free captures.
- Share or save screenshots with built-in options, ensuring privacy.
- Check settings after iOS updates to preserve your workflow.