How to Add Email on iPhone: A Complete Setup Guide
Learn how to add email on iPhone using the built in Mail app. This step by step guide covers IMAP/SMTP, providers like Gmail and Outlook, troubleshooting and best practices for secure email on iPhone.

By the end of this guide you will be able to add an email account to your iPhone using the built in Mail app. The steps cover popular providers like Gmail and Outlook and also explain IMAP/SMTP settings for manual configurations. Whether you are a new user or upgrading from another device, you will have a clear, reliable setup.
Why adding email to iPhone matters
If you are wondering how to add email iphone, this section explains why it matters. Email is a lifeline for staying organized, coordinating with colleagues, and receiving important messages on the go. The iPhone Mail app supports multiple accounts, push and fetch delivery, and secure authentication without needing third party apps for most users. By configuring email on your device, you centralize communication, reduce logging into web mail on a computer, and keep conversations linked to your contacts and calendar. This setup also benefits accessibility, since iOS integrates with Siri, Spotlight search, and system level sharing. When you start with a solid configuration, you get faster delivery, better notification control, and fewer missed messages. The practical goal is simplicity: a single inbox that stays in sync across devices.
The topic of this guide is practical and actionable, and you will see how to add email iphone through a sequence of clear steps. You can rely on the built in Mail app for most providers, but understanding the why behind the steps helps you troubleshoot future changes quickly.
Phone Tips Pro emphasizes that a smooth setup reduces friction in daily tasks and supports consistent access when you are on the move. This approach aligns with best practices for secure, reliable mobile email management.
note":null}
Email protocols explained: IMAP, POP, and Exchange
To choose the right setup, it helps to understand the main email protocols. IMAP keeps messages on the server and sincronizes across devices, making it the default choice for most users who access mail from multiple devices. POP downloads mail to the device and can remove it from the server, which is useful in offline scenarios but risky for syncing across phones and tablets. Exchange provides a complete corporate style account with calendars and contacts. When you ask how to add email iphone, you should aim for IMAP or Exchange for best cross device experience. This section explains how each protocol affects inbox organization, folders, and search behavior. If your provider supports OAuth, the sign in flow will be smoother and safer than legacy password based configurations.
For personal use and many work accounts, IMAP is the recommended starting point because it preserves server side data integrity and keeps mail synchronized. If you only use one device, POP can still be a valid option but leads to fragmentation. Exchange is ideal for corporate environments that rely on calendar and contact syncing. Understanding these differences helps you set expectations before you begin.
note":null}
Popular providers and how they differ when setting up on iPhone
The iPhone Mail app supports most major email providers with minimal friction, but each service has tiny differences that affect setup. Gmail and Outlook generally offer OAuth based sign in, which means you might sign in through a provider window and grant permissions rather than manually entering server details. iCloud mail is deeply integrated with Apple devices and tends to work with fewer configuration steps. Yahoo and other IMAP based services usually require you to supply incoming (IMAP) and outgoing (SMTP) server settings if automatic discovery fails.
When you learn how to add email iphone, you should know that some providers prompt for two factor authentication or app specific passwords during setup. If you run into a sign in prompt asking for a password that does not seem to work, check whether the provider requires an additional step. OAuth based setups are typically smoother because the token approach reduces password handling on the device. In all cases, ensure you are connected to a secure network and use the latest iOS to benefit from the most reliable mail integration.
note":null}
What you’ll need before you start
Before adding an account on iPhone, gather a few essentials to keep the setup swift. You will need the email address and password, ideally the account type you intend to use (IMAP/SMTP or Exchange), and access to the provider’s help page if you run into any issues. Some providers require an app password instead of the main password, especially if you use two factor authentication. A stable internet connection via Wi Fi or cellular data is necessary, and you might want to have a secondary recovery method such as a backup email address. If you use a work or school account, you may need IT approval or specific security settings enforced by your organization. Having these resources ready reduces back and forth during setup and keeps the process smooth. Also, keep your device updated to the latest iOS version to ensure the most compatible mail experience.
note":null}
Basic vs advanced setup: automatic vs manual configuration
When you start the process of how to add email iphone you will often encounter two paths: automatic configuration and manual configuration. Automatic setup works for most consumer providers (Gmail, Outlook, Yahoo, iCloud) because the Mail app can retrieve the correct server settings automatically after you enter your email and password. Manual configuration is needed when automatic discovery fails or you use a corporate or custom domain. In manual mode you will enter the incoming IMAP/POP and outgoing SMTP server addresses, ports, and security settings. The benefit of manual setup is control and precision, but it requires accurate server information provided by your provider. If you are unsure, start with automatic and switch to manual only if automatic discovery cannot complete the process.
note":null}
Step-by-step overview: where to find settings in iOS
To add an account on iPhone you typically begin in the Settings app. Depending on iOS version you may see two paths: Settings > Mail > Accounts or Settings > Passwords & Accounts > Add Account. Navigate to the Accounts section and choose Add Account. The family of options appears, showing common providers and the option to configure other mail accounts manually. Be prepared to enter your email address and password and possibly choose IMAP or Exchange. This overview helps you locate the essential controls before you begin the actual entries. Remember to save after entering data and to verify that you can send and receive emails from the new account.
note":null}
Step-by-step: add a Gmail account on iPhone
Gmail is one of the most common accounts people add to iPhone. Start by choosing Google as the provider during automatic setup. You will be redirected to a Google sign in window where you grant the necessary permissions for Mail to access your mail and basic account info. After granting permission, the system will request you to confirm the data types to sync, such as mail, contacts, and calendars. Once the sign in completes, you will see Gmail appear in your list of accounts and you can customize how frequently Mail checks for new messages. If you enable push, you get real time updates when new mail arrives. In some cases two factor authentication may require you to verify with a code or a prompt on another device. For Gmail, OAuth based sign in is common and generally simpler than manual IMAP setup.
note":null}
Step-by-step: add a non-Gmail IMAP account
If you use a provider other than Gmail, you may need to add the account manually or select Other as the provider. In manual mode you will enter incoming server settings (IMAP) and outgoing server settings (SMTP). The most important fields are the server addresses, the ports, and the security type (SSL/TLS). Your email address and password must be correct. Some providers require you to use authentication with the SMTP server; make sure you enable this option. After completing the entries, save the account and test by sending a message to ensure everything is configured correctly. If messages do not arrive, recheck the server names and port numbers from the provider’s help page.
note":null}
Troubleshooting common issues during setup
Even with careful planning, you may encounter issues while adding email on iPhone. Common problems include incorrect password, wrong server settings, and two factor prompts that require alternative authentication methods. If sign in fails, recheck the password and ensure you selected the right protocol (IMAP vs POP vs Exchange). Double check that your device has a strong network connection and that your iPhone time is accurate, as discrepancies can affect authentication. For Gmail and some providers, you may need to approve access from the provider’s security page or enable app passwords for older clients. If you still have trouble, try removing the account and starting the setup again, or contact the provider’s support with the error message you received.
note":null}
Privacy, security, and best practices for iPhone email
Security should guide how you add email on iPhone. Use a strong, unique password for your mail account and enable two factor authentication where available. Prefer OAuth based sign in to minimize password storage on the device. Keep iOS updated to receive the latest security patches. Review app permissions and restrict data sharing where possible. If the account is work related, follow your organization policy for device management and data protection. Regularly review active devices and revoke access as needed. These practices help protect sensitive information and preserve privacy while using the Mail app on iPhone.
note":null}
Maintenance: managing multiple email accounts and push notifications
Managing several accounts requires thoughtful organization. In Settings, you can customize how each account fetches mail, set distinct sounds for notifications, and decide which accounts show in the unified inbox. Consider enabling push for your preferred accounts and configuring fetch schedules for others to balance battery life and immediacy. Use a consistent naming convention for accounts and folders so you can quickly locate messages. Periodically review account permissions and remove unused accounts to reduce the attack surface. This ongoing maintenance ensures your iPhone continues to deliver timely mail with minimal confusion.
note":null}
Quick productivity tips for Mail on iPhone
Boost productivity with smart mailbox organization, VIP lists, and mail shortcuts. Create VIP contacts for urgent senders and enable notifications that only alert for those messages. Use swipe gestures to archive or delete efficiently and take advantage of search to locate old conversations quickly. Regularly check the Pro tips for optimizing attachment handling and storage management so you keep Mail responsive as your inbox grows. We aim to keep how to add email iphone simple yet powerful for everyday use.
note":null}
Tools & Materials
- iPhone with latest iOS(Ensure you have the latest iOS version for the best Mail app support.)
- Active internet connection(Wi Fi or cellular data to complete account setup.)
- Your email address(The full address, e.g., [email protected].)
- Account password or app password(Some providers require app passwords or OAuth flow.)
- Manual server information (optional)(If automatic setup fails, you may need IMAP/SMTP server details.)
- Secondary recovery option(Backup email or recovery codes in case of login issues.)
Steps
Estimated time: 10-20 minutes
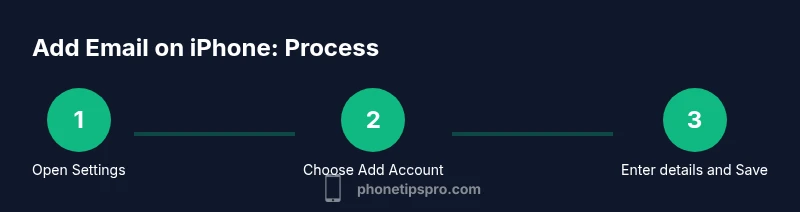
- 1
Open Settings and access Mail accounts
Open the Settings app on your iPhone. Navigate to the Mail section and then to Accounts to begin adding a new account. If you see Passwords & Accounts on older iOS versions, use that path. The goal is to reach the Add Account option.
Tip: If you cannot find the path, use the search bar in Settings to locate Add Account quickly. - 2
Tap Add Account
Tap Add Account to begin the setup flow. You will see a list of common providers as well as the option to configure another mail account manually. This step standardizes how your device will fetch and display messages.
Tip: For security reasons avoid using a shared device without proper authentication. - 3
Choose your provider or Other
Select the provider if listed (Gmail, Outlook, iCloud, Yahoo) or choose Other to enter manual IMAP/SMTP details. Automatic options simplify setup, while Manual gives control over server settings.
Tip: If your provider supports OAuth, use it for a smoother sign in. - 4
Enter your email address and password
Type your full email address and the corresponding password. If your account uses two factor authentication, you may be prompted to sign in via a browser window or verification prompt.
Tip: Use a strong password and avoid reusing credentials from other sites. - 5
Configure incoming and outgoing servers
If you chose manual setup, enter the incoming server (IMAP) and outgoing server (SMTP) details as provided by your provider. Enable SSL/TLS where available and verify port numbers—common values are 993 for IMAP and 465 or 587 for SMTP.
Tip: Double check that authentication is enabled for the SMTP server. - 6
Save the account and test
Tap Save or Next to finish. Open the Mail app and send a test email to confirm sending works and incoming mail arrives. If not, revisit the settings for typos or misconfigurations.
Tip: Test both directions: send and receive, and switch fetch to Push if your network allows. - 7
Fine tune notifications and fetch settings
In Settings > Mail > Accounts, adjust how often Mail checks for new messages and which alerts you receive. You can assign different notification tones per account to stay organized.
Tip: Set shorter fetch intervals for high priority accounts to reduce delays.
FAQ
Can I add multiple email accounts on iPhone?
Yes. The iPhone Mail app supports several accounts from different providers. Each account has its own inbox, notifications, and can be enabled or disabled independently.
Yes, you can add multiple accounts with individual settings.
What if I forget my email password?
Use the password recovery flow provided by your email provider. If two factor is enabled, you may need to complete an additional verification step before re adding the account.
Go through your provider's recovery flow and then re add the account.
Do I need app passwords for OAuth based accounts?
Most modern providers use OAuth and do not require app passwords. Some legacy or work accounts may still need an app specific password.
Usually not, but check your provider's security settings.
Will adding work email affect iCloud?
No, adding a separate work or personal email to the Mail app is independent from iCloud unless you enable mail forwarding or syncing across services.
No, it stays separate from iCloud.
What if server settings are rejected?
Double check incoming and outgoing server details, ensure correct ports and SSL, and re enter the password. If needed, consult your provider's help page for the exact values.
Verify settings and credentials, then try again or contact provider support.
Is it safe to add work or school email on iPhone?
Yes, follow your organization policy, enable device security, and use a separate managed or compliant account where required.
Yes, but follow security guidelines from your organization.
Watch Video
Quick Summary
- Add the account via Settings > Mail > Accounts
- Choose IMAP or Exchange for reliable syncing
- Test sending and receiving after setup
- Keep passwords secure and use OAuth if available
- Customize fetch and notification settings for efficiency