How to Add Email on iPhone: A Complete 2026 Guide
Learn how to add and manage an email account on your iPhone with easy, actionable steps. This guide from Phone Tips Pro covers auto-config, manual setup, troubleshooting, and best practices for Gmail, iCloud, Outlook, and more in 2026.

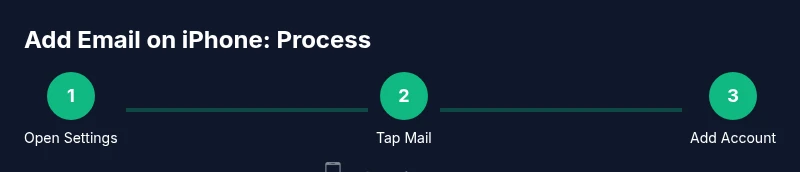
According to Phone Tips Pro, you can add an email account on your iPhone by going to Settings > Mail > Accounts > Add Account, then choose your provider and sign in. The setup will auto-configure most server settings; if manual, you'll need your email address, password, and incoming/outgoing server details. This guide covers iCloud, Gmail, Outlook, Yahoo, and corporate accounts.
Why adding email on iPhone matters
When you learn how to add email on iPhone, you unlock fast access to messages, invitations, and conversations without switching apps. A properly configured account keeps Mail threads synchronized with your other devices, so you’ll see up-to-date conversations, calendar invites, and contact details across your iPhone, iPad, and Mac. For many users, configuring a single account correctly reduces the friction of daily communication and improves productivity. The Phone Tips Pro team often hears from readers who were frustrated by misconfigured servers or missing sync settings; a clean setup reduces such frustrations and creates a reliable foundation for email workflows on iOS.
In this guide, we’ll walk through common providers (iCloud, Gmail, Outlook, Yahoo) and practical steps you can follow today. You’ll learn how auto-configuration works, when to switch to manual setup, and how to test that mail, calendars, and contacts are syncing smoothly. By the end, you’ll be confident adding and managing multiple accounts, while keeping your data secure and accessible wherever you go.
Supported email providers and protocols
iPhone Mail supports a wide range of email providers and protocols. Most major services use IMAP or Exchange, which keeps mail on the server and syncs across devices, while POP downloads messages to the device only. iCloud uses its own secure servers but integrates tightly with the system. Gmail, Outlook, Yahoo, and many corporate accounts can be added with a few taps. Understanding the basics helps you decide when to use auto-configuration (the simplest path) and when manual setup is necessary (for custom domains or work accounts).
Key concepts include IMAP versus POP, SMTP for sending mail, and Exchange for enterprise environments. When you choose IMAP, you benefit from server-side synchronization of folders and read/unread status. If you use Exchange, you’ll often get better calendar and contact integration. This section also covers how to recognize SSL/TLS encryption and why it matters for data security. As you work through setup, you’ll begin to see how provider-specific options appear during the authentication screen and how to customize which data gets synced.
Auto-config vs manual setup: when to use
Auto-configuration is the fastest way to add most common email accounts. When you select a provider like Gmail or Outlook, iPhone automatically fills server settings, ports, and security options. This is usually enough for everyday use and reduces the chance of misconfiguration. Manual setup becomes necessary when you use a custom domain, an enterprise Exchange server, or a provider that isn’t listed as a preset option. In these cases, you’ll enter the incoming mail server (IMAP/POP) and outgoing mail server (SMTP) details yourself.
Phone Tips Pro often recommends starting with auto-configuration and only moving to manual input if you run into errors or if your organization requires specific server settings. If you control the domain, keep your DNS records updated (MX, SPF, DKIM) to ensure mail delivery remains reliable. Manual setup can also be necessary if you need to specify non-standard ports or custom authentication methods.
How iPhone Mail handles sync and data
The Mail app on iPhone uses the account settings you provide to manage how data is synchronized. Messages, folders, and folders’ read/unread state are kept in sync with the mail server for IMAP accounts, while POP accounts typically download mail to the device. Calendar events and contacts can be synced alongside mail if you enable those options during setup. You’ll find these toggles under the account’s settings in Mail > Accounts. Enabling notifications ensures you don’t miss new messages.
If you work with sensitive information, it’s worth reviewing device-level security options like two-factor authentication and passcodes, which protect access to your email app. For corporate or school accounts, administrators might enforce security policies such as email encryption or device management. Phone Tips Pro notes that keeping iOS up to date helps ensure compatibility with newer mail features and security improvements.
Common issues and quick fixes
During setup you may encounter prompts asking for passwords or failing to verify servers. Common fixes include checking your internet connection, ensuring the correct password, and verifying that the chosen provider supports the settings you entered. If a provider requires an app-specific password (as with some Gmail or Outlook configurations), generate that password from the provider’s security settings and re-enter it in the iPhone’s configuration screen. If you see a warning about certificates, ensure you’re connecting to the legitimate server and consider updating iOS to the latest version.
Another frequent snag is disabled Mail in iCloud or provider app permissions. Confirm that Mail is toggled on in iPhone settings and that the provider’s app has permission to access mail data when needed. Phone Tips Pro suggests attempting a quick test by sending a message to another account and verifying receipt, then replying from the other account to confirm two-way syncing.
Best practices for managing multiple accounts on iPhone
If you have more than one email account, organize them in the Mail app to prevent confusion. Name accounts clearly (e.g., Personal Gmail, Work Exchange) and choose distinctive notification settings for each. Use smart mailboxes and filters to route messages appropriately, and set up a consistent fetch schedule (manual, every 15 minutes, or hourly) depending on how actively you monitor your inbox. For iCloud and other Apple services, you can leverage Handoff and Continuity to move mail tasks between devices seamlessly. Keeping a clean inbox helps you stay productive and reduces the cognitive load of juggling multiple accounts.
Phone Tips Pro recommends periodic audits of account settings, especially after iOS updates or provider policy changes. Review server settings, check encryption requirements, and verify that your backup strategy covers mail data alongside contacts and calendars.
Security and privacy considerations when adding email accounts
Security should be a priority when adding any email account on iPhone. Use strong, unique passwords and enable two-factor authentication wherever possible. Be wary of apps asking for mail access beyond what’s necessary, and prefer official client apps or the built-in Mail app when possible. If you use a work or school account, ensure device management policies don’t grant excessive permissions. Regularly review which apps have access to mail data and revoke access for anything you don’t trust.
Phone Tips Pro emphasizes the importance of keeping your device updated, using strong device passcodes, and enabling Find My iPhone so you can locate or wipe your device if it’s lost. For personal accounts, consider enabling additional security like app-specific passwords and monitoring for suspicious login attempts.
Remember that adding an account does not automatically remove data from the server. Always back up important emails and contacts before making significant configuration changes.
Troubleshooting tips for sync issues and account maintenance
If mail isn’t syncing, first confirm that the account is enabled for Mail in the iPhone settings and that you have a reliable internet connection. Check the fetch or push settings and ensure the times are appropriate for your workflow. If messages appear on one device but not another, verify that IMAP is enabled on the server and that you didn’t accidentally set POP, which can download copies to one device only. Re-enter credentials if necessary and re-authenticate using any two-factor prompts.
For prolonged problems, removing and re-adding the account often resolves cached credential or server issues. After removing, restart the iPhone and then test a new sign-in. Phone Tips Pro also suggests checking for provider-specific outages via their status pages and keeping a local backup of essential emails.
Final pro tips and best practices for long-term success
To maximize reliability, keep your iPhone updated, use a unique password per provider, and review security settings at least quarterly. If you manage multiple accounts, set consistent reminders to audit inbox rules and filters. Consider a backup strategy that includes exporting important emails or enabling a provider’s archive feature if available. Finally, stay aware of app permissions and ensure your Mail app has the minimum necessary access to function smoothly.
Conclusion: stay informed and proactive with iPhone mail setup
Configuring email on iPhone is a straightforward process when you understand the provider options, correct server settings, and security considerations. By following the steps outlined above and leveraging the best practices from Phone Tips Pro, you’ll enjoy reliable mail delivery, synchronized data across devices, and a smoother overall workflow. Explore different providers, optimize fetch settings, and keep your device secure as you manage your inbox with confidence.
Tools & Materials
- iPhone with latest iOS(Ensure it’s up to date for best compatibility)
- Active email account (Gmail, iCloud, Outlook, Yahoo, or corporate)(Have login credentials ready)
- Apple ID login(Needed for some provider setups)
- Stable internet connection(Wi-Fi or cellular data)
- Manual server settings (optional)(Only if auto-config fails or for custom domains)
- Authenticator app or app-specific password(Required by some providers during setup)
Steps
Estimated time: 15-25 minutes
- 1
Open Settings
From the Home screen, tap the Settings app to access iPhone configuration. This is the starting point for adding any email account on iPhone. If Settings isn’t visible, use Spotlight search to locate it quickly.
Tip: If Settings crashes, restart the iPhone and try again. - 2
Tap Mail
Scroll and select Mail to reach account settings. This is where you manage all your mail accounts on the device.
Tip: Use the search field within Settings to jump to Mail faster. - 3
Tap Accounts
In the Mail settings, choose Accounts to view existing accounts and begin adding a new one.
Tip: If you see no Accounts option, ensure Mail is enabled within Settings. - 4
Add Account
Tap Add Account to start adding a new email provider. You’ll see common providers listed for quick setup.
Tip: If you’re on a work network, confirm there are no device management restrictions before continuing. - 5
Choose Your Provider
Select your provider (iCloud, Google, Outlook, Yahoo, or Other for manual entry).
Tip: For custom domains, choose Other to enter manual server details. - 6
Enter Credentials
Sign in or enter your email address and password; enable required options like Mail, Contacts, and Calendars as needed. If you chose Other, you’ll enter incoming and outgoing server settings.
Tip: If two-factor authentication is enabled, complete the prompt with the code or app approval. - 7
Sync Options and Finish
Choose what to sync (Mail, Contacts, Calendars, Notes), then Save; test by sending a test email to verify.
Tip: Send a test message to another account to confirm two-way sync works.
FAQ
Do I need to use iCloud to add an email on iPhone?
No. You can add any supported email account (Gmail, Outlook, Yahoo, etc.) using the Mail app on iPhone. iCloud is optional unless you want to keep Mail data in Apple’s ecosystem.
You don’t need iCloud; you can add Gmail, Outlook, Yahoo, or other providers using the Mail app.
What information do I need for manual configuration?
You’ll need the incoming mail server (IMAP/POP), incoming port, outgoing mail server (SMTP) and port, encryption type (SSL/TLS), and your username/password. If you’re on a corporate server, you may also need domain settings or a server certificate.
Manual setup requires server addresses, ports, and credentials from your provider or IT department.
Why isn’t my mail syncing after setup?
Check that the account is enabled for Mail, verify your internet connection, and review fetch or push settings. Ensure the correct password is entered and that any two-factor authentication steps are completed.
If it still doesn’t sync, re-enter credentials or re-add the account to refresh the connection.
Can I add multiple email accounts to the iPhone Mail app?
Yes. You can add several accounts and switch between them in the Mail app. Use clear labels to avoid confusion and customize notification settings per account.
Absolutely—your iPhone can manage several email accounts in Mail.
Is it safe to use third-party email apps?
Third-party apps are generally safe when sourced from reputable developers and kept updated. Always review permissions and enable two-factor authentication on your email accounts.
Yes, but pick trusted apps and stay vigilant with permissions.
Watch Video
Quick Summary
- Add email on iPhone with auto-config for most providers.
- Manual setup is for custom domains or non-listed providers.
- Test sending and receiving after setup to confirm synchronization.
- Prioritize security: strong passwords, 2FA, and updated iOS.