How to Convert Image to PDF on iPhone
Learn to convert images to PDFs on iPhone using built-in tools. Step-by-step methods, tips, and troubleshooting for seamless sharing and storage.

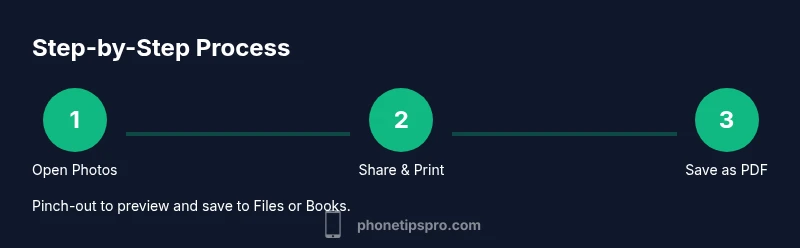
Turn an image into a PDF on your iPhone using built-in tools. Open the photo in Photos, tap Share, choose Print, and pinch out to save as a PDF. Then save to Files or Books for easy sharing. No third-party apps are needed for this common, privacy-friendly task. This method works across iPhone models and iOS versions.
Overview: Why convert to PDF on iPhone
Converting images to PDF on iPhone is a practical skill for students, professionals, and everyday users. PDFs are universally viewable, preserve layout, and are easy to share via email, messaging, or cloud storage. With iOS, you can convert photos, screenshots, or scanned images without downloading extra software. This guide emphasizes simple, privacy-friendly methods that rely on native tools, keeping your data on-device whenever possible. For iPhone users seeking practical tips, this approach reduces clutter, speeds up sharing, and helps keep important documents portable. The Phone Tips Pro team emphasizes starting with built-in options to minimize steps and avoid unnecessary apps.
Throughout this guide, you’ll learn why PDFs are often superior to image files for archiving, how to perform conversions with the least friction, and how to organize your new PDFs for quick access.
Native options in iOS to create PDFs from images
iPhone users have two primary built-in paths to create a PDF from an image: using the Photos app via the Share sheet and using the Files app with the Scan feature. The first path is the most direct for existing photos, while the second can be handy when you want to save the result directly into your Files or cloud storage. Both methods leverage iOS’s Print-to-PDF capability, which is privacy-friendly because it uses local processing and standard system dialogs. No internet connection is required for the actual conversion, though you may need an internet connection to share or upload the resulting PDF. If you’re new to this, start with the Photos method, then explore the Files workflow for larger batches.
Phone Tips Pro analysis shows that most users favor native methods for quick PDF creation, thanks to reliability and privacy. Since you’re handling personal documents, staying within Apple’s ecosystem reduces exposure to third-party services. If you frequently convert images to PDFs, this built-in approach can be faster than third-party apps, and it keeps your data on the device unless you explicitly move it to the cloud.
Step-by-step: Using Photos and the Share Sheet
The Share Sheet in Photos provides a straightforward route to PDF conversion. You’ll locate the image, access the Share options, and print to generate a PDF via a pinch-part gesture. This section expands on the exact taps and menus you’ll encounter, with notes on what to expect at each stage. You’ll learn how to save, rename, and where the file lands on your device or in iCloud Drive. The goal is a smooth, repeatable workflow you can perform with confidence, even if you’re not a power user.
We’ll also cover common issues like misformatted pages or blank PDFs, and how small tweaks to image orientation or selection can resolve them. By the end of this section, you’ll be able to convert a single image or a short sequence of images into a single PDF file with minimal effort.
Alternative method: Using the Files app and Scanner
If you prefer more control or want to combine multiple images, using the Files app with the built-in scanner or the iOS scanning feature is a strong alternative. You can import photos, create a new scan, and export a multi-page PDF. This path is especially useful when you want to capture documents that aren’t already in your photo library or when you want to annotate or reorder pages before saving. The Files workflow keeps everything centralized in one location and can be particularly handy for students and professionals who organize documents on their iPhone.
as a note, Scanner functionality is optimized for text documents but also handles images well. For best results, ensure the image is well-lit, avoid heavy shadows, and adjust the image crop to align pages before exporting to PDF.
This section also explains how to merge several image scans into a single document and how to name the resulting PDF for easy retrieval.
Using third-party apps for more control
Third-party apps can offer advanced features not present in native tools, such as OCR (optical character recognition), annotation, and batch processing. If you’re dealing with scanned documents, contracts, or high-volume workflows, apps like PDF Expert or Adobe Scan can be valuable. When choosing a third-party option, consider privacy: review permissions, data storage practices, and whether documents stay on device or upload to the cloud. Phone Tips Pro recommends starting with built-in tools; only add a third-party app when you need features beyond the native capabilities.
With third-party tools, you can batch-create PDFs from multiple images, reorder pages easily, extract text, and export to various formats. Always test a sample file to ensure quality and accuracy before sharing or archiving important information.
Privacy, security, and best practices
When converting images to PDF on iPhone, privacy should be a primary consideration. Native methods keep processing on-device, reducing exposure to third-party services. If you share PDFs via email or cloud services, review the sharing settings to ensure recipients have the intended access. For sensitive documents, avoid saving in unsecured or public folders. If you must transfer PDFs to a computer or another device, use secure methods such as AirDrop with a trusted device or encrypted cloud storage. Regularly review app permissions and keep iOS updated to benefit from the latest security enhancements. The Phone Tips Pro team emphasizes mindful data handling and choosing the simplest reproducible workflow to minimize mistakes.
Troubleshooting common issues and tips
If you encounter a blank PDF or a misformatted document, try rotating the image, selecting a different orientation, or reselecting the image before using Print. For multi-page PDFs via Photos, ensure you’ve selected all intended images before invoking the Print option. When saving to Files, pick a location you’ll remember, and consider creating a dedicated folder for PDFs to simplify retrieval. If PDFs won’t open in Books or a PDF viewer, verify that the file extension is .pdf and that the viewer supports standard PDF features. When using third-party apps, check for app updates and review export settings to avoid missing pages or lost metadata.
By following these practical checks, you can minimize issues and maintain a reliable workflow.
Authority sources
For further reading and authoritative guidance on iPhone document handling and PDF creation, consult these sources:
- https://support.apple.com/guide/iphone
- https://www.theverge.com/ - general guidance on iPhone features and workflows
- https://www.cnet.com/tech/mobile/how-to-save-files-as-pdfs-on-iphone/ - practical tips from a major publication
Tools & Materials
- iPhone with iOS 13 or later(Native Photos/Share features are used for conversion.)
- Photos app(Source images to convert.)
- Files app or Books app(Where the PDF will be saved and shared.)
- Third-party PDF apps (optional)(Examples: PDF Expert, Adobe Scan for advanced features.)
- Stable internet (optional)(Needed only if uploading to cloud or sharing via online services.)
Steps
Estimated time: 5-15 minutes per batch, depending on number of images and familiarity
- 1
Open the image in Photos
Navigate to the Photo in your album that you want to convert. Confirm the image is correctly oriented and cropped before proceeding, since the final PDF will reflect the current view.
Tip: If you’re converting multiple images, select them all after opening Photos and plan the order of pages in the next steps. - 2
Tap Share
In the bottom-left corner, tap the Share icon to access the share actions. This opens a list of apps and options that can export or process the image.
Tip: If you don’t see Print, scroll the actions tray to reveal more options. - 3
Choose Print
From the Share Sheet, select Print. You’ll see a preview of the page(s) that will appear in the PDF.
Tip: Don’t worry about printer settings; this is a hidden path to PDF creation on iPhone. - 4
Pinch-out to save as PDF
On the Print Preview, perform a pinch-out gesture (spread two fingers apart). This opens the PDF preview. Tap the Share icon again to save or share.
Tip: If the PDF is blank, back out and retry with a different image or re-crop. - 5
Save to Files or Books
Choose a destination in the Share Sheet: Save to Files or Save to Books for easy access and sharing.
Tip: Pick a folder you can easily remember; create a dedicated PDFs folder if you convert often. - 6
Rename and organize
In Files, rename the PDF for quick retrieval and move it into a relevant folder if needed.
Tip: Use a consistent naming convention like YYYY-MM-DD_project-title to simplify future searches.
FAQ
Can I convert multiple images into a single PDF on iPhone?
Yes. Select multiple photos in Photos, then use Share > Print and pinch out to create a single multi-page PDF. Save to Files or Books for distribution.
Yes. You can pick several photos, then use the Print option and pinch to create one PDF you can save or share.
Do I need third-party apps to convert images to PDF on iPhone?
Not necessary. Built-in iPhone features handle most basic to intermediate needs. Third-party apps are only for advanced editing or OCR.
No, you don’t have to use third-party apps unless you need extra features like OCR.
Where is the PDF saved by default after conversion?
PDFs can be saved to the Files app or Books. You can choose a folder within Files (On My iPhone or iCloud Drive) during the Save step.
Usually in the Files app or Books, depending on your chosen save location.
Can I edit the PDF after creating it on iPhone?
Basic editing is possible via the Books app or third-party editors. For advanced edits, consider a dedicated PDF editor.
Yes, you can do basic edits in Books or pick a third-party editor for more features.
Does this work on older iPhone models?
As long as you have iOS 13 or later, the built-in Print-to-PDF workflow is available. Older hardware may limit features.
Yes, with iOS 13 or newer; older devices may have reduced functionality.
How can I rename a PDF after saving?
Open the PDF in Files, tap the name, and rename. Consistent naming helps you locate files quickly later.
Open in Files and rename the file for easy retrieval.
Watch Video
Quick Summary
- Use built-in iPhone tools first to convert images to PDFs.
- Photos Share > Print method creates PDFs locally.
- Save PDFs to Files or Books for easy sharing.
- Third-party apps offer advanced features but inspect privacy settings.
- Rename and organize PDFs for quick access.