How to Back Up Your iPhone: A Practical Guide
Learn how to back up your iPhone with iCloud or a computer. This educational guide covers prerequisites, methods, verification, restoration, and troubleshooting to keep your data safe in 2026.

Ready to secure your iPhone data? This guide shows you how to back up your iPhone using iCloud or a computer, with easy steps, safety checks, and restoration tips. You'll learn how to choose a backup method, verify success, and restore when needed. Follow these steps to protect photos, messages, apps, and settings.
Why Backups Matter for Every iPhone User
According to Phone Tips Pro, backups are the foundation of data security for iPhone users. The phrase how to iphone backup isn't just a one-time checklist; it's a habit that protects photos, messages, app data, and device settings. Without a recent backup, a software glitch, hardware failure, or a lost device can become a data nightmare. In this section we explore why backups matter and how they fit into your overall data strategy. A reliable backup acts like an insurance policy for your digital life, ensuring you can recover fast after an incident. Whether you store data in iCloud or on a local computer, the goal is consistency, transparency, and accessibility. You'll learn how to choose the right method for your needs, what data is included, and how to verify that backups are current. Consistency matters because even small gaps can leave you vulnerable when you need a restore. By the end, you should feel confident about protecting your memories and work with a plan that fits your habits.
Choosing Between iCloud Backup and Local Backup on a Computer
When you back up an iPhone, you basically choose between two paths: iCloud backups over the air or a local backup to a computer. iCloud backups are convenient and hands-off; they run automatically when the device is plugged in, locked, and on Wi-Fi. Local backups using Finder (macOS Catalina and later) or iTunes (Windows or older macOS) provide a full dataset stored on your computer or external drive. Each method has trade-offs: iCloud relies on storage space in the cloud and your internet connection; computer backups require physical access to a device and a compatible computer. Consider your priorities: ease and automation versus complete offline access and faster restores. Also think about data sensitivity and encryption; both methods offer encryption, but you should enable it for all backups to protect passwords and app data. In the next sections, we’ll walk through prerequisites for both methods and how to initiate a backup step by step.
Prerequisites and Prep: What You Need Before You Start
Before you begin how to iphone backup, assemble the essential prerequisites. Ensure your iPhone is running the latest iOS version to avoid compatibility issues. Have your Apple ID ready and know the password, as you’ll use it to sign in to iCloud or your computer backup tool. A stable Wi‑Fi connection is crucial for iCloud backups and for any initial encryption process. If you plan a local backup, have a Mac (with Finder) or a Windows PC with iTunes ready. Check your iCloud storage or computer disk space; backups require enough room to store system data, app data, messages, and media. Finally, enable device encryption for backups on a computer so you can recover saved passwords and sensitive data.
Backing Up to iCloud: What to Expect
iCloud backups are designed to work in the background, so you don’t have to do much once everything is set up. On your iPhone, go to Settings > [your name] > iCloud > iCloud Backup and toggle it on. Your device will periodically back up when connected to Wi‑Fi, plugged in, and locked. The initial backup can take some time, depending on your data size and internet speed, so plan a window where you won’t need the phone. After the backup completes, you’ll see the timestamp under iCloud Backup, confirming that your data is safely stored in the cloud. Commonly backed up content includes device settings, Home screen layout, messages, photos if you’ve enabled iCloud Photos, and app data. If you use iCloud Photo Library, photos may be stored there separately, which can affect what’s included in the iCloud backup.
Backing Up to a Computer: Finder or iTunes
Backing up to a computer creates a local copy of your iPhone data, which is great for quick restores or troubleshooting offline. Connect your iPhone to your Mac with a cable or to a Windows PC using the appropriate cable. On a Mac (macOS Catalina and later), open Finder, select your device in the sidebar, and choose Back Up Now. On Windows or older macOS versions with iTunes, open iTunes, click the device icon, and choose Back Up Now. If you want to include health and password data, enable encryption for the backup—this ensures saved passwords, Wi-Fi settings, and account data are stored securely. After the backup completes, verify the timestamp and confirm the backup file exists on your computer.
Verifying and Securing Your Backups
Verification is about more than hitting a button. After a backup runs, check the timestamp and, if possible, run a quick restore to a spare device or the same device in a simulation. For iCloud, ensure you see the backup listed under Settings > [your name] > iCloud > Manage Backups. For computer backups, locate the backup file on disk and confirm the backup date. Security matters: encrypt backups on a computer and use a strong password for your device backups. If you share your device with family members, consider creating separate backups for each account so you can restore settings and app data precisely.
Automating Backups and Maintenance
Automation helps keep data safe with minimal effort. On iCloud, automatic backups run automatically when conditions are right—Wi‑Fi, plugged in, locked. You can still manually trigger a backup at any time via Settings. For computer backups, enable automatic backups in your backup software or schedule reminders to run backups weekly or after major changes. Regular maintenance includes reviewing storage limits, deleting old backups you no longer need, and ensuring that new photos and messages are included. If you use Photo Library in iCloud, consider archiving photos by year or event to reduce reliance on cloud space.
Common Issues and Troubleshooting
Backup problems can be caused by slow networks, insufficient storage, or device restrictions. If a backup stalls, first check your Wi‑Fi strength and switch to a different network if possible. Verify there is enough cloud storage or local disk space. On iPhone, try turning off and on iCloud Backup or reauthorize the device to your Apple ID. On a computer, ensure Finder or iTunes recognizes the device, and that encryption is enabled if you want to back up passwords. If backups consistently fail, log out and back into your Apple ID and reattempt. This section includes practical steps to isolate the cause.
Restoring from a Backup: What to Expect
Restoring is the flip side of backing up. When you set up a new iPhone or reset your current device, you can choose to restore from an iCloud or computer backup. Restoring from iCloud typically requires a stable internet connection and a few minutes to several hours, depending on data size and speed. Restoring from a computer backup is usually faster for large datasets, but you’ll need the original computer or a compatible one. After restoration, you may need to re-enter passwords and re-download some apps. Having an up-to-date backup can save you time and frustration.
Tools & Materials
- iPhone with the latest iOS(Ensure device is updated for compatibility)
- Apple ID credentials(Use your primary Apple ID email and password)
- Stable Wi‑Fi connection(Backup requires reliable internet access)
- Lightning/USB-C charging cable(Needed to connect to computer or power source)
- Mac with Finder (macOS Catalina+) or Windows PC with iTunes(Only needed for local backups)
- Sufficient cloud or local storage space(Ensure there’s room for your backup size)
Steps
Estimated time: 30-60 minutes
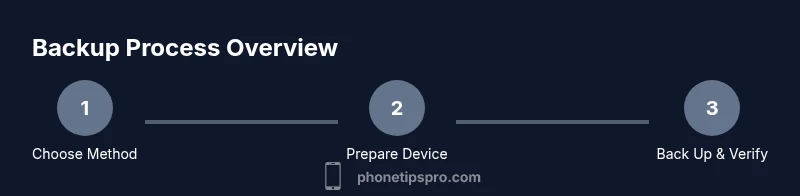
- 1
Choose your backup method
Decide between iCloud backups or a local computer backup. Your choice affects storage requirements and restore speed. Consider your internet access, device availability, and whether you want automatic protection.
Tip: If you have ample iCloud storage, iCloud backups offer automatic protection with minimal effort. - 2
Prepare your device
Make sure your iPhone is charged or plugged in and connected to a stable Wi‑Fi network. Sign in to your Apple ID if prompted and verify that you have access to password-protected accounts you want included in the backup.
Tip: Plug in during the process to prevent mid-backup power loss. - 3
Enable iCloud Backup (optional step)
If you’re using iCloud, turn on iCloud Backup in Settings. This setting allows automatic backups when the device is idle, connected to power, and on Wi‑Fi.
Tip: Make sure you have enough iCloud storage to accommodate the backup size. - 4
Initiate an immediate iCloud backup (optional)
Manually start a backup to create the first restore point. This gives you a current snapshot before major changes.
Tip: Perform this when you have a reliable network and privacy of the data you’re backing up. - 5
Back up to a computer (Finder/iTunes)
Connect your iPhone, trust the computer if prompted, then select Back Up Now. Enable encryption if you want passwords and health data included.
Tip: Encryption protects sensitive information but requires a password you’ll remember. - 6
Verify the backup
Check the backup timestamp and ensure the backup completed without errors. For iCloud, confirm under Manage Backups; for computer backups, locate the backup file on disk.
Tip: If there’s a failure, review storage space and network status before retrying. - 7
Set automatic backups
Enable automatic backups in iCloud or your backup tool, so new data gets saved without manual steps.
Tip: Automatic backups reduce the risk of data loss between manual backups. - 8
Test restore from backup
Perform a test restore on a spare device or during a controlled reset to verify the backup works as expected.
Tip: A test restore confirms you can recover critical data when needed. - 9
Maintain backup hygiene
Review backup storage regularly, delete outdated backups if necessary, and keep your device’s software up to date.
Tip: Rotating backups avoids clutter and reduces restore time.
FAQ
What data is included in an iCloud backup?
iCloud backups include most device settings, app data, Home screen layout, messages, and network configurations. Photos may be included if you have iCloud Photos enabled, but if you use iCloud Photos, the photos themselves might be stored there rather than entirely in the backup.
iCloud backups cover settings, apps, and messages, with photos often stored separately in iCloud Photos.
Do I need Wi-Fi to back up with iCloud?
Yes. iCloud backups require a Wi‑Fi connection. You cannot back up to iCloud over cellular data. If you have limited data, schedule backups when on Wi‑Fi.
iCloud backups need Wi‑Fi; cellular data isn’t used for iCloud backups.
How do I restore from an iCloud backup on a new iPhone?
During setup, choose Restore from iCloud Backup, sign in with your Apple ID, and select the backup you want to use. The device will download settings, apps, and data from that backup.
During setup, pick Restore from iCloud Backup and choose the backup you want.
Can I back up to both iCloud and a computer at the same time?
Yes, you can maintain both, but they serve different purposes. Use iCloud for automatic, off-site protection and a computer backup for faster local restores or offline access.
You can use both; one covers automatic cloud protection, the other gives fast local restores.
Why is my backup taking so long?
Long backups usually involve large media libraries or slow network speeds. Ensure strong Wi‑Fi, free cloud space, and consider performing the backup in the background during low-usage times.
Big media libraries or slow networks slow down backups; ensure good Wi‑Fi.
Is it possible to back up only photos?
Backups are designed to capture a full snapshot of device data. If you only want photos backed up, use iCloud Photos or an alternate photo backup solution in addition to a full backup.
Backups cover more than photos; for photos alone, rely on iCloud Photos or another tool.
Watch Video
Quick Summary
- Back up regularly using your preferred method.
- Verify the backup date and integrity after each run.
- Encrypt backups to safeguard passwords and sensitive data.
- Know how to restore data quickly when needed.