How to Choose What to Backup on Your iPhone
Learn how to decide which data to back up on your iPhone, balance iCloud and local backups, and protect memories with a clear, step-by-step plan. Practical tips for photos, messages, and app data.

If you want to protect your essential data, you need a clear plan for iphone choose what to backup. Start with irreplaceable items like photos, messages, and key app data, then decide whether to back up to iCloud or a local computer. This guide helps you pick and configure backups quickly and reliably.
Why choosing what to backup matters
Choosing what to back up on your iPhone is more than a storage decision—it's a data protection strategy. When you iphone choose what to backup, you decide which memories, conversations, and settings are most valuable and which items can be re-created or downloaded. This selective approach reduces backup times, saves precious storage, and makes restores simpler and faster if your device is lost, damaged, or swapped. According to Phone Tips Pro, a thoughtful backup plan aligns with your daily habits and data footprint, helping you avoid the common pitfall of backing up everything that isn’t truly essential. Think of your data in tiers: irreplaceable memories (photos and videos), critical communications ( Messages, Mail), and adaptable items (apps and settings that can be reinstalled or reconfigured). A well-planned backup also improves privacy by ensuring encryption is applied to sensitive information.
Understand backup options on iPhone
iPhone users have a choice between iCloud backups, which sync data to Apple’s cloud, and local backups created with Finder (on macOS) or iTunes (on Windows). iCloud Backups are automatic and convenient, but they rely on your storage plan and network connection. Local backups give you direct control, work offline, and can be encrypted for security, but require a computer and a cable. Phone Tips Pro’s guidance emphasizes encryption for sensitive data in both approaches. If you enable iCloud Backup, you’ll typically back up most settings, messages, app data, and photos stored in iCloud-compatible locations. If you prefer a local backup, you’ll capture a complete snapshot of your device contents, which you can restore without an internet connection.
Decide data categories to back up
Not all data is equal in value or difficulty to recreate. Start by listing your data categories: Photos and videos, Messages (including attachments), Contacts, Calendars, Mail, Notes, Keychain passwords, Health data, Wallet passes, Settings, and App data. Some items, like Photos and Messages, are often non-replicable, while others can be re-downloaded or re-created after a restore. The goal is to protect the data that would be most painful to lose and that would be time-consuming to reconstruct. For people who rely on specific app configurations, backing up app data is critical, especially for productivity tools and business apps. Phone Tips Pro notes that prioritizing these libraries reduces anxiety after device changes and minimizes downtime.
Data prioritization framework you can use
Create three priority tiers to guide your backup choices: critical, important, and optional. Critical data includes items you would miss immediately if lost (photos, messages, contact details, key health metrics). Important data covers settings and app data that speed up a smooth return to normal use. Optional data includes media from apps that can be reinstalled or downloaded later. This framework helps you allocate limited storage wisely and tailor backups to your actual needs. In Phone Tips Pro Analysis, 2026, users who apply a prioritization framework report clearer backup strategies and better recovery outcomes. Remember that encryption should be enabled for sensitive data in any backup method.
How to configure backups on iPhone (step-by-step overview)
Configuring backups involves choosing a target (iCloud or Finder), enabling appropriate options (Photos, Messages, Health, Keychain), and testing the restore process. If you back up to iCloud, ensure enough storage and a reliable Wi-Fi connection. If you back up locally, verify that the backup completes and verify its integrity on your computer. The Phone Tips Pro team recommends enabling automatic backups where possible to maintain up-to-date protection, while periodically reviewing what is included in each backup to keep your data footprint manageable.
Managing storage and backup frequency
Storage space is often the limiting factor in backups. Assess your iCloud storage plan and adjust it to fit your priorities, or designate a local backup routine on your computer with encrypted storage. Regular backups help reduce the risk of data loss from device failure, theft, or software issues. A practical cadence is to back up after major changes (new photos, new conversations, or large app updates). For many users, nightly automatic backups to iCloud or a computer strike the right balance between protection and bandwidth usage.
Security and privacy considerations for backups
Backups contain a lot of personal data, so security matters. Always enable encryption on local backups and require authentication for access. Use a strong passcode, turn on two-factor authentication for your Apple ID, and review which apps have backup permissions. Your backup’s privacy depends on your settings and the encryption options you select; never disable encryption on backups if confidentiality is important to you. Phone Tips Pro recommends periodic reviews of backup security settings and keeping devices up to date with the latest OS updates to minimize vulnerabilities.
Troubleshooting common backup issues
Backups can fail for a variety of reasons: insufficient storage, network issues, or corrupted backup files. Start with a quick check of your storage quota and network status, then attempt a fresh backup. If a backup stalls, pause, resume, or restart the process. For local backups, ensure the computer has the latest software and the USB cable is functional. For iCloud backups, verify your Apple ID credentials and sign out/in if necessary. When issues persist, consult official support resources or your backup logs to identify the offending item.
How to verify backups and perform test restores
Confirmation that a backup actually completed successfully is essential. On iCloud, review the backup details to confirm the date, time, and size of the last backup. On Finder, inspect the backup set in the backup directory and attempt a test restore on a spare device if you have one. Testing restores helps you catch issues before you need them, such as missing photos, incomplete app data, or encrypted backups that require re-authorization. The goal is to confirm you can recover essential data when needed, not just create a backup file.
Final recommendations and a call to action
In the end, a pragmatic, layered backup approach works best. Prioritize irreplaceable data, enable automatic backups, and keep security top of mind. The Phone Tips Pro team recommends documenting your backup settings and conducting periodic tests so you’re prepared for device changes or data loss. Remember: consistent practice beats perfect plans, and a well-maintained backup is a security habit you can rely on.
Tools & Materials
- iPhone(Fully charged or connected to power during backup)
- Apple ID with active iCloud(Needed for iCloud backups and syncing)
- Stable Wi-Fi connection(Backups over cellular are not recommended)
- Mac or Windows computer(Needed for Finder/iTunes backups (local backups))
- Lightning to USB-C/USB-C cable(Needed for wired local backups)
- External storage (optional)(For storing encrypted local backups or additional copies)
- Passcode and biometric access ready(Authorize backups and restores when prompted)
Steps
Estimated time: 30-45 minutes
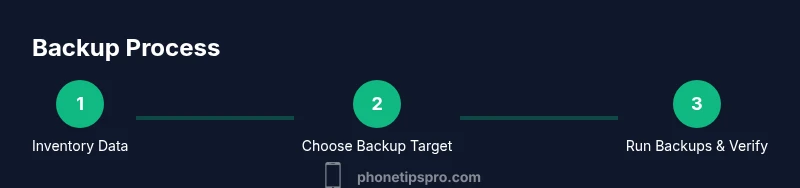
- 1
Inventory your data
Identify data you consider irreplaceable (photos, messages, contacts). Note data that can be re-downloaded or recreated (some app data, online content). This upfront inventory helps you decide which categories must be backed up and which can be skipped.
Tip: Create a quick data inventory checklist to reference during setup. - 2
Choose your backup target
Decide between iCloud and local backups (Finder/iTunes). iCloud is convenient and automatic, but a local backup gives you a complete snapshot without relying on the internet. Encryption should be enabled for sensitive data in either option.
Tip: Check your cloud storage capacity before enabling iCloud backups. - 3
Back up photos and videos
Turn on iCloud Photos or perform a dedicated photo backup to your computer. Large media libraries can take time, especially over Wi‑Fi; keep your device connected and do not interrupt the backup.
Tip: If you use iCloud Photos, ensure Optimize Storage is appropriate for your device. - 4
Back up messages and app data
Enable Messages in iCloud if desired and verify that essential app data is included in the backup. Messages and some app data are often crucial for continuity after a reset or device replacement.
Tip: For critical apps, confirm that their data is included in the backup by checking app-specific settings. - 5
Back up health data and passwords
Health data and Keychain passwords require encrypted backups. Ensure Health is enabled in iCloud settings if you want seamless restoration of health metrics and saved credentials.
Tip: Keep your device with a strong passcode and set up two-factor authentication for your Apple ID. - 6
Enable automatic backups
Turn on automatic backups so new data is preserved without manual steps. For iCloud, this runs when connected to power and Wi‑Fi. For local backups, set a regular schedule on your computer.
Tip: Pair automatic backups with a monthly manual backup to catch anything missed. - 7
Perform a manual backup test
Run a manual backup to verify the process completes successfully. Check the backup date, size, and any error messages. A test confirms you can restore if needed.
Tip: After the test, review backup contents to confirm key items are present. - 8
Review and prune backups
Periodically review backup contents and prune items you no longer need. This saves storage and reduces confusion during restores. Keep a clean, purposeful backup strategy.
Tip: Delete redundant backups only after confirming you don’t need the older copies. - 9
Document settings and schedule
Record your backup targets, data categories, and backup cadence. A simple doc helps you maintain consistency over time and simplifies troubleshooting.
Tip: Store this document in a safe place and update it after any major changes.
FAQ
What should I back up on my iPhone first?
Prioritize photos, messages, and contacts, followed by important app data. This ensures you can recover the most valuable items quickly after a restore.
Back up the essentials first—photos, messages, and contacts—and then the rest if space allows.
Should I rely on iCloud or a local backup?
Both have benefits. iCloud is convenient and automatic, while local backups are offline and can be encrypted for security. Consider using both if storage and security are priorities.
iCloud is convenient, but local backups give you offline access and extra control.
How often should I back up my iPhone?
Aim for daily automatic backups if possible; otherwise back up after major changes like new photos or messages. Regular backups reduce loss risk.
Back up daily if you can, or after big changes to data.
Can I back up everything, including apps?
Most data including app data and settings can be backed up, but some app content may require re-download or reconfiguration after restore. Check individual app backup options when needed.
Most data can be backed up, but some app content may need reconfiguration.
How can I verify a backup worked?
View the backup details on iCloud or Finder and perform a test restore if possible. Verification helps ensure your data is recoverable when needed.
Check backup details and run a test restore if possible.
What data is not backed up by default?
Some temporary files, cache, and certain in-app data may not be included. Verify with each app and, if needed, export critical items separately.
Some data may not be backed up; verify app-specific items.
What about health and password data?
Health data and Keychain passwords require encrypted backups. Ensure you enable encryption in the backup settings and keep device security strong.
Ensure health and password data are included via encrypted backups.
How can I improve backup reliability?
Keep your OS and apps up to date, check storage space, and use a combination of cloud and local backups for redundancy.
Keep software updated and back up in multiple locations for reliability.
Watch Video
Quick Summary
- Identify irreplaceable data before backing up.
- Choose iCloud or local backups based on needs and storage.
- Enable encryption for all backups to protect privacy.
- Test restores to ensure backups are usable.