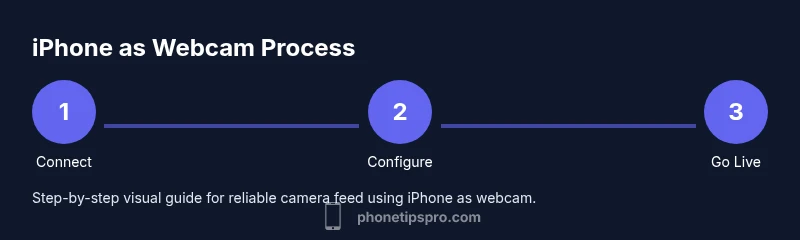
How to Use iPhone as Webcam
Learn how to turn your iPhone into a high-quality webcam for video calls and streaming. This step-by-step guide covers Continuity Camera on Mac, Windows options, wired and wireless setups, and optimization tips for lighting, audio, and framing.

By turning your iPhone into a webcam, you can achieve crisper video for calls and streams without expensive gear. Use Continuity Camera on a compatible Mac or install a third‑party app for Windows. This guide walks you through wired and wireless setups, plus tips for lighting, audio, and mounting so you look your best on every call.
Why use iPhone as webcam
According to Phone Tips Pro, using your iPhone as a webcam can dramatically improve video clarity and flexibility compared with standard laptop cameras. The iPhone's sensor, lens quality, and ability to shoot in higher resolutions provide crisper detail and more natural motion. For remote work and content creation, this approach offers a simple, cost-effective upgrade without dedicated hardware. When you couple it with steady lighting and good audio, you’ll see a professional difference in meetings and streams. The Phone Tips Pro team found that users often report clearer skin tones and better dynamic range, especially in fluctuating lighting. This is true for a wide range of setups, from casual calls to professional broadcasts. Whether you have a newer iPhone or an older model, the steps below will help you maximize your feed.
What you need before you start
Before you begin, gather essential items and confirm compatibility. You’ll want a recent iPhone (iOS 16+), a computer (Mac or Windows), and a way to connect (wired USB or reliable Wi‑Fi). If you plan to use Continuity Camera on a Mac, ensure your macOS is Ventura or later. For Windows, pick a reputable third‑party app such as EpocCam, Camo, or similar. A sturdy mount, good lighting, and a microphone (external or built‑in) will also dramatically improve results. Phone Tips Pro research shows that a stable setup and clean framing contribute as much to perceived quality as the camera itself.
Continuity Camera on Mac: prerequisites and setup
Continuity Camera is built into macOS and iOS for compatible devices. To use it, you’ll need a Mac running macOS Ventura or newer and an iPhone running iOS 16+. Both devices should be signed into the same Apple ID and have Bluetooth and Wi‑Fi enabled. On your Mac, open a supported app (Zoom, Teams, FaceTime) and select the iPhone as your camera. For the best experience, keep the iPhone plugged in when possible to prevent battery drain and ensure a stable feed. You can also enable Center Stage or Portrait mode for a more dynamic look, depending on your app’s support.
Windows options: EpocCam, Camo, and alternatives
If you’re not on a Mac, you’ll rely on third‑party apps to turn your iPhone into a webcam. EpocCam and Camo are two popular choices that provide driver support for Windows and Mac. Install the app on your iPhone and the corresponding desktop driver on your PC. Then, connect via USB for a more stable feed or use Wi‑Fi when a wired connection isn’t convenient. These apps often provide additional settings for resolution, frame rate, and exposure, allowing you to fine‑tune the image to your lighting conditions. Remember, quality varies with network conditions, so a wired setup is usually better for live streams.
Lighting, audio, and framing matters
A great image comes from more than the camera. Position your iPhone at eye level, use natural light or a soft artificial light, and minimize backlighting. Keep the mic covered or use an external mic to improve audio clarity and reduce echo. In apps that support it, disable the built‑in mic on your computer and route audio through the device you’re using as a webcam. Small improvements—like a clean desk, neutral background, and stable frame—can dramatically boost perceived quality and viewer engagement.
Troubleshooting common issues
If your feed freezes or lags, check connections and try a wired setup. Ensure you’ve granted camera access to the app on your iPhone and computer, and verify both devices are on the same network for wireless connections. If you’re on Windows and see driver errors, reboot both devices and reinstall the webcam app. For lighting problems, experiment with angle and distance to avoid harsh shadows or blown highlights. In most cases, a simple tweak to mounting or power sourcing resolves the majority of problems.
Tools & Materials
- iPhone with iOS 16+(Ensure the device supports Continuity Camera if using macOS.)
- USB-C to Lightning or Lightning to USB-C cable(Wired connection offers the most stability.)
- Computer (Mac with macOS Ventura+ or Windows PC)(Choose Continuity Camera on Mac or a third‑party app on Windows.)
- Third‑party webcam app (EpocCam, Camo, etc.)(Needed for Windows or non‑Apple setups.)
- Phone mount or adjustable stand(Place at eye level to avoid awkward angles.)
- Stable lighting (lamp or ring light)(Natural light is best; supplement with soft lighting.)
Steps
Estimated time: 45-60 minutes
- 1
Check compatibility and plan your setup
Review your devices and decide whether you’ll use Continuity Camera on Mac or a Windows app. Confirm iPhone model, iOS version, and macOS or Windows version. Decide between wired USB or wireless connection based on your environment.
Tip: Starting with a wired plan reduces latency and dropouts. - 2
Install or verify necessary software
If you’re on Mac, you may not need extra software beyond the operating system. If you’re on Windows, install EpocCam, Camo, or another supported driver and ensure it’s up to date. Restart the computer after installation.
Tip: Keep software updated to ensure compatibility with the latest iOS and OS versions. - 3
Connect your iPhone to the computer
Connect via USB for stability or connect over Wi‑Fi if you’re short on ports. On first use, unlock the iPhone and trust the computer prompt if it appears. Ensure both devices are on the same Wi‑Fi network if using wireless methods.
Tip: A charged iPhone helps prevent mid‑call battery drain. - 4
Mount and frame your shot
Position the iPhone so the lens is at or slightly above eye level. Use a stable stand or tripod and avoid reflections from windows or bright lights behind you.
Tip: Aim for a clean, distraction‑free background. - 5
Select the iPhone camera in your app
Open your video conferencing or streaming app and choose iPhone as the camera input. Adjust video resolution and frame rate if the option is available.
Tip: Test with a quick 30‑second recording before going live. - 6
Tune lighting and audio
Add adequate lighting from the front and reduce backlight. Use the iPhone mic or an external microphone; mute the computer mic if routing audio through the iPhone.
Tip: Consider a headset to prevent echo and improve voice clarity. - 7
Test connectivity and settings
Join a test call to check video quality, framing, and audio. If there’s lag, switch to a wired connection or lower the resolution.
Tip: Document preferred settings for future calls. - 8
Troubleshoot common issues
If the feed drops, reconnect cables, reboot devices, or reinstall drivers. Check permissions in iOS and the desktop OS so the camera isn’t blocked.
Tip: Keep a backup plan, such as an alternate app, for critical calls.
FAQ
Can Continuity Camera be used with Windows, or only Mac?
Continuity Camera is built into macOS and iOS. Windows users rely on third‑party apps like EpocCam or Camo to achieve similar functionality.
On Windows, you’ll need EpocCam or Camo to turn your iPhone into a webcam.
Is wired or wireless connection better for reliability?
A wired USB connection is generally more stable with lower latency, while wireless can work well on fast networks if there’s minimal interference.
Wired usually performs better; wireless can work well with a strong, interference-free network.
What if the video lags or freezes?
Check the connection, switch to wired if you’re on Wi‑Fi, reduce resolution, close background apps, and restart the apps or devices if needed.
Try a wired connection first and lower the resolution if you see lag.
Will using my iPhone drain the battery quickly?
Streaming video consumes power. If possible, plug the iPhone into a charger during long calls or streams.
Keep it plugged in during longer sessions to avoid power loss.
How do I improve audio quality?
Use an external microphone or headset, and route audio through the iPhone app when possible. Disable the computer mic if routing from the iPhone.
A dedicated mic plus a headset reduces echo and noise.
What mounting options work best?
A sturdy tripod, desk stand, or phone clamp that holds the phone at eye level improves framing and reduces wobble.
Mount at eye level for natural framing.
Watch Video
Quick Summary
- Choose wired when possible for stability
- Mac users can leverage Continuity Camera for a seamless feed
- Windows users need a third‑party webcam app
- Lighting, framing, and audio are as important as the camera