Using Your iPhone as a Webcam on PC: A Practical Guide
Learn how to turn your iPhone into a PC webcam with USB or Wi‑Fi connections using EpocCam, iVCam, or DroidCam. This guide from Phone Tips Pro covers setup, troubleshooting, and best practices for reliable video quality.

Yes— you can use iPhone as a webcam on PC by installing a companion app on both devices. Popular options include EpocCam, iVCam, and DroidCam. Connect via USB or Wi‑Fi, grant camera access, install any required drivers, and then choose the iPhone as your webcam in apps like Zoom or Teams. Phone Tips Pro’s guidance helps you pick a reliable option and set it up quickly.
Can you use iPhone as webcam on PC? Overview
If you’ve ever wondered can you use iphone as webcam on pc, the answer is yes with the right bridge software. Your iPhone camera can feed a PC via USB or Wi‑Fi by using a dedicated app on both devices. This approach is popular among students, remote workers, and livestreamers who want a compact, high‑quality camera without buying a separate webcam. According to Phone Tips Pro, the key is compatibility and stability: pick a trusted app, ensure drivers are current, and test the setup before important calls. In practice, this means choosing a solution that fits your workflow—whether you need mobile flexibility or a consistently wired connection for reduced latency. With careful setup, you’ll often notice crisper video, better color, and easier framing than many built‑in laptop cameras. The ultimate goal is a reliable feed that works across the conferencing apps you rely on daily.
Understanding USB vs Wi‑Fi: stability vs convenience
When you ask can you use iphone as webcam on pc, you’ll encounter two main connection options: USB and Wi‑Fi. USB tends to deliver lower latency and fewer drops, making it ideal for live streaming, exams, or fast meetings. Wi‑Fi offers flexibility and mobility, letting you position the phone away from the PC, which is handy for multi‑room setups or quick demos. Phone Tips Pro notes that for most busy users, a wired USB connection provides the most stable feed, while Wi‑Fi is perfectly adequate for casual calls on a stable network. Regardless of choice, ensure the cables are of good quality and that your network is not congested by other devices.
App options explained: EpocCam, iVCam, and DroidCam
Several popular apps bridge the gap between iPhone cameras and PC software. EpocCam, iVCam, and DroidCam each offer slightly different features and driver models. EpocCam is known for broad compatibility with many video apps, while iVCam emphasizes high resolutions and configurable frame rates. DroidCam is a favorite for straightforward setup and reliable performance on both USB and Wi‑Fi. Phone Tips Pro recommends testing a couple of options to see which delivers the most stable connection on your specific hardware and network configuration. Whichever you choose, read the app’s PC driver instructions carefully and install any required extensions prior to mounting the device.
Hardware and software prerequisites
Before you start, confirm you have the basics in place: an iPhone with a recent iOS version, a Windows PC ready for new drivers, and a suitable USB cable or an active Wi‑Fi network. Some iPhone models benefit from a high‑quality USB cable to keep power stable during longer calls. The PC side will need the corresponding desktop driver for the chosen app, plus access to your camera in Windows privacy settings. Phone Tips Pro emphasizes doing a quick sanity check: verify that the iPhone camera works in its own app, then test the device with the bridge app before attempting a formal meeting.
Troubleshooting common issues you’ll encounter
Latency, dropouts, and driver conflicts are the most frequent hurdles when using an iPhone as a webcam on PC. If you encounter lag, start by switching from Wi‑Fi to a wired USB connection. Check that you’ve installed the latest drivers from the app’s official site and that Windows isn’t blocking camera access in Privacy settings. Firewall software or VPNs can also interfere with the camera stream; disable them temporarily during setup to isolate the problem. If the feed still fails to appear, try a different USB port, reboot the PC, and re‑install the bridge app. Phone Tips Pro suggests keeping the iPhone on charge during extended use to avoid unexpected shutdowns.
Best practices for quality and privacy
To maximize video quality, optimize lighting and framing first: place the iPhone at eye level, use a neutral background, and avoid harsh backlight. For privacy, disable the camera when you’re not using it and periodically review app permissions. If you’re streaming or recording, consider enabling the app’s focus lock and white balance controls to maintain consistency. Phone Tips Pro also recommends establishing a dedicated setup for calls—a single busier network path helps the PC keep a steady feed and reduces the chance of interference from other devices on the same network.
Tools & Materials
- iPhone with camera (any model)(Ensure it is charged and updated to iOS 15+ for best compatibility)
- Windows PC (Windows 10/11)(Keep OS and drivers up to date)
- USB cable (Lightning-to-USB-C or USB-C to USB-C, depending on iPhone)(Prefer a high‑quality cable to avoid power issues)
- Third‑party webcam app (EpocCam, iVCam, or DroidCam)(Choose based on cross‑platform compatibility)
- Video conferencing software (Zoom, Teams, Meet)(Installed and updated)
- Phone stand or tripod for stable framing(Optional but recommended for consistency)
Steps
Estimated time: 20-40 minutes
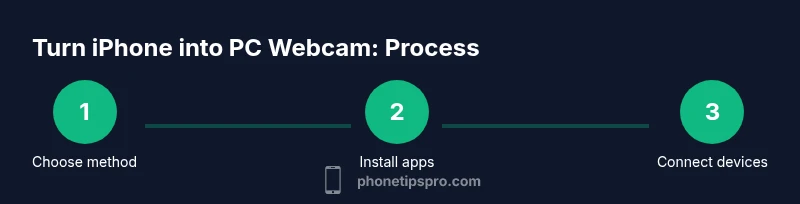
- 1
Choose connection method
Decide whether to use a USB cable for stability or Wi‑Fi for flexibility. If you’re streaming or need low latency, USB is usually the better option. If you’re in a pinch and want cordless setup, Wi‑Fi works, but test for latency first.
Tip: USB is the default choice for most professional uses due to lower latency. - 2
Install the bridge app on iPhone and PC
Download EpocCam, iVCam, or DroidCam on your iPhone and install the corresponding desktop driver. Complete the onboarding prompts, grant camera access, and verify the app is allowed through Windows firewall if prompted.
Tip: Make sure you’re using the latest version on both devices for compatibility. - 3
Connect devices (USB or Wi‑Fi)
If USB: connect the iPhone directly with the cable and trust the computer on the iPhone. If Wi‑Fi: connect both devices to the same network and launch the app to establish the feed.
Tip: For USB, try a different port if the feed doesn’t appear. - 4
Configure your PC camera settings
Open your video conferencing app and select the bridge app’s device as the webcam. Check audio and video preview to confirm the feed; adjust resolution and frame rate if the app allows it.
Tip: If the camera isn’t visible, restart the app or reboot the PC. - 5
Test and optimize
Do a quick test call or recording. If you see lag, lower the resolution or switch to USB; ensure lighting is steady and lens is clean for sharp video.
Tip: Avoid lighting directly behind you to prevent backlighting. - 6
Troubleshoot common problems
Check drivers, re‑install the bridge app, and verify Windows privacy settings for camera access. If you still see issues, try a different app and test the simplest configuration first.
Tip: Document the steps that work so you can repeat the setup quickly later.
FAQ
Can I use the iPhone camera as a webcam on PC without any apps?
No. You need a bridge app to route the camera feed from iPhone to the PC. These apps handle driver installation and device recognition for Windows.
You’ll need a bridge app on both devices to connect the iPhone camera to your PC.
Will this work with Zoom, Teams, or Google Meet?
Yes. Once you select the bridge device in your conferencing app, you can use the iPhone feed across Zoom, Teams, Meet, and other platforms.
Yes, most major video apps recognize the iPhone camera when selected as the webcam.
Is USB better than Wi‑Fi for this setup?
Generally, USB provides lower latency and a more stable feed than Wi‑Fi. Use USB for important calls or streams when possible.
USB usually gives you smoother video with less lag.
What about charging during use?
Yes. Keep the iPhone plugged in while connected to the PC to avoid unexpected shutdowns and preserve battery health during longer sessions.
Keep it charged so you don’t lose video mid‑call.
What if the camera keeps disconnecting?
Check the USB cable, try a different port, reinstall drivers, and confirm both devices are on the same network if using Wi‑Fi. Firewall or VPNs can block the feed as well.
Recheck connections and drivers, and test on a simple setup first.
Will the video look as good as a dedicated webcam?
Quality varies by iPhone model, lighting, and app settings. You can achieve excellent results, but lighting and background remain important.
It can look superb with proper lighting and settings.
Watch Video
Quick Summary
- Choose USB for lowest latency when possible
- Test multiple bridge apps to find the best fit
- Ensure consistent lighting and stable framing
- Keep devices charged and drivers up to date