Record Sound on iPhone: A Complete Guide for Beginners
Learn to record crisp, clear sound on iPhone using built-in apps, external mics, and smart settings. Practical tips, step-by-step guidance, and editing basics.

Goal: You’ll learn to record high‑quality sound on your iPhone using built‑in apps and accessories. This guide covers the Voice Memos and Camera apps, when to use each, and how to optimize mic placement, levels, and background noise. You’ll also get a quick compare of external mics and practical editing tips to finish with clean, publishable audio.
Why recording sound matters on iPhone
Sound quality can make or break a video, podcast, or interview. On iPhone, great audio starts long before pressing the record button: plan, environment, and the right tool for the job. According to Phone Tips Pro, the most reliable iPhone audio results come from a clear plan, a capable microphone, and a quiet space. In this section we explore why crisp sound matters across use cases—podcasts, voice memos, and mobile videos—and outline the key factors that influence recording quality: hardware, environment, and technique. We’ll also compare built‑in mic performance to external options, so you can choose the approach that fits your needs and budget. By understanding the basics here, you’ll be better prepared to capture clean, intelligible sound that listeners can trust. Remember: your phone is a versatile tool, but good audio requires intentional setup.
Choosing the right microphone for iPhone
When you move beyond the built‑in mic, you gain dramatic improvements in clarity and consistency. Lavalier mics placed about 6–8 inches from the subject provide steady levels and freedom of movement for hands‑free recording. Shotgun mics oriented toward the source can work well for interviews in quiet rooms, but they’re less forgiving in noisy environments. Consider your use case, budget, and portability. For casual use, a simple lavalier mic with a Lightning or USB‑C adapter can be an excellent value. For mobility, a compact wireless system can give you more distance without cables, though it adds setup steps.
Setting up for clean recordings: environment and apps
Preparation matters as much as the mic. Start by choosing a quiet space, close doors, and reduce echo with soft furnishings. Enable Do Not Disturb to minimize interruptions. In Voice Memos or your preferred app, choose the mono or stereo setting depending on your needs, test levels, and monitor with headphones to ensure you’re not clipping. If you will be recording video, keep the mic out of the camera frame and avoid placing it behind reflective surfaces that can distort sound. Finally, ensure your iPhone is charged and close by, so you don’t lose the moment to a dead battery.
Recording with Voice Memos: step‑by‑step workflow
Voice Memos is a quick way to capture audio for notes, interviews, or ideas. Open the app, tap the red record button, speak clearly at a natural pace, and tap Stop when you’re done. Use the built‑in trimming tools to cut silences or mistakes, then share or export the file in the desired format. For best results, record a short test clip first to check levels and background noise. Keep the mic close but not touching your lips to avoid popping sounds.
Recording with the Camera app for video with audio
The Camera app records video with built‑in audio, but the microphone is still your phone’s internal mic unless you connect an external mic. Attach your microphone, then frame your subject and press Record. Do a brief test recording to verify that the mic is picking up the desired source and adjust the position as needed. In post, you can mute the original audio and replace it with a higher‑quality track if needed.
Using external microphones with iPhone: adapters and tips
External mics offer the most improvement for high‑quality sound. Choose a lavalier or compact shotgun depending on your setup, and use the appropriate adapter (Lightning or USB‑C). Make sure cables are secure and tangle‑free, and test before you shoot. Wind protection dramatically improves outdoor recordings; consider a furry windscreen for gusty environments. If you are recording with headphones on, make sure the monitoring path is separate from the recording path to avoid feedback.
Wind, noise, and distance: tips to reduce issues
Outdoor recording introduces wind and ambient noise. Shield the mic from the wind using a windscreen, and place it at a steady distance from the source. Turn off fans and air conditioners when possible. In noisy spaces, position the mic closer and use a directional mic to reduce reverberation. Always monitor with headphones to catch issues in real time and adjust placement as needed.
Editing and exporting audio: basics in iPhone and computer
After recording, export the file and perform light editing in your preferred app. Remove silences, trim error phrases, adjust volume levels, and apply a light noise reduction if available. When exporting, choose a widely compatible format (M4A or WAV) and check the file size. Back up the original recording before editing, and consider labeling files with date and context for easy retrieval.
Common pitfalls and quick fixes
Common issues include clipping, wind noise, and handling sounds from the phone or mic cable. If levels are too high, re‑record with a lower input or place the mic farther away. If wind is present, reposition and deploy a windscreen. Remember to test and monitor before critical recordings rather than relying on post‑hoc fixes.
Troubleshooting monitoring and latency issues
If you hear latency or timing mismatches between the mic and your track, ensure you are using a compatible interface and that the app supports direct monitoring. Use wired headphones to avoid feedback and confirm that your device is not overloaded with background apps. When problems persist, reset the app or restart the iPhone to clear potential glitches.
Tools & Materials
- iPhone with the latest iOS(Ensure updates are installed for best mic compatibility)
- Voice Memos app(Default app for quick recordings)
- Camera app(Use for video with audio capture)
- External microphone (lavalier or compact shotgun)(Choose based on use-case: wired or wireless)
- Adapter (Lightning to 3.5mm or USB-C, depending on model)(Needed to connect non-Lighting mics)
- Headphones(For real-time monitoring and level checks)
- Wind protection (windscreen or furry cover)(Helpful for outdoors)
- Tripod or phone stand(Stability and hands-free recording)
- Note-taking app or notebook(Capture context for later editing)
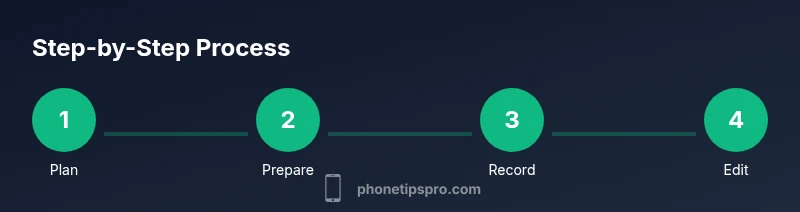
Steps
Estimated time: 40-60 minutes
- 1
Plan your recording
Decide which app and mic setup fits your goal (memo, video, or interview). Check environment and prepare your equipment. A quick plan saves time and reduces re-shoots.
Tip: List the recording goals and choose the mic type before you start. - 2
Prepare your iPhone settings
Enable Do Not Disturb, lock screen, and ensure enough battery. Open your chosen app and test a short clip to set baseline levels.
Tip: Mute notifications but keep the mic live for testing. - 3
Connect the microphone
Attach the external mic and any adapters, then test connection in the app. Ensure the mic is detected and not muted in system settings.
Tip: Do a quick headphones test to confirm signal path. - 4
Record with Voice Memos
Open Voice Memos, press the red record button, speak directly into the mic. Do a short test clip, then adjust distance and angle as needed.
Tip: Record a 5–10 second test before the main take. - 5
Record with Camera for video
In the Camera app, switch to video, connect mic, and record a short test clip. Ensure mic remains in frame or close to the source.
Tip: Keep the mic out of view and avoid touching it during recording. - 6
Perform post‑record checks
Play back the clip with headphones, check levels, and identify any clipping or wind noise. Re‑record if necessary.
Tip: Always monitor in real time and fix issues before moving on. - 7
Edit and export
Trim silences, apply light noise reduction, and export to a universal format. Label the file with date and context for easy retrieval.
Tip: Keep a backup of the original recording.
FAQ
Can I record decent audio with only the iPhone's built-in microphone?
Yes, for casual notes or quick memos, but you’ll see clear improvements with an external mic in most scenarios.
You can start with the built-in mic, but an external mic will usually give you clearer audio.
Which microphone is best for iPhone recordings?
There isn’t a single best mic; choose based on use-case. Lavalier mics are versatile for interviews, while compact mics suit vlogging.
Choose a mic based on your needs; lavalier mics are great for movement, compact mics for on‑the‑go recording.
Do I need wind protection outdoors?
Wind protection helps reduce rumble; a furry windscreen is often worth the extra setup. Indoors, it’s less critical.
Outdoors, wind protection is important; indoors you’ll usually be fine without it.
How can I reduce background noise during recording?
Choose a quiet space, use cardioid or lavalier mics, and monitor with headphones to catch noise in real time.
Work in a quiet room and monitor the sound as you record; you’ll catch noise early.
Can I edit audio directly on iPhone?
Yes, Voice Memos and iMovie offer basic editing; for more advanced work, transfer files to a computer.
You can edit on iPhone with built‑in tools, or move files to a computer for advanced editing.
What formats should I export to?
Export to common formats like M4A or WAV depending on your project; check compatibility with your publishing platform.
Export in a widely compatible format such as M4A or WAV depending on what you’re publishing.
Watch Video
Quick Summary
- Plan before recording
- Choose the right mic
- Monitor with headphones
- Edit and back up originals