Can the iPhone charging port be replaced? A practical guide
Learn whether the iPhone charging port can be replaced, explore model feasibility, DIY vs pro options, costs, risks, and a step-by-step approach with safety and warranty considerations.

Yes—can the charging port on an iphone be replaced? In many cases, yes, but model design and age matter. The repair typically involves removing the screen and accessing the port assembly. Outcomes depend on waterproof seals and the device's internal layout. This quick guide outlines when DIY is feasible, typical timelines, and when to opt for professional service or Apple support. According to Phone Tips Pro, replacing a charging port is a specialized repair that varies by model and access to authentic parts. If you attempt it without the right tools, you risk further damage or losing water resistance.
Can the charging port on an iphone be replaced? What you should know
If you’re asking can the charging port on an iphone be replaced, the short answer is that it can be replaced in many cases, though model design, production year, and the device’s overall condition influence feasibility. The repair usually requires removing the display to reach the port assembly, detaching related cables, and carefully reseating the connector. Practical outcomes hinge on preserving waterproof seals and avoiding collateral damage to nearby sensors. This is not a universal fix: some port assemblies are integrated with other modules, making a swap more complex. For iPhone owners, this question often comes with concerns about dust ingress, reliability after repair, and preserving the device’s water resistance. According to Phone Tips Pro, replacement feasibility varies by model and access to authentic parts, so verify compatibility before ordering a replacement kit.
Why some models complicate port replacement
Not all iPhone generations are created equal when it comes to port replacement. Early models tend to present clearer access paths, while newer generations may embed the Lightning port within a tightly packed motherboard area. The challenge is not only removing the old port but ensuring that the new port aligns perfectly with the sensor assemblies and connector cables. In tight spaces, misalignment can lead to charging faults, intermittent connection, or even data transfer issues. This is why model-specific service manuals and verified repair tutorials are essential references before you begin. The Phone Tips Pro team emphasizes checking whether the port is part of a larger module or if it can be swapped standalone without disturbing nearby components.
DIY vs professional repair: the trade-offs
DIY port replacement can be tempting for budget-conscious owners, but it demands precision, anti-static handling, and the right toolkit. Mistakes can damage connectors, ribbon cables, or the logic board, and they might void warranty coverage. Professional service provides trained technicians, authentic parts, and diagnostic checks, often with a warranty on the repair. While the upfront cost is higher, you gain a verified result and reduced risk of long-term issues. Phone Tips Pro analysis shows that many users underestimate the complexity of port replacements, especially on newer iPhone models with multi-layer boards and waterproof seals. A cautious approach—weighing cost, risk, and long-term device health—helps you choose the best path.
Costs, warranties, and risk considerations
Costs for port replacement vary widely by model, location, and service level. Independent shops may price parts and labor differently than Apple-authorized service providers. If your device is under warranty or AppleCare, sending it to Apple can preserve coverage for related hardware faults, but it may not cover user-caused damage or past port failures. The risk of damaging surrounding components or compromising water resistance is real, so assess the potential impact on resale value and future repairs. If you’re unsure, seek an in-person diagnostic first to determine whether a port replacement is the right remedy or if alternative fixes (like charging cable replacement or a port-cleaning service) are sufficient.
What to expect in a professional repair workflow
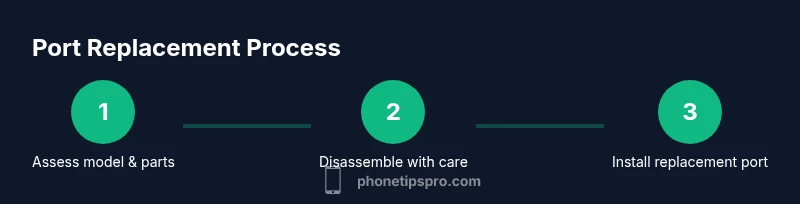
A professional port replacement typically begins with a diagnostic check, followed by disassembly to access the port, removal of the old port assembly, installation of the replacement part, and careful reassembly. The technician will test charging, data transfer, and any sensor functions after reassembly to confirm reliability. Adhesive seals may require replacement to restore water resistance, especially after screen removal. Post-repair, you should receive a brief test report and a warranty outline for the port and related components. If contact issues persist after reassembly, the shop should re-evaluate without extra charges if it’s within the warranty window.
Safety, tools, and initial steps before a repair
Before you start: back up your data, fully power down the device, and establish a clean, static-free workspace. Gather model-matching tools and a replacement port assembly, ensuring you have the correct parts for your iPhone variant. Use an anti-static wrist strap and magnetic parts tray to keep screws organized. If you notice corrosion, swollen batteries, or visible water damage, stop and seek professional assistance to avoid personal injury or further material damage.
Tools & Materials
- Replacement charging port assembly (model-specific)(Source from a reputable supplier; ensure exact model compatibility)
- Pentalobe screwdriver (P2/P5)(For outer case screws and display frame)
- Tri-point Y0 screwdriver(Internal screws near the port area)
- Phillips screwdriver #00(Optional for model-specific screws)
- Spudger and nylon pry tools(Non-conductive tools to avoid shorting connectors)
- Tweezers(Fine-point for small connectors and screws)
- Suction cup(Helpful for screen separation on some models)
- ESD wrist strap(Ground yourself to prevent static damage)
- Adhesive strips and mounting tools(Necessary if you must reseal the device)
- Isopropyl alcohol 70-90%(For gentle cleaning of connectors and surfaces)
- Heat source (heat gun or hair dryer)(Softens old adhesives; use with caution)
- Magnetic tray or labeled containers(Keeps screws organized during disassembly)
Steps
Estimated time: 60-120 minutes
- 1
Power down and prepare workspace
Shut down the iPhone completely and disconnect it from any charger. Set up a clean, well-lit workspace with a non-static mat. Organize screws by size and keep tools within reach.
Tip: Take a photo of screw layouts before removal to guide reassembly. - 2
Open the device safely
Remove the display assembly following model-specific instructions. Use the proper pentalobe and tri-point drivers to avoid stripping screws. Disconnect the battery connector only after the display is released to minimize risk.
Tip: Never pry cables with metal tools; use plastic picks to prevent damage. - 3
Access the charging port area
Carefully detach nearby cables that shield the port, then locate and remove the port screws. Gently pry the old port away from the chassis without bending flex cables.
Tip: Label or bag small components to prevent mix-ups during reassembly. - 4
Install the replacement port
Position the new port assembly, align connectors, and secure with screws. Recheck that all cables sit properly and seat connectors fully without applying excessive force.
Tip: Double-check that protective seals are intact before resealing. - 5
Reassemble and test
Reattach the screen, reconnect the battery, and power on the device. Run a charging test with different cables to confirm a stable charge and look for any error indicators.
Tip: If the device won’t power, re-check connector seating immediately. - 6
Seal and finalize
Replace any adhesive seals and reseal the device as per model guidelines. Verify water resistance if this applies to your model, and perform final functional checks.
Tip: Keep your receipt and what was replaced in case you need warranty service later.
FAQ
Is replacing the charging port covered under warranty?
Warranty coverage depends on whether the issue is deemed manufacturing-related and whether the repair was performed by an authorized provider. Unauthorized DIY replacements can affect eligibility. Always check your specific warranty terms before proceeding.
Warranty depends on whether the repair qualifies under your plan and who performed it.
Can I do it myself at home?
Yes, some experienced users replace the port themselves, but it's risky. You can damage the device or void warranties if you’re not careful. Consider professional service if you’re unsure about handling delicate ports.
DIY is possible but risky; professional help is safer for most users.
How do I know if the port is really the problem?
Try multiple charging cables and chargers first. If none cause a reliable charge, the port or its connector could be faulty. A professional diagnostic can confirm the exact fault.
A professional diagnostic can confirm whether the port is the issue.
How long does a port replacement take in a shop?
Repair duration varies by model and shop workload. Expect diagnostic time plus the replacement and reassembly, with some models taking longer if additional components are involved.
It depends on the model and shop; consult the service provider for an estimate.
Will replacing the port affect water resistance?
Yes, resealing and testing are essential. A port replacement can compromise waterproof seals if not done with proper adhesives and gasket replacements. Ask the technician about seal integrity guarantees.
Waterproofing can be affected; ensure the seals are properly replaced and tested.
What if my device is still under warranty after a port repair?
If the repair is performed by an authorized provider and not caused by user damage, the repair may be covered under warranty. Keep documentation for future claims.
The warranty may still apply if the repair is authorized and not user-damaged.
Watch Video
Quick Summary
- Assess model compatibility before attempting replacement.
- Weigh DIY risk against professional service for long-term reliability.
- Test charging after reassembly to confirm solid operation.
- Preserve warranty status by understanding coverage and repair eligibility.