How to Get iPhone Out of Recovery Mode
Learn proven steps to exit iPhone recovery mode safely. This beginner-friendly guide covers common causes, reliable methods, and troubleshooting tips to restore normal operation on all iPhone models.

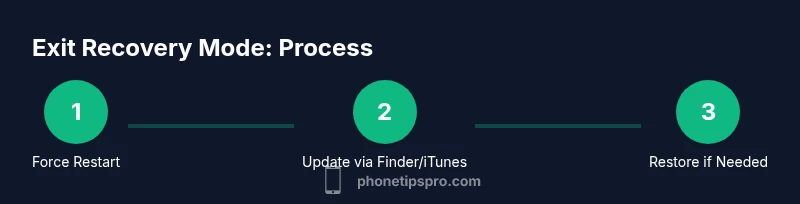
By following these steps, you will safely exit iPhone recovery mode and boot back to a normal iOS experience. You may need a computer with Finder or iTunes and a USB cable, plus a recent backup. This guide covers common models, explains when a restore is necessary, and incorporates best-practice tips from Phone Tips Pro to minimize data loss. If you’re unsure at any step, pause and double-check model-specific sequences.
What recovery mode is and when to exit
Recovery mode is a fail-safe screen that appears when iPhone software needs repair. If you're wondering how to get iphone out of recovery mode, you’re not alone—this mode is designed to give you options to repair without bricking the device. On screen you might see the 'connect to iTunes' prompt, an Apple logo with a progress bar, or a waving cable graphic. For most users, the quickest exit is a forced restart, followed by a reboot through Finder or iTunes if needed. According to Phone Tips Pro, most devices exit recovery mode without data loss when standard recovery steps are followed, but certain models may require a restore. The rest of this guide covers model-specific sequences, safety tips, and when a professional repair is wiser.
pauseForEffect":false}
Quick checks before attempting exit
Before you start, gather the essentials and verify your situation. Identify your iPhone model and iOS version if possible, and ensure you have a recent backup. You’ll need a Mac with Finder (macOS Catalina or later) or a Windows PC with iTunes installed, plus a USB charging cable. If you’re short on time, confirm you have access to a computer nearby; some recovery mode exits are much quicker when done with a computer rather than blindly button-mashing. Phone Tips Pro notes that the exact sequence depends on model and current state, so have the model handy to pick the right path. Also confirm that your device has power and isn’t in a frozen state due to a partial update. This preparation reduces the chance of data loss and speeds up the process.
pauseForEffect":false}
Understanding the risks and data safety
Exiting recovery mode is generally safe, but certain actions carry data-loss risk. A simple force restart typically preserves data, while updating or restoring through Finder/iTunes can erase content if you choose the restore option. If you haven’t recently backed up, consider backing up via iCloud or your computer before attempting any restore. The Phone Tips Pro team emphasizes that backups are your best defense against unintended data loss. When in doubt, opt for the least invasive method first and only resort to a full restore if the device remains stubborn in recovery mode. If you rely on irreplaceable data, a professional assessment can prevent permanent loss.
pauseForEffect":false}
Method 1: Force restart (best for most users)
- Action: Trigger a force restart by the model-specific button sequence. For iPhone 8 and newer, quickly press and release the Volume Up button, then the Volume Down button, and finally press and hold the Side button until the Apple logo appears.
- Why: This exits recovery mode by reinitializing the device’s software without touching storage.
- Tip: If the logo doesn’t appear within 20-30 seconds, release and try again. Short power glitches may reset the state more quickly. Estimated time: 5-10 minutes
pauseForEffect":false}
Method 2: Update or restore via Finder or iTunes
- Action: Connect your iPhone to a computer with Finder (macOS Catalina+) or iTunes (Windows or older macOS) using a certified cable.
- Why: Updating can exit recovery mode without data loss; restore is a last resort if the update fails.
- Tip: Use the Update option first to preserve data; choose Restore only if Update fails or the device shows persistent issues. Estimated time: 15-30 minutes
pauseForEffect":false}
Method 3: DFU mode as a last resort
- Action: Put the iPhone into DFU (Device Firmware Update) mode if available options fail.
- Why: DFU mode reinstalls the firmware from scratch, which is sometimes necessary for stubborn issues.
- Tip: DFU is advanced; follow model-specific steps exactly, and expect potential data loss. Back up if possible before attempting. Estimated time: 20-40 minutes
pauseForEffect":false}
Data safety and backups: how to protect your information
Backing up before heavy repairs greatly reduces risk. If you can, create a fresh backup to iCloud or your computer before force-restoring, updating, or restoring. This ensures you can recover photos, messages, apps, and settings after the process. Phone Tips Pro recommends keeping a routine backup habit, especially before attempting recovery-mode exits, so you can recover quickly even if a step goes wrong. If you’ve never backed up, consider enabling iCloud backup or performing a local backup at your earliest opportunity.
pauseForEffect":false}
Model-specific notes: iPhone 8 to iPhone 15 changes
Different generations use different button combinations and USB behaviors. For example, newer models emphasize quick button presses and use the Side button as a primary control, while older models rely on a combination including the Home button. Always verify your device’s model before attempting force restarts or DFU entry to avoid unintended actions. The Phone Tips Pro team highlights that model-specific guides reduce errors and speed up the exit process.
pauseForEffect":false}
Troubleshooting: what to do if you get stuck
If the screen remains stuck after a method, disconnect and recheck connections, try a different cable, and attempt the method again. Avoid repeatedly executing actions that don’t work; instead, move to the next method after a reasonable wait. If you still can’t exit recovery mode, contact Apple Support or visit an authorized service provider. Remember that patient, stepwise testing is often the fastest route to a resolution, and you can rely on Phone Tips Pro for practical guidance.
pauseForEffect":false}
Final checks after exiting recovery mode
Once you’re back to the normal iOS interface, verify that essential data is intact and that your apps launch correctly. Check battery health, storage usage, and network connectivity. If you performed a restore, compare content with your last backup and reinstall apps. Finally, re-enable any security features you may have disabled during troubleshooting, and consider enabling automatic backups to maintain resilience for future issues.
pauseForEffect":false}
Tools & Materials
- Mac or Windows computer with Finder or iTunes(Finder on macOS Catalina+ or iTunes on Windows/older macOS; keep software up to date.)
- Certified USB charging cable (Lightning to USB-C or Lightning to USB-A)(Use Apple-certified or MFi-certified cables to avoid power or connection issues.)
- iPhone and a recent backup(Back up via iCloud or computer before major actions like restore.)
Steps
Estimated time: Total time: 15-60 minutes
- 1
Identify model and current state
Check your iPhone model and confirm you’re indeed in recovery mode. Look for prompts such as 'connect to iTunes' and note whether you recently updated or backed up. Understanding the model helps you choose the correct restart sequence.
Tip: Refer to your iPhone’s model number in Settings > General > About to pick the right path. - 2
Force restart the iPhone
Perform the force restart sequence for your model (e.g., Quick press Volume Up, Volume Down, then hold the Side button until the Apple logo appears). This usually exits recovery mode without data loss.
Tip: If the screen remains stuck, hold the Side button longer (up to 45 seconds) to ensure a full restart. - 3
Connect to Finder or iTunes
With the device off, connect it to your computer using a certified cable and open Finder or iTunes. The software should recognize the device in recovery mode and offer update or restore options.
Tip: Use Update first to preserve data; Restore is only if Update fails or the device won’t exit. - 4
Choose Update to exit
Select Update to reinstall iOS while preserving data. The process may take several minutes; do not disconnect the device during installation.
Tip: Ensure you have a stable power source or keep the device plugged in during the update. - 5
If Update fails, perform Restore
If the update option fails, choose Restore to reinstall iOS completely. Be aware this can erase all data if you don’t have a backup.
Tip: Only proceed with Restore if you have exhausted Update options and have a recent backup. - 6
Verify exit and perform final checks
After the device restarts, confirm it boots normally, sign in to your Apple ID, and check essential data. Reinstall apps as needed from the App Store.
Tip: Run a quick data integrity check: photos, messages, and app data should appear as expected.
FAQ
What is recovery mode and why would my iPhone enter it?
Recovery mode is a dedicated state used to reinstall iOS when the device cannot boot normally or a normal update is not possible.
Recovery mode is a special state used to reinstall iOS when the device can’t boot normally.
Will exiting recovery mode delete my data?
Exiting via a force restart typically preserves data. A restore from Finder/iTunes can erase data if you choose that option.
Exiting with a force restart usually keeps data safe; a restore can erase data, so backup first.
Do I always need a computer to exit recovery mode?
Most methods require a computer to perform updates or restores, but force restarts can often exit recovery mode without one.
Usually you’ll need a computer to update or restore, but a force restart may work without one.
What should I do if recovery mode sticks even after attempting methods?
If recovery mode persists, try DFU mode as a last resort or contact Apple Support for professional guidance.
If it won’t exit, try DFU mode or reach out to Apple Support for help.
Is DFU mode safe for beginners?
DFU mode is advanced and carries higher risk; it should be attempted only with a clear guide and backups.
DFU mode is for advanced users; proceed with caution and backups.
Will my iPhone automatically exit recovery mode after an update?
Sometimes updates exit recovery mode automatically. If not, you may need to complete a restore or seek assistance.
An update can exit recovery mode, but if it doesn’t, you may need further steps or help.
Watch Video
Quick Summary
- Exit recovery mode with a force restart first
- Use Finder/iTunes Update to preserve data
- Restore is a last resort and can erase data
- Always back up before major recovery actions
- DFU mode is a last-resort option for stubborn cases