How to Put iPhone into Recovery Mode: A Complete Step-by-Step Guide
Learn how to put iPhone into Recovery Mode to troubleshoot unresponsive devices. This expert guide from Phone Tips Pro covers model differences, safe steps, and what to expect during restore or update.

By following this guide, you’ll safely place almost any iPhone into Recovery Mode to reinstall iOS or troubleshoot unresponsive hardware. The process varies slightly by model (Face ID, Home button), but the core steps are the same: prepare your device, connect to a computer running iTunes or Finder, and perform the model-specific button sequence. Use Recovery Mode only when standard resets fail.
Understanding Recovery Mode on iPhone
Recovery Mode is a dedicated startup state that enables a computer running iTunes or Finder to reinstall iOS on an iPhone when normal booting isn’t possible. This mode is a safety valve for devices that won’t start correctly or show persistent software glitches. It’s not the same as DFU mode, which is deeper and more invasive. For most troubleshooting, Recovery Mode is sufficient to refresh the iOS image and restore proper boot behavior. According to Phone Tips Pro, following the official steps reduces the risk of misconfiguration and data loss compared with ad hoc methods. If you’re wondering how to put iphone into recovery mode, this guide will walk you through precise button sequences by model, what to expect on-screen, and how to proceed after the restore begins.
Understanding recovery options helps you pick the right path: a simple app crash might be solved with a standard reset, while a failed update or boot loop often requires Recovery Mode to reinstall iOS cleanly. The end goal is a stable boot with intact device functionality and restored access to your data, ideally from a recent backup.
In practice, Recovery Mode is most useful when your iPhone can communicate with a computer but won’t complete the normal iOS load. Be aware that if you choose to restore, you may lose data that isn’t backed up, so backups are essential before attempting any reinstall.
When to Use Recovery Mode vs DFU or Reset
Recovery Mode is a reliable option when iOS won’t boot, updates fail to complete, or you encounter a crash loop. It differs from a standard reset, which only restarts the iPhone, and from DFU (Device Firmware Update) mode, which is deeper and used for more advanced firmware problems. If you can access the home screen or Settings, a regular reset or erase-and-restore from a backup might be sufficient. But when the device is stuck in a boot loop or shows the connect-to-iTunes screen, Recovery Mode is the safer first step. DFU should be reserved for situations where Recovery Mode can’t solve the issue. Understanding these distinctions helps you avoid unnecessary steps and protect your data.
What You’ll Need Before You Start
Before attempting recovery, gather a few essentials so you don’t have to improvise mid-process. You’ll want a charged iPhone or kept on a power source, a working USB cable, and a computer with iTunes (Windows or macOS Mojave and earlier) or Finder (macOS Catalina and later). A recent backup is strongly recommended so you can restore data after iOS is reinstalled. If you have never backed up, consider iCloud or computer-based backups to ensure you can recover your files later. Having these tools on hand minimizes interruptions and reduces the risk of errors during the recovery sequence. For added peace of mind, confirm you have access to your Apple ID credentials in case you need to re-activate after reinstall.
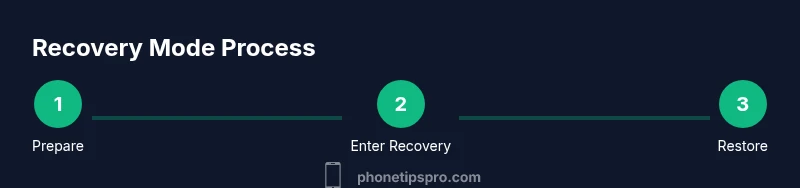
Step-by-Step Overview by Model
The exact button sequence to enter Recovery Mode depends on your iPhone model. Here’s a quick framework you can reference as you prepare for the next section, which provides model-specific instructions. In short, iPhone 8 and later use a fast sequence with the Volume buttons and Side button; iPhone 7 uses a combination of Volume Down and the Side button; iPhone 6s and earlier rely on the Home button with Sleep/Wake. This model-based approach ensures the device enters Recovery Mode reliably, allowing iTunes or Finder to detect the iPhone and present restore options. Always watch for the “Connect to iTunes” or “Connect to Finder” screen as the signal that you’re in Recovery Mode.
How to Enter Recovery Mode: Model-Specific Button Sequences
iPhone 8 and later (Face ID or Touch ID with no Home button)
- Quickly press and release Volume Up, quickly press and release Volume Down, then press and hold the Side button. Keep holding until the screen shows the recovery prompt (Connect to iTunes or Finder). If you release too soon, repeat the sequence; persistence is key.
iPhone 7
- Press and hold the Volume Down button and the Sleep/Wake (Side) button at the same time. Keep holding until the recovery screen appears. This method ensures the device communicates with the computer for iOS reinstall.
iPhone 6s and earlier
- Press and hold the Home button and the Sleep/Wake (Power) button together. Hold until you see the recovery screen, then connect to your computer.
What happens after Recovery Mode appears
- Connect the iPhone to the computer running iTunes/Finder and follow the on-screen prompts to restore or update. If you have a current backup, choose Restore from Backup after the process completes to minimize data loss.
Exiting Recovery Mode and What to Expect During Restore
If the restore completes successfully, iOS reinstallation finishes and the iPhone reboots. You’ll be prompted to set up as new or restore from a backup. If the process fails or you see error messages, you may need to repeat the steps or try a different USB port or cable. Keep your device connected to power during the restore to prevent interruptions. After the device boots, verify that data restored from your backup appears correctly and that you can sign back into your Apple ID. In some cases, you may need to re-install apps or reconfigure settings once iOS is back online. For ongoing issues, consider seeking support from Apple Support or a trusted technician.
Troubleshooting Common Issues with Recovery Mode
If Recovery Mode doesn’t appear, check the connection by using a different cable or USB port, and ensure the iPhone is charged. Update the computer’s iTunes or Finder to the latest version, as older software may fail to recognize the device. If you’re using a Windows PC, try a different USB port and run iTunes as an administrator. If you still can’t enter Recovery Mode after multiple attempts, the device could have a hardware fault that requires professional diagnosis. Always avoid forcing the device into Recovery Mode through third-party tools, which may cause further issues.
How to Exit Recovery Mode Without Restoring
If you enter Recovery Mode by mistake or decide not to proceed with a restore, you can exit by performing a force restart. For iPhone 8 and later, quickly press and release Volume Up, quickly press and release Volume Down, then press and hold the Side button until the Apple logo appears. For iPhone 7, hold the Volume Down and Sleep/Wake buttons until the device reboots. For older models with a Home button, hold the Home and Sleep/Wake buttons until the device restarts. Exiting Recovery Mode returns you to the normal iOS boot process, enabling you to retry other troubleshooting methods.
Tools & Materials
- iPhone and charger(Keep the device charged; a low battery can interrupt the process.)
- USB cable (Apple-certified or MFi)(Use the original cable or a certified alternative to ensure stable communication.)
- Computer with Finder/iTunes(macOS Catalina+ uses Finder; Windows or macOS Mojave and earlier use iTunes.)
- Recent backup(Back up to iCloud or computer before starting restoration.)
Steps
Estimated time: 15-40 minutes
- 1
Back up your iPhone
Create a recent backup before attempting recovery so you can restore data afterwards. Choose iCloud backup or local backup via Finder/iTunes depending on your setup. This protects you from data loss if the restore resets some settings or apps.
Tip: Verify the backup completed successfully before proceeding. - 2
Charge or connect to power
Plug your iPhone into a charger or keep it on a power source throughout the process. A dying device can abruptly stop the recovery operation, which could corrupt the reinstall.
Tip: Avoid starting on battery levels below 20%. - 3
Connect to computer
Attach the iPhone to your computer with a certified cable and open Finder (macOS Catalina+) or iTunes (Windows or older macOS). This enables the computer to communicate with the device during recovery.
Tip: Try a different USB port if the computer doesn’t recognize the device. - 4
Enter Recovery Mode – iPhone 8 and later
Rapidly press and release Volume Up, then Volume Down, then press and hold the Side button until the recovery screen appears. The screen should show Connect to iTunes or Finder.
Tip: If you miss the moment, repeat the sequence a couple of times; timing matters. - 5
Enter Recovery Mode – iPhone 7
Press and hold the Volume Down and the Side button together. Keep holding until the recovery screen is shown. Release only when you see the prompt.
Tip: If the Apple logo appears, you held the buttons too long—start again. - 6
Enter Recovery Mode – iPhone 6s and earlier
Hold the Home button and the Sleep/Wake button together until the recovery screen appears. This indicates the device is ready for restoration via Finder/iTunes.
Tip: Be patient; it may take several seconds to show the recovery screen. - 7
Restore or Update via Finder/iTunes
Follow the on-screen prompts in Finder or iTunes to restore or update iOS. If you restore from a backup, choose the backup when prompted after the process completes.
Tip: If the restore fails, try another USB port or cable and retry.
FAQ
What is Recovery Mode on iPhone?
Recovery Mode is a special startup state that allows a computer to reinstall iOS when the device won’t boot normally. It’s a safe path to troubleshoot software issues when standard resets fail.
Recovery Mode is a safe startup state that lets a computer reinstall iOS when the iPhone won’t boot properly.
Will Recovery Mode erase my data?
Entering Recovery Mode itself doesn’t erase data. However, choosing Restore during the process reinstalls iOS and may erase existing data if not restored from a backup.
Recovery Mode itself doesn’t erase data, but a full restore may delete data if you don’t have a backup.
Can I exit Recovery Mode without restoring?
Yes. You can perform a force restart to exit Recovery Mode and return to the normal iOS boot, then retry other troubleshooting steps if needed.
You can exit Recovery Mode by force restarting, returning to the normal boot sequence.
What if Recovery Mode doesn’t appear?
Check the USB cable and port, ensure the device is charged, update Finder/iTunes, and try again. If problems persist, hardware issues may be involved.
If Recovery Mode doesn’t show, verify cables and ports, then retry or seek help.
Is Recovery Mode the same as DFU mode?
No. Recovery Mode reinstalls iOS with a standard boot process, while DFU mode is a deeper firmware restoration used for serious issues.
Recovery Mode reinstalls iOS; DFU mode is a deeper restore for more severe problems.
How long does a restore take?
Restore duration varies with your internet speed and computer performance. Expect a window of several minutes to a bit longer.
Restore time depends on internet and computer speed; it can take several minutes.
Do I need to enter Recovery Mode on every iOS device?
Most iPhones require a model-specific button sequence to enter Recovery Mode. In rare cases, hardware issues may prevent access.
Most devices need a specific button sequence, but some hardware problems can block access.
What should I do after Recovery Mode restores iOS?
Set up your iPhone, sign back into iCloud, and restore from your most recent backup to recover apps and data.
After restore, set up your device and restore from backup to recover data.
Watch Video
Quick Summary
- Back up before starting Recovery Mode.
- Use the correct model-specific button sequence.
- Restore via Finder/iTunes and then recover data from backup.
- If issues persist, contact Apple Support.