How to Remove eSIM from iPhone: A Practical Guide
Learn how to remove an eSIM from your iPhone with a clear, step-by-step process. This expert guide covers preparation, model safety, potential pitfalls, and how to re-activate or transfer your plan after removal.

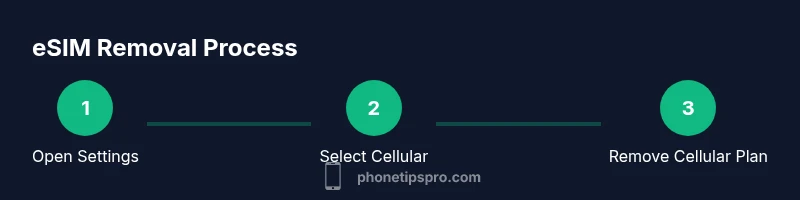
You can remove an eSIM from an iPhone by opening Settings, tapping Cellular, selecting the eSIM you want to delete, and choosing Remove Cellular Plan. This action disables that eSIM’s service and won’t affect a physical SIM. If you plan to switch carriers, remove the old eSIM before adding a new one.
What is an eSIM and why remove it?
An eSIM is a digital SIM profile embedded in your iPhone that lets you activate cellular service without a physical SIM card. It can simplify switching carriers or adding a second line on dual-SIM models. Removing an eSIM is sometimes necessary when you’re changing carriers, cleaning up unused plans, or preparing a device for sale. According to Phone Tips Pro, understanding when and why to remove an eSIM helps prevent service gaps and keeps your device organized. If you’re managing multiple plans, labeling each eSIM clearly in Settings can prevent confusion later. Remember that removing an eSIM disables the associated cellular plan, but it does not automatically erase the device’s data or other network settings. This action is reversible if you add a new eSIM or re-activate a former plan later on.
Scenarios where removing an eSIM makes sense
There are several common situations where removing an eSIM is appropriate. You might be switching carriers and transferring service to a new eSIM with your new carrier, consolidating lines on a single plan, or troubleshooting connectivity issues tied to a corrupted eSIM profile. Another reason is privacy or security concerns—removing unused eSIM profiles reduces potential unauthorized access. Phone Tips Pro analysis shows that most users remove an old eSIM after a carrier switch rather than keeping outdated profiles active. Before you proceed, verify whether your current carrier needs you to deactivate the plan from their side to avoid ongoing charges or activation prompts on boot.
Compatibility and model differences you should know
Most modern iPhone models support eSIM, but you should confirm that your device is capable and that your current iOS version supports eSIM management. Some older devices may have limited eSIM functionality or require carrier-specific settings to remove or re-add a profile. In practice, iPhone models released in recent years use eSIM as a standard feature, and iOS provides built-in controls to manage these profiles. If you share the device with others, ensure that removing one eSIM does not impact any other active plan on the same device. This is especially important for dual-SIM configurations where one line uses a physical SIM and the other uses an eSIM.
Preparation before removal: what to gather and check
Before removing an eSIM, back up any necessary activation details (QR codes, carrier activation IDs, or notes from your carrier). Make sure your iPhone is charged and connected to the internet for verification during the process. If you’re planning to switch carriers, contact the new carrier to obtain a new eSIM or QR code and confirm any prerequisites. It’s also wise to note your current plan name and number associated with the eSIM in case you need to reference it later. A quick backup of your device settings can save time if you decide to re-activate the same eSIM later. Phone Tips Pro recommends having a secondary device or screenshot as a reminder of the plan’s label.
What happens after removing an eSIM and how to verify
After removal, the iPhone will no longer use the cellular plan associated with that eSIM. You should see that specific line disappear from Cellular Plans, and the device will rely on any remaining active plans for service. If you still need cellular access, you’ll need to add a new eSIM or use a physical SIM where available. To verify, go back to Settings > Cellular and confirm that only the desired plans appear. If service remains unavailable, perform a quick network settings reset or contact the carrier to ensure there are no lingering activations tied to the old profile. Phone Tips Pro notes that most removals are straightforward and do not require a full device reset.
Troubleshooting common issues after removal
If you encounter issues like no service after removing an eSIM, double-check that the remaining plans are active and correctly configured for your region. Ensure that the carrier settings are updated by going to Settings > General > About and following prompts if an update is available. If your device still cannot connect, contact your carrier to verify there are no blocks tied to the removed profile and request a fresh activation via a new eSIM. In some cases, a temporary network reset or a quick reinstall of the carrier settings can resolve residual activation state problems. Phone Tips Pro emphasizes that most problems stem from outdated carrier information or a missing secondary plan during a transition.
Re-adding or transferring an eSIM later
When you’re ready to re-activate, you can add a new eSIM by scanning a QR code provided by your carrier or by using the carrier’s app. If you’re transferring from an old eSIM to a new one, ensure the old profile is fully removed and your new plan is activated on the correct line. If you intend to reuse the same eSIM profile, keep the activation details handy and confirm compatibility with your iPhone model and iOS version. The process is generally quick, but it may require carrier support to finalize activation. The Phone Tips Pro team recommends documenting activation steps and keeping your carrier contact handy for a smooth reactivation.
Tools & Materials
- iPhone with an active eSIM(Charge to at least 50%; ensure iOS is up to date)
- Carrier activation details or QR code(Needed if you plan to re-activate the same or a new eSIM)
- Alternative network plan information (optional)(Useful if you’re switching carriers or traveling)
Steps
Estimated time: 5-10 minutes
- 1
Open Settings
Unlock your iPhone and open the Settings app to access network options. This is the first step to locate the eSIM you plan to remove.
Tip: Have your device charged to avoid interruptions. - 2
Tap Cellular
From Settings, select Cellular (or Mobile Data) to view all cellular plans linked to your iPhone. This is where eSIM profiles appear.
Tip: If you don’t see Cellular, ensure your device is unlocked and on iOS that supports eSIM management. - 3
Choose the eSIM you want to remove
Under Cellular Plans, identify the eSIM profile you want to delete. If you have multiple profiles, select the correct one to avoid removing the wrong plan.
Tip: Label plans clearly in Settings for easier future reference. - 4
Remove Cellular Plan
Tap Remove Cellular Plan (or Delete Plan) and confirm the action in the prompt. This disables the profile’s service on the iPhone.
Tip: Review what you’re deleting to prevent accidental removal of an active line. - 5
Confirm removal
If prompted, enter your passcode to authorize the removal. The device will apply the change immediately.
Tip: Do not skip confirmation; this step ensures the change is intentional. - 6
Verify your remaining plans
Back in Cellular settings, verify that only the intended plans remain active. Remove any stray labels or notes to avoid confusion later.
Tip: If you plan to keep service, ensure the remaining plan is configured for your region. - 7
Re-activate or switch if needed
If you intend to re-activate later or switch carriers, obtain the new eSIM (QR code or app) and follow the carrier’s re-activation steps.
Tip: Document activation steps and keep carrier support contact handy in case you hit an obstacle.
FAQ
Do I need to remove an eSIM before selling my iPhone?
Yes. Removing unused eSIM profiles helps protect your privacy and prevents accidental activations on a used device. You can re-add a new eSIM or transfer ownership with a fresh activation later.
Yes, you should remove any active eSIM profiles before selling the device to protect your privacy and ensure a clean setup for the new owner.
Will removing an eSIM erase my phone number or data?
Removing an eSIM only disables the cellular plan tied to that profile. It does not erase your data or any other content on the iPhone. You may lose the associated phone number if no other plan remains active.
No, it won’t erase your data, but you might lose the number tied to that eSIM if you don’t have another active plan.
Do I need to contact my carrier after removing an eSIM?
In many cases you won’t need to contact your carrier, but some carriers require deactivation on their end to avoid charges or conflicts. Check with your carrier if you’re unsure.
Usually you don’t have to, but it’s a good idea to confirm with your carrier if there are any ongoing charges or activation flags.
Can I remove an eSIM on any iPhone model?
Most recent iPhone models support eSIM management in Settings, but older devices or regional variants may differ. If you don’t see the option, verify iOS compatibility or check with your carrier.
If you don’t see the option, your device or region may not support managing eSIMs in Settings.
What if I’ve lost the QR/activation details for my eSIM?
Without activation details, you’ll need to obtain a new QR code or eSIM activation method from your carrier. Do this before removing the old profile if you plan to re-activate soon.
You’ll need new activation details from your carrier to re-activate later.
Will removing the eSIM reset my iPhone settings?
No. Removing an eSIM only affects cellular plans; it doesn’t reset your device settings, apps, or data. You can still use Wi-Fi and other features normally.
No, it doesn’t reset your device; you’ll still have access to Wi-Fi and apps.
Watch Video
Quick Summary
- Identify the eSIM you plan to remove before starting.
- Removing an eSIM disables only that profile; your physical SIM remains untouched.
- Back up activation details if you might re-activate later.
- Carrier steps may be required to deactivate or re-activate an eSIM.