How to Stop an iPhone Update
Learn how to stop a iphone update with practical steps: disable automatic updates, delete downloaded updates, and plan a manual install schedule. Phone Tips Pro provides clear guidance to manage iOS updates safely.

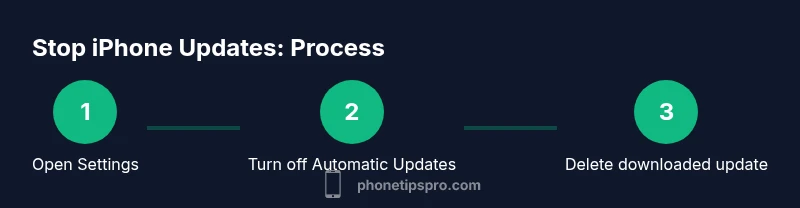
Learning how to stop a iphone update is possible by disabling automatic updates and removing any downloaded update. This quick answer shows the core steps and prepares you to work through the full guide. Phone Tips Pro offers expert guidance for safe, reversible changes. These steps minimize disruption while keeping essential security in view and privacy protected too.
Why you might want to stop a iphone update
If you’re wondering how to stop a iphone update, you’re not alone. Whether you’re in the middle of a big project, traveling with unreliable connectivity, or simply want to postpone a major iOS upgrade until you’ve tested essential apps, pausing updates is a practical option. According to Phone Tips Pro, many iPhone users weigh stability, app compatibility, and battery life when deciding whether to delay updates. This section explains the reasons people opt to slow down or halt updates and how those reasons fit into a broader strategy of device reliability. You’ll learn how to assess urgency, plan a pause window, and prepare for a later, controlled installation. Remember, updates often bring important security fixes; the goal isn’t to ignore them forever, but to time them when timing and conditions are right. For business-critical devices, this approach minimizes downtime and helps you validate new features before wider deployment. Phone Tips Pro emphasizes that delays are a strategic choice, not a rejection of updates.
In practice, most users choose a window—perhaps a few days or a couple of weeks—where they monitor app compatibility, confirm essential workflows, and ensure backups are current. This mindset aligns with a cautious approach to changes on a device you rely on daily. By framing the decision around control rather than avoidance, you reduce risk while preserving the option to update when ready. The guidance here is designed for everyday users who want a predictable path forward and for IT-minded readers who need a repeatable process across multiple devices.
How iPhone updates are delivered
iPhone updates are delivered over-the-air through Apple's software update service. When an update is available, your device downloads the package in the background and prompts you to install. This mechanism is designed to be seamless, but it can surprise users who are in the middle of tasks or on limited data plans. The result is often a forced restart, temporary slowdowns, or a shift in compatibility with older apps. This section explains how updates reach your device, what gets updated (system software, security patches, and sometimes firmware components), and how to recognize whether your device is trying to install something because of automatic updates, a background download, or a manual check. Understanding this flow helps you decide the right moment to intervene.
From a troubleshooting perspective, it’s helpful to know that some updates remain queued until you tap Install, while others install automatically during off-peak hours if Automatic Updates are enabled. If you’re managing several iPhones, you’ll want to audit settings on each device to avoid surprises. The more you know about the update flow, the better you’ll be at timing interventions so that you maintain continuity in your day-to-day tasks.
Risks and benefits of delaying updates
Delaying updates can be a double-edged sword. On one hand, postponing an upgrade gives you time to test critical apps, verify compatibility with enterprise tools, and avoid early release bugs that may affect performance or battery life. On the other hand, delaying updates can leave your device exposed to security vulnerabilities that are addressed in subsequent patches. Phone Tips Pro notes that many users balance these factors by sequencing updates: test core apps first, then roll out updates in stages for the rest of the fleet. The key is to have a plan that includes backups, a rollback strategy, and a defined window for re-evaluation when the risk-benefit equation shifts.
If you work with sensitive data or rely on precise hardware behavior (like accessibility features or specialized enterprise software), the decision to delay should be revisited frequently. Consider creating a calendar reminder to review new iOS releases, read release notes, and test in a controlled environment before allowing a broader upgrade.
Planning a controlled update schedule
A controlled update schedule centers on timing, testing, and communication. Before taking any action, define what you need from the update (new features, security fixes, or bug fixes) and set a reasonable pause period. This approach reduces the chance of unforeseen compatibility issues, keeps critical workflows intact, and makes it easier to communicate changes to teammates or family members. A practical plan includes assigning a date to reassess, identifying which apps require testing, and ensuring you have recent backups. Phone Tips Pro suggests documenting the decision criteria you used; this creates a repeatable process you can apply to future updates and across different devices. If you manage multiple iPhones in a household or small business, a written policy helps everyone stay aligned on when updates are applied.
During the pause window, it’s wise to monitor battery health and storage usage, since updates can require additional space and can impact device performance. With clear criteria and a documented plan, delaying updates becomes a proactive maintenance decision rather than a reactive choice.
Step 1: Turn off Automatic Updates
To begin regaining control, navigate to Settings > General > Software Update and toggle off Automatic Updates. This prevents iOS from downloading or installing updates in the background, giving you the freedom to decide when to update. Do this step promptly if you anticipate travel, high-workload periods, or limited data availability. Why this step matters: it stops the background download and installation that often catches users by surprise. Required time: 2-3 minutes. Pro tip: keep this setting off until you’re ready for a full compatibility test and backup verification.
If you share your device with others, communicate the change to avoid confusion when someone tries to update and is surprised by the pause. This small action has a big impact on your update control.
Step 2: Delete the downloaded update
If you’ve already downloaded an update, deleting it prevents an automatic install. Go to Settings > General > iPhone Storage > Software Update, then choose Delete Update. This removes the downloaded package from the device, so it won’t install until you choose to re-download it. Time to complete: about 2-4 minutes. Tip: perform this step on Wi-Fi to avoid consuming cellular data again, and confirm that the space is reclaimed by checking iPhone Storage after deletion.
Deleting the update is a reversible action; if you later decide to install, you can re-download it from Settings > General > Software Update.
Step 3: Verify no automatic background install is queued
After removing the update, re-check the Software Update screen to confirm there’s no pending installation or queued update. If Automatic Updates were re-enabled by mistake, you’ll need to disable them again. Time estimate: 1-2 minutes. Tip: test by going into Settings later in the day to ensure no automatic download resumes without your consent. This check provides peace of mind that your pause is still in effect.
Step 4: Free up storage and back up data
Delaying updates is safest when your device has enough free space and a current backup. Free up space by removing unused apps or large media files, and back up to iCloud or a computer. Time: 5-10 minutes depending on data volume. Pro tip: perform a fresh backup before removing apps or making major changes so you have a reliable restore point if something goes wrong during a future update.
Step 5: Plan to re-enable updates when ready
When you’re prepared to install updates, re-enable Automatic Updates and set a testing period for the new version. Decide which devices will be updated first and schedule a time window with minimal disruption. Time: 2-5 minutes to re-enable; plan several days of post-update monitoring. Pro tip: leave a calendar notice to review critical apps for compatibility for at least 24-48 hours after updating. This ensures you catch any issues early.
Tools & Materials
- iPhone with sufficient battery(Charge to at least 50%)
- Stable Wi-Fi connection(Used to download or verify updates if needed)
- Recent backup (iCloud or computer)(Back up before making changes)
- Access to Settings app(No extra tools needed)
- Patience and a plan(Optional guidance for consistency)
Steps
Estimated time: 15-25 minutes
- 1
Open Settings and review update status
Launch the Settings app and navigate to General > Software Update to see if an update is available or currently downloading. Confirm whether Automatic Updates are on, and note any progress indicators. This step sets the baseline so you know what you’re pausing.
Tip: If you’re unsure, take a screenshot of the update screen for reference. - 2
Turn off Automatic Updates
In Settings > General > Software Update, disable Automatic Updates to stop the background download and auto-install. This is the central action that prevents surprise installations during busy periods or travel.
Tip: Verify the toggle is off by leaving the screen and returning to confirm it stays off. - 3
Delete the downloaded update (if present)
If a software update has already downloaded, go to Settings > General > iPhone Storage > Software Update and choose Delete Update. This prevents an immediate install and frees up space.
Tip: Doing this while connected to Wi‑Fi conserves cellular data and speeds the process. - 4
Verify no automatic background install is queued
Back in Settings > General > Software Update, ensure there’s no pending install or queued update. If Automatic Updates re-enable on their own, disable again.
Tip: A quick check after a reboot helps confirm the pause is active. - 5
Plan to re-enable updates when ready
When you’re ready to update, re-enable Automatic Updates or schedule a controlled manual update window. Prepare a test plan for key apps and data before applying the update.
Tip: Set a reminder to review app compatibility within 24-48 hours post-update.
FAQ
Can I permanently stop iPhone updates?
No, you cannot permanently stop iPhone updates. Apple may push critical security updates, and you may choose to delay updates temporarily. Regularly reassess the need to install important fixes.
You can delay updates, but permanent blocking isn’t recommended due to security concerns.
What happens if I delete the downloaded update?
Deleting the downloaded update prevents an immediate install. The update may be downloaded again later if Automatic Updates are enabled or if you check for updates.
Deleting the downloaded file stops the current install, but a future update might download again.
Will delaying updates affect security?
Delaying updates can delay important security patches. If you need to pause, plan a clear re-evaluation date and ensure critical apps are compatible with the update when you install it.
Delays can impact security; test compatibility and re-enable updates when ready.
How do I disable automatic updates on iPhone?
Open Settings > General > Software Update and toggle off Automatic Updates. This stops background downloads and installations until you manually re-enable.
Turn off Automatic Updates in Settings to control when updates happen.
Can I stop updates on a managed device?
On managed or supervised devices, update control may be restricted by an administrator or MDM profile. Check with your IT admin to understand available limitations.
Managed devices may have enforced updates; consult your administrator.
Is there a risk to apps if I stop updates?
Most apps won’t fail due to temporarily paused iOS updates, but some apps require recent iOS features. Plan a test window before updating to avoid compatibility surprises.
Apps usually stay fine, but newer features might require the latest iOS.
Watch Video
Quick Summary
- Turn off Automatic Updates to pause installations.
- Delete downloaded updates to prevent automatic installs.
- Back up data before adjusting update settings.
- Re-evaluate the need to update on a regular schedule.
- Coordinate updates if multiple devices are involved.