Photo Prints from iPhone: A Practical Guide
Learn how to print photos from your iPhone with the right paper, color management, and workflow. This educational guide covers at-home vs professional printing, finishes, and practical tips to ensure high-quality photo prints.

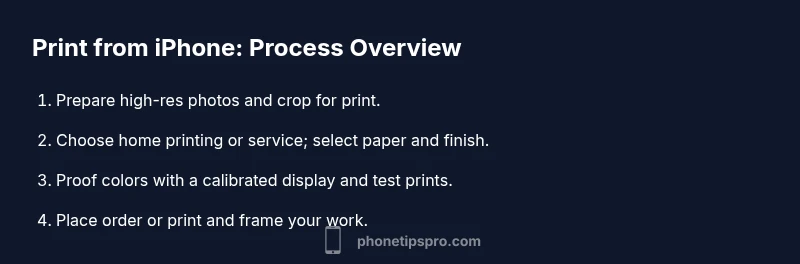
Printing photos from your iPhone is doable with the right prep: choose the right paper, calibrate color, and pick a printing method that fits your needs. Whether you print at home or use a service, your results depend on resolution, crop, and finish. According to Phone Tips Pro, start with a clear goal, verify color accuracy, and review proofs before ordering.
Understanding Print Quality and Formats
When you start printing photos from your iPhone, the most critical factor is resolution relative to the print size. A photo’s pixel dimensions determine the maximum printable size at a given DPI. For sharp 300 PPI prints, aim for roughly 3000x2000 px for a 10x6.5 inch image, or larger for larger sizes. You’ll also choose between finishes—glossy, matte, luster—and paper weights in the 180–300 gsm range. Matte finishes are forgiving of reflections, while glossy finishes tend to enhance color pop and detail. If you plan to frame prints, consider archival nitrile or acid-free paper for longevity. For color accuracy, enable color management in your device settings and compare a calibrated monitor to a printed proof. This ensures your final output matches what you see on screen.
Beyond hardware, understand that paper choice and finish dramatically influence perceived sharpness, color depth, and longevity. Glossy finishes can enhance micro-contrast but may reflect ambient light; matte or luster papers offer better viewing angles and reduced glare. For archival quality, select acid-free stock and consider pigments designed for long-term color stability. When assessing a print, look for edge sharpness, color fidelity, and consistent tonality across the image. These checks help you decide whether to re-edit before a larger run.
Preparing Your iPhone Photos for Printing
Before you print, you should identify the best candidate photos and optimize them. Start in the Photos app: crop to the desired aspect ratio (for example, 4:3 or square for frames), adjust exposure and contrast, and straighten if needed. If you shoot in RAW with an iPhone (via third-party apps), export to TIFF or high-quality JPEG to preserve dynamic range. Always shoot in the largest available resolution; avoid excessive sharpening on export, as printers handle sharpening better when applied in moderation. Finally, check for motion blur and noise, and bookmark your favorite edits so you can reapply them to the print version.
Organize your edits by project (e.g., portraits, landscapes, color studies) and save separate presets for print-ready exports. If your photo has harsh highlights or deep shadows, use local adjustments to protect detail in the brightest and darkest regions. When exporting, maintain consistent color space (sRGB for most home printers, Adobe RGB or ProPhoto RGB if your printer supports a wider gamut) and ensure the final file size isn’t unnecessarily large for your chosen paper size.
Home Printing vs. Professional Printing Services
Home printing gives you speed and control, but you’ll need a good printer, quality paper, and accurate color settings. Service printing offers consistent color management, professional papers, and better consistency for large orders, but includes shipping time and a markup. If you choose a service, compare proof options (soft proofs vs hard proofs) and check whether they accept the file format you saved. For best results, save print-ready files in TIFF or high-quality JPEG with minimal compression. If you’re trying a new printer, run a test print on a small photo to preview colors and sharpness before committing to a larger order.
If you frequently print, consider establishing a workflow that mirrors a pro lab: calibrated monitor, color-managed export, and a preferred paper and finish. For families or events, batch-processing photos with similar lighting and color helps maintain consistency across prints. Remember that service-based printing may excel in color stabilization and batch consistency, but you’ll trade some control and speed for the potential quality gain.
Color Management, Proofing, and Color Profiles
Color management begins with your screen calibration and printer profile. Use sRGB for general prints; switch to Adobe RGB or ProPhoto RGB if you need a wider color gamut and your printer supports it. When possible, request a printer profile from the service and review a test print. For proofs, compare color shifts caused by lighting and paper finish; you may notice warmer tones on matte vs glossy. Light booth evaluation or color-calibrated monitor helps ensure your final piece aligns with your intent.
Keep a library of paper profiles and printer presets so you can reproduce consistent results. When working with services, request soft proofs before committing to a full run and confirm that the final outputs match your expectations under the intended display conditions (home, gallery, or office lighting).
Fine-Tuning for Specific Print Scenarios
Not all photos print the same. Portraits benefit from slight adjustments to skin tones and contrast; landscapes emerge with careful saturation and clarity adjustments. For small prints such as 4x6 or 5x7, consider cropping a bit to emphasize the subject and leaving negative space for framing. For large prints like 16x20 or 24x36, start with the highest resolution photo and avoid upscaling; use a service that offers a high-quality inkjet paper with archival properties. If you plan multiple prints, save a master file with non-destructive edits and different color profiles to compare how each setting looks on paper. In general, you’ll want to test a few variations and select the one that reads best at the intended viewing distance. Remember that different paper finishes interact with color differently; glossy papers will exhibit vibrant, punchy colors while matte papers reveal more texture and softer gradients.
For black-and-white prints, use a slightly higher contrast to maintain tonal separation, and consider a light scratch removal pass to prevent visible digital noise in large formats.
Common Mistakes and How to Fix Them
A surprising number of prints disappoint because of avoidable mistakes. Common culprits include exporting with too much compression, neglecting to apply a color-managed workflow, and selecting a finish that clashes with the subject. Always preserve the original RAW or high-resolution file, export at high quality, and verify that color profiles are consistent across devices. When color shifts appear, reproof using a calibrated monitor and adjust white balance or saturation accordingly. If you’re shrinking an image for a smaller print, ensure you haven’t cropped essential details. Finally, manage expectations by ordering a small test print first and evaluating the result under the lighting conditions where the final piece will hang.
Budget-Friendly Strategies and Alternatives
Printing at scale doesn’t have to break the bank. Start with smaller prints or a few centerpiece pieces, then expand. Look for service providers that offer introductory discounts, bundled deals, or loyalty programs. Consider efficient packaging and shipping options to minimize costs. If you print yourself, invest in a reliable printer with good color handling and use standard-quality paper rather than premium stock for draft proofs. For gift-giving or small shows, consider creating collages or photo books that consolidate multiple images into a single piece, reducing materials and framing costs.
Another approach is to curate a seasonal or themed set of images and print them as a single collage or mini photobook rather than many individual pictures. This can improve perceived value and reduce waste while still delivering a high-impact display.
Maintaining and Displaying Your Prints
Once you have your prints, proper storage and framing preserve color and integrity. Use UV-protective glass or acrylic to reduce fading, and mount prints with acid-free mats. Store unframed prints flat in a cool, dry place and avoid humidity extremes. When framing, choose acid-free backing and consider non-glare frames for display rooms with bright light. Regularly check for signs of fading or yellowing, and reframe or remount as needed. By combining careful handling with quality materials, your iPhone prints can become lasting keepsakes.
Finally, create a simple catalog or digital backup of your prints, including the original iPhone photo, print size, paper type, and finish. This helps you recreate look-and-feel in future batches and makes it easier to reorder prints from the same setup.
Tools & Materials
- iPhone with Photos app(Latest iOS recommended)
- Printer (inkjet or laser)(Color management capable)
- Photo paper (glossy, matte, or luster)(200-300 gsm recommended)
- Color-calibrated monitor(Helpful for proofing)
- USB cable or AirPrint-enabled connection(Ensure compatibility)
- Photo editing app (built-in Photos or third-party)(For export and edits)
- Calibration print or color profile(If available from service)
- Storage for prints (envelope, packaging)(Keep prints flat and protected)
Steps
Estimated time: Varies by method: 30-60 minutes for home printing; 3-7 days for service printing.
- 1
Open Photos and choose photos
Open the Photos app, select the images you want to print, and decide the crop to your target aspect ratio. This ensures the final print matches the frame or display size. If you shoot in portrait or landscape, lock the orientation to avoid unintended rotations.
Tip: Use the crop tool to set a standard aspect ratio (4:3 or 1:1) before editing - 2
Check resolution and print size
Review the image’s pixel dimensions and estimate the maximum print size at 300 PPI. Larger prints require higher resolution or careful upscaling. Avoid enlarging past the photo’s native resolution to keep detail sharp.
Tip: Aim for a print size that uses most of the photo’s pixels without stretching - 3
Export print-ready file
Export the photo in TIFF or high-quality JPEG from your editing app to preserve dynamic range and color. Disable aggressive compression settings that degrade detail. Save a separate copy for editing so the original remains untouched.
Tip: Choose TIFF when possible for archival prints - 4
Choose printing route
Decide between home printing or using a professional service. Home printing gives instant results, while a service offers consistent color and better archival papers. Compare costs, turnaround times, and proof options before deciding.
Tip: Order a small test print if you’re new to a service - 5
Select paper and finish
Pick the paper type and finish (glossy, matte, luster) based on subject and lighting. Glossy accents color and detail; matte reduces glare and is more frame-friendly. For portraits, consider slightly warmer tones and softer contrast on matte.
Tip: Glossy prints tend to appear brighter under direct light - 6
Print a test copy
If possible, run a test print on a smaller size to check color and sharpness. Compare to your screen, then adjust Brightness, Contrast, and Color Temperature as needed. Use a color-managed workflow to minimize surprises on the final print.
Tip: Always test smaller sizes before committing to large formats - 7
Place full order or print
Proceed with the full print run or order from the service, ensuring your file is print-ready and correctly sized. Double-check the surface finish, frame dimensions, and delivery address. Confirm shipping times and whether proofs are included.
Tip: Ask for a soft proof if the service offers it - 8
Care for and display prints
Store prints flat in a cool, dry place out of direct sunlight. Use UV-protective framing and acid-free materials for longevity. Proper mounting and framing protect against fading and damage.
Tip: Avoid exposing prints to direct sun for extended periods
FAQ
What is the best print size for iPhone photos?
The best print size depends on the photo’s resolution. Use the pixel dimensions to calculate an appropriate print size at 300 PPI, and avoid upscaling beyond the photo’s native resolution.
Choose a print size that fits the photo’s resolution to maintain detail.
Can I print directly from iPhone without a computer?
Yes. Use AirPrint-enabled printers or apps to print directly from your iPhone. Some services also accept photos via mobile upload.
You can print directly from your iPhone using AirPrint or a mobile upload.
Which finish is best for photos?
Glossy finishes boost color and detail but reflect light; matte finishes reduce glare and are more frame-friendly. Choose based on lighting and viewing distance.
Glossy is vivid; matte reduces glare and is more forgiving in bright rooms.
How do I ensure color accuracy?
Calibrate your monitor, export with high-quality settings, and review proofs. If using a service, request color proofs or profiles when available.
Calibrate both screen and printer and ask for proofs if possible.
How long does printing take?
Home printing is usually quick, often under an hour. Professional services require processing and shipping, typically several days.
Home prints are quick; services take days for processing and delivery.
Watch Video
Quick Summary
- Choose high-resolution photos for best results
- Use color management and proofs to ensure accuracy
- Decide between home printing and service based on needs
- Carefully select paper and finish for subject
- Proof and test before finalizing large orders