What Should iPhone Exposure Be? A Practical Guide
Learn how to set the right iPhone exposure for diverse scenes, avoid blown highlights, and shoot consistently. This guide covers exposure controls, HDR use, stability, and post-processing basics to improve your iPhone photography.

Ready to nail iPhone exposure? You’ll learn how to set the right brightness for tricky scenes, from backlit portraits to snowy landscapes. Start by defining your goal, then tap to focus, drag the exposure slider to fine-tune, and lock exposure when needed. Turn on HDR or Smart HDR for tricky lighting, use a tripod for stability, and test with a quick comparison shot.
What should iphone exposure be and why it matters
If you're wondering what should iphone exposure be, the short answer is: exposure determines how bright your image appears and how much detail you preserve in highlights and shadows. On iPhone, exposure is not a fixed number; it’s a balance controlled by your screen brightness, the camera’s auto settings, and how you position your subject. According to Phone Tips Pro, mastering exposure is the difference between a washed-out sky and a well-defined subject. In practice, you aim for an image where the subject looks natural and there is still detail in bright areas without crushing them.
The core idea: exposure vs. scene brightness
Exposure is the camera’s way of translating light into an image. A scene with bright light or strong glare will push the camera to reduce brightness to protect highlights, while a dim scene will increase brightness to reveal details in shadows. The iPhone makes this balancing act easy: you can adjust the brightness on-screen after you focus, and you can rely on Smart HDR to help preserve detail across bright and dark areas. Understanding this balance helps you decide when to adjust exposure manually versus letting the automatic system handle it.
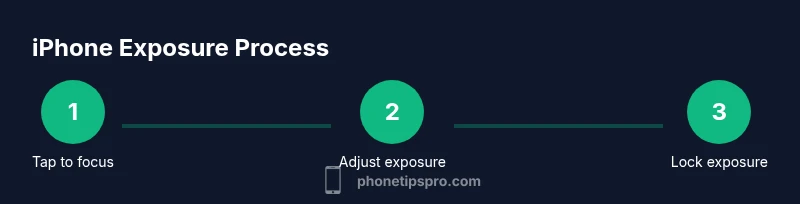
Basic exposure controls you’ll use most
On most iPhone models, you tap to focus, and a small sun icon appears next to the focus box. Dragging up increases exposure (brightens the image), while dragging down decreases exposure (darkens the image). This is your primary tool for shaping brightness in any given shot. If you want consistency across a sequence, you can lock exposure temporarily by holding on the subject until AE/AF Lock appears, then recompose and shoot. Remember, exposure changes affect shadows, highlights, and color richness.
When to adjust exposure: common real-life scenarios
Backlit subjects, snowy scenes, or beach landscapes with a bright sky can wash out details if left to automatic exposure. In these cases, gently reducing exposure helps preserve the sky’s blue and the subject’s texture. Conversely, indoor scenes with warm tungsten lights can appear yellow or amber if exposure is too low; increasing exposure helps render true colors and texture. The goal is to keep both bright areas and shadows readable without oversaturating any part of the image.
HDR and Smart HDR: what they do for exposure
HDR technologies combine multiple exposures to preserve detail in both bright and dark regions. When you shoot in high dynamic range, the camera will blend frames to minimize blown highlights and crushed shadows. On iPhone, HDR behavior is automatic in many modes, but you can enable or disable HDR for different effects. For scenes with extreme brightness contrast, HDR often yields more balanced results without manual tweaking, but it may smooth subtle textures in some cases.
Practical tips for tricky lighting situations
Snowy scenes often reveal blown highlights if exposure is left on auto; reduce exposure slightly to retain sky texture and snow detail. Backlit portraits benefit from lowering exposure to reveal facial features, while keeping the background glow intact. Night scenes benefit from careful exposure control to avoid overly bright signs or neon reflections. In all cases, use the exposure slider as your primary tool, and verify by comparing a couple of shots with different brightness levels.
How exposure affects color and white balance
Exposure settings influence color saturation and white balance. Overexposed shots often look washed out and cool; underexposed images can appear overly warm or muddy. When you adjust exposure, re-check color accuracy and, if needed, tweak white balance or apply a subtle warmth in post-processing to preserve a natural look. The right exposure helps colors pop while preserving the scene’s true mood.
Stabilization and composition for better exposure
A stable camera helps your exposure decisions pay off. Use a tripod or rest on a solid surface when shooting in low light or using longer shutter-like effects. Framing your subject with ample lighting on the face or key details ensures the exposure slider works on meaningful parts of the image. Short test shots give you quick feedback on brightness and texture before finalizing the composition.
Quick-start checklist for great iPhone exposure
- Tap to focus on your subject and note the sun icon for exposure control.
- Drag the sun (exposure slider) up or down to adjust brightness.
- Lock exposure if you need a series of shots with the same brightness.
- Use HDR when there’s bright sky and dark foreground.
- Review a few test shots and compare brightness and detail before choosing the final image.
Post-processing: when and how to adjust exposure after the shot
Post-processing can enhance exposure, but aim to preserve the shot’s natural feel. Use a subtle exposure adjustment to bring out shadows without introducing noise, then tweak contrast to maintain texture. Avoid over-editing; small, measured changes keep your iPhone photos looking authentic and professional. As always, back up the original image before editing for safety.
What to practice next time you shoot
Practice with a fast-moving scene, like a street, to see how quick exposure changes affect brightness across frames. Try backlit scenarios, indoor portraits, and outdoor landscapes to build a mental map of which exposure settings yield the most natural results for each situation. Over time, your instinct for what should iphone exposure be will become second nature.
Tools & Materials
- iPhone with Camera app(Any model that supports on-screen exposure controls and AE/AF lock)
- Clean lens cloth(Ensure no smudges distort exposure reading or color accuracy)
- Stable surface or tripod(Helpful for low-light or long-exposure-like shots to reduce shake)
- Adequate lighting(Balanced indoor lighting or natural light improves exposure accuracy)
- Optional editing app(Use for fine-tuning exposure and color after capture)
Steps
Estimated time: 10-15 minutes
- 1
Prepare the scene
Assess lighting and decide the exposure goal for the shot. Ensure subject is well lit and avoid harsh backlight unless intentional for effect.
Tip: Have a stable light source and minimal glare to keep the exposure reading clean. - 2
Open Camera and compose
Launch the Camera app, frame your subject, and ensure the main details are within the viewfinder.
Tip: Lock the grid to aid composition and avoid cutting important details at the edge. - 3
Tap to focus
Tap the screen on your subject to set focus and reveal the exposure slider.
Tip: Try to place the subject slightly off-center for a balanced exposure read. - 4
Adjust exposure
Slide the sun icon up to brighten or down to darken the image until the highlights and shadows look balanced.
Tip: Make small adjustments and compare, especially in high-contrast scenes. - 5
Lock exposure if needed
Hold on the subject until AE/AF Lock appears to keep exposure constant across a sequence.
Tip: Useful when recomposing or shooting a series in similar lighting. - 6
Enable HDR when appropriate
Turn on HDR/Smart HDR for scenes with bright backgrounds and dark foregrounds to preserve detail.
Tip: HDR helps with dynamic range but may reduce fine texture in some images. - 7
Stabilize for low light
If light is low, use a tripod or surface to minimize shake and improve exposure accuracy.
Tip: Even small stabilizations can dramatically improve exposure consistency. - 8
Review and compare
Take a quick shot, review brightness and detail, then adjust and retake if needed.
Tip: Compare with and without exposure adjustments to confirm impact.
FAQ
How do I adjust exposure on an iPhone?
Tap to focus on your subject, then drag the sun icon up or down to adjust brightness. Use AE/AF Lock for stability across multiple shots.
Tap to focus, then move the exposure slider to brighten or darken. Use the lock to keep brightness consistent while you reframe.
What is AE/AF Lock and when should I use it?
AE/AF Lock locks exposure and focus, preventing automatic adjustments as you reframe. Use it for a sequence of similar shots in the same lighting.
AE/AF Lock keeps brightness and sharpness steady while you compose your shot.
Does HDR always improve exposure?
HDR blends multiple exposures to protect highlights and preserve details. It helps in scenes with bright sky and shadows but may reduce subtle texture in some cases.
HDR can save you from blown highlights, but check results for texture and color.
How should I expose for snowy or bright scenes?
Slightly reduce exposure to retain texture in snow and sky, avoiding washed-out whites while keeping shadows readable.
Lower brightness a touch to keep the snow details without washing out the sky.
Can exposure affect color accuracy?
Yes. Over- or under-exposure can shift color tones. Check white balance after adjusting exposure and correct if needed in post.
Exposure changes color accuracy; verify tones after brightness tweaks.
What should iphone exposure be for night photos?
In low light, keep exposure modest and use a tripod. Slightly brighten to reveal detail without introducing noise.
In dark scenes, stabilize and adjust exposure just enough to see details clearly.
Watch Video
Quick Summary
- Tune exposure with the slider to balance highlights and shadows.
- Use AE/AF Lock for consistency across shots.
- HDR helps in high-contrast scenes but may smooth texture.
- Stability and lighting quality drive exposure accuracy.
- Review shots and adjust for natural color and brightness.