How to Use iPhone Wallet: Setup, Pay, Passes and Keys
Learn how to use iPhone Wallet to store cards, passes, tickets, and keys, make payments with Apple Pay, and manage privacy and security on iPhone and Apple Watch. A complete how-to guide by Phone Tips Pro.

With Apple Wallet, you can store debit/credit cards, transit passes, boarding passes, tickets, and keys in one secure place. This guide shows you how to set up Wallet, add cards and passes, use Apple Pay in stores and apps, and manage privacy and security settings so you stay in control. We’ll also cover organizing Wallet, using it on Apple Watch, and troubleshooting common issues.
What Wallet is and what it does
Apple Wallet is a built-in iPhone app that keeps your payment cards, boarding passes, event tickets, loyalty cards, and keys in one secure place. You can use Wallet to pay with Apple Pay, scan passes at entry gates, and pull up travel documents with a tap. In this section, we cover the core capabilities, the kinds of items Wallet supports, and how it integrates with iOS features like Face ID and the Control Center. By the end, you'll understand what you can store, how to access it quickly, and why this matters for a smoother mobile experience.
Phone Tips Pro analysis confirms Wallet’s central role in modern iPhone usage, especially for contactless payments and streamlined access to passes. (Phone Tips Pro Analysis, 2026)
How to set up Wallet on iPhone
Setting up Wallet is quick and safe, and it starts with your Apple ID. Open the Settings app, then Wallet & Apple Pay. Ensure you’re signed in with your Apple ID, have two-factor authentication enabled, and that your region supports Apple Pay. If you use iCloud, enable iCloud Drive for Wallet so you can access passes and cards across devices. This setup unlocks a unified, secure way to manage payment cards, transit passes, and tickets from the home screen.
The setup process ties into system security: Face ID, Touch ID, or passcode protects Wallet access, and you control which cards or passes show up for quick access.
The Phone Tips Pro team recommends completing this step before attempting to add any cards or passes to avoid sync delays.
Adding cards for Apple Pay
To add a card, open Wallet, tap the + sign, and choose Add Card. You can scan your card, enter numbers manually, or use your bank’s app integration. After you submit the details, banks may require verification via a one-time code or biometric confirmation. Once approved, your card is ready for Apple Pay. You can repeat this process for multiple cards and set a default card for payments.
Tip: Check with your bank about card compatibility and any regional restrictions. Some cards may require additional verification steps.
Adding passes, tickets, and loyalty cards
Wallet isn’t limited to payment cards. You can store boarding passes, event tickets, loyalty cards, and coupons. Tap the + sign in Wallet and select Scan Code, Find Passes, or Add Pass to import a pass from a retailer or airline app. Many passes will automatically update with your latest data, such as flight times or gate information. If you have a paper ticket, you can often convert it to a digital Pass via the retailer or airline app.
Keep passes organized by category and pin those you use most for quick access.
Using Wallet on iPhone and Apple Watch
Wallet works across devices. On iPhone, double-press the side button or use the defined gesture to access Apple Pay and nearby passes. On Apple Watch, you can pay with a double-press of the side button and select the card you want. This cross-device capability makes wallets extremely handy when your iPhone isn’t handy.
For travelers and daily commuters, syncing Wallet between iPhone and Apple Watch can save time at checkpoints, gates, and retail terminals.
Managing passes, boarding passes, and keys securely
Security is core to Wallet. Access to cards and passes is gated by Face ID, Touch ID, or your device passcode. If you lose your phone, use Find My iPhone to remotely lock or erase data. Regularly review your Wallet to remove unused cards and passes, and enable two-factor authentication for your Apple ID. Keep your device software up to date to benefit from the latest Wallet security improvements.
Organizing Wallet: sorting, favorites, and quick access
Wallet lets you reorder items for faster access. Long-press a card or pass, then drag to place it higher in the list. Consider creating a set of “Favorites” by keeping your most-used items at the top. For frequent travelers, group passes by trip or airline, and for shoppers, pin loyalty cards to appear near the checkout flow. Regular cleanups keep Wallet lean and efficient.
Privacy and security: Face ID, Passcode, and privacy controls
Wallet security relies on your device’s biometrics and password protection. You can customize which items require authentication, and Apple Pay transactions can work with a quick Face ID/Touch ID check. Be mindful of where you store sensitive passes, and consider removing cards you rarely use from Wallet. In addition, review app privacy settings to limit data sharing related to Wallet usage.
Common scenarios and tips
Travelers use Wallet for boarding passes and transit cards; shoppers rely on Apple Pay to speed up checkout; event-goers show digital tickets; students store campus passes. In each case, ensure passes are up to date, check expiration dates, and maintain a backup method in case of connectivity issues. Keep a clean Wallet by removing expired passes and updating new cards after renewal.
Troubleshooting common issues
If Wallet doesn’t show a pass, try pulling down to refresh, sign out and back into your Apple ID, or check that iCloud Drive is enabled for Wallet. If Apple Pay isn’t working, verify card status with your bank, confirm the card is enabled for Apple Pay, and ensure your iPhone is running a supported iOS version. For Apple Watch users, make sure the watchOS version is compatible and the watch is paired correctly.
Advanced tips and accessibility features
For power users, enable Wallet Shortcuts for quick actions, such as showing a boarding pass with a single gesture. Use VoiceOver and larger text settings to navigate Wallet more comfortably. If you frequently switch cards, set a quick-access method in Control Center. Accessibility options ensure Wallet remains usable for all, including those with vision or dexterity needs.
Next steps and staying updated
As Apple updates Wallet with new features, revisit Settings > Wallet & Apple Pay to review new options, supported passes, and privacy controls. Subscribe to official Apple support channels and Phone Tips Pro updates to learn about changes and best practices for Wallet usage.
Tools & Materials
- iPhone (iOS 17 or later)(Ensure you’re on a supported version to access Wallet features.)
- Apple ID with two-factor authentication(Needed for iCloud sync and secure access.)
- Stable internet connection (Wi-Fi or cellular)(Used for card verification and pass updates.)
- Device passcode / Face ID / Touch ID(Protects Wallet access and payments.)
- Bank-issued card details for Apple Pay(Required to add real cards for payments.)
- Apple Watch (optional)(Optional companion for Wallet and Apple Pay on your wrist.)
- Transit cards or tickets (optional)(Digital versions can be stored for quick access.)
Steps
Estimated time: 15-25 minutes
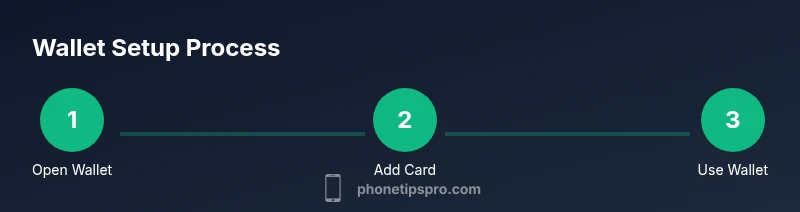
- 1
Open Wallet and sign in
Unlock your iPhone and open the Wallet app. If prompted, sign in with your Apple ID and enable two-factor authentication to secure your wallet data. This initial step prepares the app for adding cards, passes, and tickets.
Tip: Keeping your device unlocked briefly during setup speeds up the process. - 2
Add a credit or debit card for Apple Pay
Tap the + button in Wallet and choose Add Card. You can scan the card or enter details manually, then complete bank verification. Once approved, set a default card if you plan to use Apple Pay often.
Tip: Some banks require additional verification; complete all steps to enable payments. - 3
Store transit passes or boarding passes
Tap + and select Scan Code or Add Pass to import from an airline, transit provider, or event app. Passes update automatically with details like gate changes or boarding times when possible.
Tip: Keep a backup of important passes in the airline or transit app if automatic updates fail. - 4
Use Apple Pay at checkout
When checking out in store or app, double-click the side button and authenticate with Face ID/Touch ID. Hold your iPhone near the reader to complete payment. You can switch cards in Wallet before paying.
Tip: If a reader fails, try again or use the default card for a quick retry. - 5
Show passes at gates or events
Open Wallet and tap the relevant pass to display a scannable code. Present it at entry or at the event/checkpoint. Some venues support automatic ticket capture via the Wallet app.
Tip: Keep passes near the top of Wallet for faster access during busy lines. - 6
Manage and organize Wallet
Edit items by tapping and choosing Remove, or rearrange order by dragging items in Wallet. Regularly prune expired passes and outdated cards to keep everything tidy and fast.
Tip: Create a consistent order (e.g., payments, travel, tickets) for faster access. - 7
Use Wallet on Apple Watch
On your watch, double-press the side button to access Wallet for payments or passes. This is handy when you don’t want to pull out your iPhone.
Tip: Ensure watchOS Wallet settings mirror your iPhone preferences for a seamless experience.
FAQ
What items can I store in Wallet?
Wallet can store payment cards, passes, boarding passes, tickets, and select keys. Availability varies by region and vendor, but the app centralizes many everyday items for quick access.
Wallet stores cards, passes, boarding passes, and tickets, making them easy to access on your iPhone or Apple Watch.
Do I need internet to use Wallet?
You can view offline items stored on your device, such as cards and passes. Some passes and tickets may require online refreshes for updated data like gate changes or status.
Some passes work offline, but others refresh data when connected to the internet.
How do I add a card to Wallet for Apple Pay?
Open Wallet, tap the + sign, and follow on-screen prompts to add a card. Verification may occur via bank app, SMS, or email. After approval, the card is ready for Apple Pay.
Add your card in Wallet, verify with your bank, and you’re set for Apple Pay.
Can I use Wallet for transit passes?
Yes. Transit passes can be stored in Wallet when supported by the transit provider. You can tap to validate your fare or ride, depending on the system at your location.
Wallet can hold transit passes and lets you ride with a tap where supported.
How do I remove a card from Wallet?
Open Wallet, select the card, tap the menu, and choose Remove. You can remove individual cards without affecting others.
Open Wallet, pick the card, remove it, and you’re done.
Is Wallet secure for payments?
Wallet uses device-level security (Face ID, Touch ID, or passcode) and tokenized payment data. Apple Pay transactions don’t share your actual card number with merchants.
Wallet payments are protected by device security and tokenization.
Watch Video
Quick Summary
- Store cards, passes, and tickets in Wallet for quick access.
- Use Apple Pay for fast, secure payments with biometrics.
- Keep Wallet organized and secure with regular cleanups.