How to Compress Videos on iPhone: A Practical Guide
Learn practical methods to shrink iPhone videos without major quality loss, using built-in tools and trusted apps. Step-by-step guidance for Photos, iMovie, Shortcuts, and sharing.

To learn how to compress videos on iPhone, you’ll adjust resolution, bitrate, and encoding using built-in apps and trusted third-party tools. Start with Shortcuts to encode media, or use iMovie for more control, and consider batch-processing apps for multiple clips. Always keep an unedited original before converting.
Why compress videos on iPhone matters
Video takes up space quickly, especially long clips and high-resolution captures. On an iPhone, a few minutes of 4K footage can fill a chunk of storage that you might need for photos, apps, and offline content. Compressing videos helps you share clips over messaging apps, upload to social media, and store more on-device without constantly deleting other data. The art is balancing size and quality for your specific use. If you plan to post a quick montage, you can export at a lighter setting that still looks fine on a phone screen. Always keep an original copy before converting, so you can retry if you want a higher-quality version later. Phone Tips Pro recommends testing a short sample to dial in your preferred settings before processing your entire library.
Understanding video formats and codecs on iPhone
Understanding the basics helps you predict results before you compress. MP4 with H.264 or HEVC (H.265) is common on iPhones. HEVC typically delivers better quality at smaller file sizes but may not be as widely supported on older devices or certain platforms. When you compress, you might switch to a format that preserves compatibility while reducing size. The main levers are resolution, frame rate, bitrate, and codec choice. If you’re sharing clips with friends who use older devices, you may favor H.264 for broad compatibility; for social sharing with newer devices, HEVC can offer savings without dramatic loss.
Built-in methods: Shortcuts Encode Media
Shortcuts is a powerful, built-in way to batch-compress videos without a computer. Create a simple shortcut that uses Encode Media to reduce resolution or adjust quality, then export the result back to Photos. You can run it on a single video or multiple files. The key is selecting a quality level that preserves enough detail for your needs while cutting file size. This method is fast and respects your device’s limits. Tip: test with a short clip first to dial in the exact settings.
Built-in options: iMovie export settings
iMovie on iPhone lets you assemble clips into a project and export at different resolutions and qualities. Use it when you need more control over cuts and transitions, then export at a lower resolution to shrink file size. Export options vary by device, but you’ll typically be able to choose a practical balance between quality and size. If the goal is social sharing with a quick turnaround, 720p or 1080p exports usually fit well and preserve decent detail.
Photos editing and trimming for smaller files
While Photos doesn’t offer a direct one-tap compression, trimming a video to remove unneeded footage reduces duration and size. Cropping or stabilizing doesn’t automatically compress, but combined with subsequent encoding, it can help. After trimming, export the clip using Shortcuts or iMovie to achieve a smaller final file. Remember, the shorter the video, the smaller the final size, all else equal.
Third-party apps for quick compression
There are many apps in the App Store that specialize in video compression. Look for apps that let you control resolution, frame rate, and bitrate, and that offer preview tools so you can compare before finalizing. Read reviews to confirm they preserve color and audio quality. When using any third-party app, ensure you’re comfortable with its privacy terms and how it handles your media. This path is convenient for batch processing and when you need fast results.
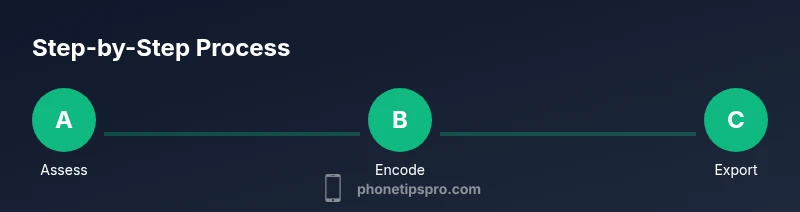
A practical 3-path workflow you can implement today
If you want maximum flexibility, follow this three-path approach: (1) Shortcuts Encode Media for quick batch compression, (2) iMovie for projects needing edits plus compression at export, (3) a third-party app when you need tight control over bitrate and format. Start with a small sample, then apply your chosen path to larger clips. This approach helps you compare outcomes and pick the best balance of size and quality.
Authority sources
For readers who want deeper technical grounding, see: • Apple’s Shortcuts guide for encoding media. • Britannica’s overview of video compression. • Apple Developer AVFoundation documentation on encoding and exporting media. These sources provide reliable context on how encoding decisions impact file sizes and compatibility.
Tools & Materials
- Shortcuts app (built-in)(Encode Media action; batch processing)
- iMovie app (optional)(Quality control; export options)
- Third-party video compression app(Controls for bitrate, resolution, and format)
- Backup copy of originals(Always keep an unedited version)
Steps
Estimated time: 25-40 minutes
- 1
Define target use and clip selection
Decide where the compressed video will be used (social, messaging, or archiving). Select one or more clips that you want to reduce in size, prioritizing those you’ll share most often.
Tip: Start with a short sample clip to test quality and settings. - 2
Back up originals
Create a safe backup of all originals before compression. This ensures you can reprocess if needed without losing the source material.
Tip: Store backups in a separate album or location. - 3
Create a Shortcuts encoding workflow
Open Shortcuts, add the Encode Media action, and set your target quality or resolution. Configure it to output to Photos so you can review results easily.
Tip: Name your shortcut clearly (e.g., VideoCompress_Sample) for reuse. - 4
Run a test on a short clip
Run the shortcut on a tiny sample clip to verify that the resulting file size and quality meet your needs before processing longer videos.
Tip: If the result is too degraded, adjust the quality setting and retry. - 5
Apply the workflow to full videos
Once you’re happy with the test, apply the same Shortcut to the full videos. Monitor for any unexpected changes in color or motion.
Tip: Process in batches to avoid overwhelming storage. - 6
Alternative path: use iMovie
If you need edits along the way, create a project in iMovie and export at a smaller resolution or quality to shrink size.
Tip: Keep transitions subtle to minimize artifacts. - 7
Review and compare results
Compare the compressed video with the original by viewing side-by-side or toggling before/after in Photos.
Tip: Note differences in motion, color, and sharpness. - 8
Share or archive
Share the smaller file to your destination or save it alongside the original in a dedicated folder for easy retrieval.
Tip: Keep a record of the settings used for future reference.
FAQ
Can I compress videos directly in Photos?
Photos does not offer a direct one-tap compression feature. Use Shortcuts or iMovie for compression, and consider trimming to reduce size.
Photos can't compress directly; try Shortcuts or iMovie for compression.
Will compressing affect video quality?
Yes, compression can reduce detail and introduce artifacts. Choose a target balance between size and clarity, and test with short clips first.
Compression can affect quality; test with a short clip to balance size and clarity.
What formats are best after compression?
MP4 with widely supported codecs is recommended for broad compatibility, particularly when sharing to various platforms.
MP4 with a common codec is usually best for compatibility.
Can I batch compress multiple videos at once?
Yes. Shortcuts can encode multiple videos in one go, and some third‑party apps support batch processing as well.
Yes, batch compression is possible with Shortcuts or batch apps.
Is there a risk to my device storage when compressing?
Original videos are preserved if you back them up; compressed copies take additional space but you control where they’re stored.
Back up originals; compressed copies still take space, manage locations.
Do I need a computer to compress videos?
No. You can compress directly on iPhone using Shortcuts, iMovie, or trusted apps.
No computer needed; you can do it on iPhone.
Watch Video
Quick Summary
- Choose the right method for your goal.
- Shortcuts enables batch processing with encoded media.
- iMovie provides more control for edits and export quality.
- Always backup originals before compression.
- Test settings on a short clip first.