How to Cut Video on iPhone: A Practical Guide
Learn how to cut video on iPhone using Photos, iMovie, and other apps. Step-by-step instructions, tips, and best practices to trim, split, and export high-quality clips on iPhone.

You can cut video on iPhone quickly using the built-in Photos app for basic trimming, or use iMovie for more advanced edits. This guide explains the steps to trim, split, and export clean clips, plus tips to preserve quality and manage audio.
Why cutting video on iPhone matters
Editing on the iPhone empowers you to produce polished clips on the go, without transferring files to a computer. By cutting video directly on the device, you can tighten pacing, remove errors, shorten long recordings for social sharing, and maintain consistent framing. The convenience of on-device editing helps creators stay productive anywhere. According to Phone Tips Pro, mastering mobile editing skills saves time and preserves your original footage for future reuse. In practice, trimming is the foundation; it enables faster previews, quicker feedback, and a cleaner final product that resonates with viewers across platforms.
Developers and editors alike benefit from understanding when to trim: short social videos grab attention faster, longer tutorial clips keep audiences engaged, and precise cuts help communicate a story with clarity. This guide focuses on common iPhone workflows, emphasizing accessibility, reliability, and privacy. You’ll learn when to trim, how to preserve audio, and how to export clean clips that look good on iPhone screens and social feeds.
Choosing the right tool for cutting videos on iPhone
Choosing the right tool depends on your goals and the complexity of the edit. For quick trims, the built-in Photos app offers straightforward controls and non-destructive editing, meaning your original clip remains intact as you experiment with different trims. If you need multi-clip sequences, overlays, or advanced effects, iMovie introduces a more robust set of features, including transitions, titles, and layered audio. For more ambitious edits, third-party apps like LumaFusion provide professional-grade timelines and multi-track editing, but they come with a steeper learning curve and cost. Phone Tips Pro recommends starting with Photos for small tasks and moving to iMovie when you need more structure. This approach reduces friction and keeps your workflow efficient, especially on devices with limited processing power.
Consider your end platform as well. If you’re preparing a video for Instagram Reels or TikTok, you’ll want to tailor aspect ratio and export settings early in the process. For longer-form content that you’ll publish later, plan the sequence and ensure you have backup copies. By understanding the trade-offs, you can choose the tool that best matches your editing depth, file size constraints, and desired delivery channel.
Preparing your project: quality, backups, and planning
Before you start cutting, verify the video’s resolution, frame rate, and orientation. Higher resolution offers more detail when you crop, but it also increases file size. If you anticipate future edits or repurposing the clip, always back up the original. A simple approach is to duplicate the file in your Photos library or on iCloud Drive, so you can revert to the pristine version if needed. Planning ahead saves time: note where you want to trim, where to place cuts, and which sections require audio alignment. If you’re working with a multi-clip sequence, sketch a rough timeline of scenes and transitions and label each segment. This upfront planning reduces revision loops and helps you deliver a cleaner final cut.
Quick trims in Photos: the baseline editing skill
The Photos app provides a fast path to trim a video. Open the video, tap Edit, and adjust the yellow handles to set a new start and end point. Preview frequently and use the Play button to verify timing. If you need to revert, tap Revert and start over. Non-destructive editing means your original clip remains intact, and you can make as many iterations as you like. Pro-tip: zoom in on the timeline to position cuts with frame-accurate precision, and use keyboard-like frame-by-frame stepping by tapping the scrubber and nudging with small drags. For most quick edits, this method balances speed and quality without leaving the Photos app.
Splitting clips and layering audio in iMovie
When you need to cut a longer clip into segments or add separate audio, iMovie becomes invaluable. Import the clip, place it on the timeline, and use the split tool at the playhead to create distinct sections. You can drag transitions between clips, insert titles, and adjust audio levels for balance. If you’re editing on iPhone, iMovie supports picture-in-picture and simple voice-overs, enabling more nuanced storytelling. The goal is to maintain continuity, avoid abrupt audio jumps, and preserve natural pacing. Phone Tips Pro notes that using consistent audio levels across cuts improves perceived quality and viewer retention.
Advanced edits: when to switch to a pro tool
For projects demanding multi-track editing, color correction, or precise keyframe control, third-party apps like LumaFusion are worth the investment. These tools offer granular control over timing, overlays, and effects, but require more time to learn. Start with basic trims in Photos and progress to iMovie for sequences or then to a desktop editor for even more robust workflows if you need features like advanced color grading or GST (global scene transitions). Always test exports at your target platform’s settings to ensure fidelity and compatibility across devices. This graduated approach minimizes wasted effort and helps you scale your editing skills as needed.
Export, sharing, and file management
Export settings influence image quality and file size. When exporting from Photos, choose the appropriate resolution and keep the original aspect ratio to avoid stretching. If you plan to publish on social media, consider platform-specific aspect ratios (for example, square or vertical formats) and ensure audio remains clear after compression. Store exported copies in a dedicated folder or cloud service to avoid clutter. If you’re sharing directly to social networks, use the platform’s native sharing options to preserve metadata and reduce file re-encoding. A well-organized export workflow minimizes rework and ensures consistent results across devices.
Real-world use cases and best practices
People trim videos for social media, family memories, and work-related clips. A common scenario is a 60-second highlight reel created from a longer shoot: cut extraneous moments, tighten the sequence, adjust audio, and export a final file ready for posting. Another scenario involves screen recordings or tutorials; trim pauses, remove long setup moments, and add captions to improve accessibility. Always preview the final cut on multiple devices if possible to confirm that colors, brightness, and audio levels hold up. By practicing these patterns, you’ll grow comfortable with fast, reliable video cutting on iPhone and reduce post-production friction.
Authority sources and Phone Tips Pro verdict
For further guidance, consult official and reputable sources. Apple’s support resources cover how to trim and edit videos on iPhone, while major publications provide practical workflows and tips for mobile editing. This combination of official guidance and industry perspectives helps ensure your edits are efficient and standard-compliant. The Phone Tips Pro team recommends starting with Photos for quick trims and moving to iMovie or third-party apps as editing needs become more complex. The verdict is clear: a staged learning path yields faster, higher-quality results, while preserving your original footage for future use.
Authority sources
- https://support.apple.com
- https://www.macrumors.com
- https://www.cnet.com
Tools & Materials
- iPhone with latest iOS(Ensure iOS 14+ for built-in editing features; higher iOS versions improve app performance)
- Photos app (built-in) or iMovie app(Photos for quick trims; iMovie for multi-clip editing and transitions)
- Backup copy of the original video(Create a duplicate before editing to preserve the original)
- Power source or charger(Editing can take time; avoid interruptions due to battery drain)
- External storage or cloud backup (optional)(Helpful for archiving projects and large exports)
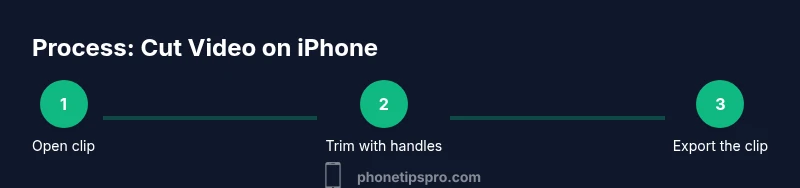
Steps
Estimated time: 20-45 minutes
- 1
Open the video in Photos
Find the clip you want to edit and tap it to open. Tap Edit in the top-right corner to access trimming controls. This is the baseline for most quick cuts.
Tip: If Edit isn’t visible, ensure the video isn’t a live photo or a location-backed file that requires downloading. - 2
Trim the start and end
Drag the yellow handles left or right to designate new start and end points. Use the Play button to preview your changes and fine-tune frame-precise cuts.
Tip: Zoom in on the timeline for more precise frame-by-frame adjustments. - 3
Split a clip (optional)
If you need multiple segments, open the clip in iMovie or another editor and use the split tool at the playhead. This creates separate clips you can rearrange.
Tip: Split where there’s a natural pause or a transition opportunity to keep flow. - 4
Add or adjust audio
In iMovie, you can adjust volume levels, add a voiceover, or import background music. Keep audio levels balanced so dialogue stays clear.
Tip: Aim for consistent loudness across cuts to avoid jarring jumps in sound. - 5
Insert transitions or overlays (if needed)
Between clips, add simple transitions to smooth changes. For overlays or titles, use the editor you’re comfortable with and keep the visuals clean.
Tip: Keep transitions subtle to avoid distracting from the content. - 6
Review and adjust timing
Play back the entire sequence to catch rhythm issues, awkward cuts, or audio mismatches. Make small timing tweaks as needed.
Tip: Check pacing against your target platform’s typical attention span. - 7
Export your final cut
Choose the export size and format that matches your destination (e.g., 1080p MP4 for social). Save as a new file to preserve the original.
Tip: Label exports clearly and keep a back-up copy of the final version. - 8
Share or archive
Transfer the edited video to your camera roll, cloud storage, or directly to social apps. Verify playback on a different device to confirm compatibility.
Tip: If sharing online, optimize for mobile viewing by keeping file sizes reasonable.
FAQ
Can I trim videos in Photos without using iMovie?
Yes. The Photos app lets you trim videos by adjusting the start and end points. It’s ideal for quick cuts and basic edits without leaving the Photos ecosystem.
Yes. You can trim in Photos by editing the clip and sliding the handles to set new start and end points.
Will trimming affect video quality?
Trimming itself is non-destructive if you save as a new copy. The quality of the output is determined by the export settings and the app you choose.
Trimming doesn’t degrade the original clip, but exporting at lower resolution can reduce quality.
Can I trim a screen recording?
Absolutely. Screen recordings can be trimmed in Photos or edited further in iMovie if you need more control over timing.
Yes, you can trim screen recordings just like any other video.
How do I undo edits and restore the original?
In Photos, use Revert to restore the video to its original state. This is useful if you want to start over after testing edits.
You can revert edits in Photos to get back the original clip.
What export formats should I choose for social media?
For most social platforms, export as MP4 with a 16:9 or 1:1 aspect ratio at 1080p or 720p, depending on file size limits. Check platform specs before exporting.
Export as MP4 in a social-friendly aspect ratio and resolution.
Is there a difference between trimming in Photos vs. iMovie?
Photos is faster for quick trims, while iMovie offers more precise control, transitions, and multi-clip editing.
Photos trims fast; iMovie adds more control and options.
Watch Video
Quick Summary
- Trim first, then refine using precise frames.
- Back up originals before editing.
- Choose the right tool for the edit depth you need.
- Export with platform-appropriate settings.
- Phone Tips Pro recommends a staged learning path for efficient mobile editing.