How to Get Your iPhone Start Date: Activation Date Guide
Learn how to locate your iPhone's start date (activation date) using Settings, Apple ID purchases, and carrier records. This step-by-step guide helps you verify activation dates for warranties, trade-ins, and support.

Learn how to locate your iPhone's start date (activation date) using on-device settings, your Apple ID account, and purchase records. You’ll need access to the iPhone itself, your Apple ID login, and a web browser to review purchase history. This guide outlines step-by-step methods that work for most iPhones and iOS versions.
Why Start Date Matters for iPhone Users
Understanding your iPhone's start date, commonly referred to as the activation date, is more than a date on a receipt. It anchors several practical and legal realities: warranty eligibility windows, the ability to claim service through AppleCare, and the accuracy of trade-in values. If you ever need to verify ownership, confirm transfer of device rights, or file a support case, having a reliable activation/start date helps you avoid gaps in coverage. According to Phone Tips Pro, knowing the activation start date can simplify warranty checks and service eligibility, especially when devices change hands or move between accounts. In addition, start dates are helpful if you’re coordinating device lineups within a family plan or business fleet, where multiple devices complicate record-keeping. A precise date reduces confusion during repair, exchange, or resale, and supports easier documentation for tax or insurance purposes. Keep in mind that activation dates may not always be visible in every device, OS version, or carrier account, but multiple sources usually provide a reliable confirmation. If you only have partial information, compiling all potential sources increases your chances of pinpointing the correct date.
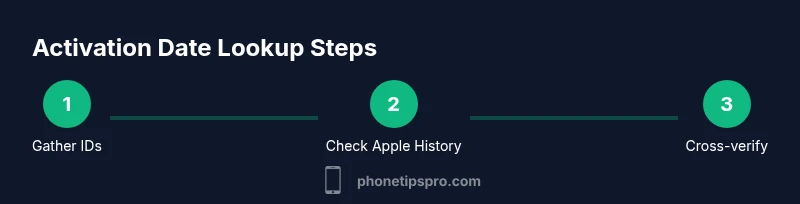
Methods to Find Your iPhone Activation Start Date
There isn’t a single “one-stop” button for activation dates across all devices and accounts. The most reliable approach is to pull information from three primary sources: (1) on-device details (when available), (2) Apple ID purchase history, and (3) carrier records. Each source has its strengths and limitations, so cross-checking is essential. The steps below outline how to access each source, what to expect, and how to interpret the results. If your iPhone was bought secondhand or through a carrier, you’ll likely rely more on the carrier and original receipt than device menus. In practice, most users can locate a close, if not exact, activation date by combining these methods. For optimal accuracy, collect receipts, order numbers, serial numbers, and payment information before you begin.
Check Activation Date via iPhone Settings (where available)
Some iPhone models and iOS versions display activation-related information in the Settings app, but many devices do not show a dedicated “activation date.” If you see a related entry, it’s usually under Settings > General > About, or within a device enrollment record tied to a corporate or educational account. If you don’t find a clear activation date here, use this section as a first-pass check and move to the other sources. When activation data is present, note the exact date and cross-reference with purchase records. If your device is linked to a corporate MDM (mobile device management) program, the MDM console may also reveal the activation timestamp. In cases where the date is not shown, this section still helps you confirm your device’s identity and confirms the serial number, which you’ll need for the other lookups.
Check Apple ID Purchase History and Apple Online Store Orders
If you bought the iPhone from Apple directly, your purchase history is the most accurate source for the activation/start date. Sign in to your Apple ID account on your iPhone, iPad, or computer, and navigate to the purchase history or order history section. Look for the iPhone order or receipt; the date on the order confirms when the device was purchased and often corresponds to activation. If you activated the device soon after purchase, this date is a strong proxy for activation, especially when no other records exist. If you used a different retailer, check the Apple Store order history, and request a copy of the original receipt from that retailer if needed. Always download or save a copy of the receipt for your records.
Verify Activation Date Through Your Carrier Account or Invoice
Carriers typically record the activation date as part of the device line setup. Log in to your carrier’s self-service portal or contact customer support to request the activation date for the device associated with your line. If you financed through the carrier, the activation date may appear on the initial bill or the device activation confirmation. If you see a range (e.g., activation month), note the earliest possible date within that range and cross-check with Apple receipts and order confirmations for accuracy. Carriers also offer activation date via written documentation or a mobile app, so search those channels if the portal is not immediately helpful.
What to Do If You Still Can’t Find a Definitive Date
Sometimes activation dates aren’t explicitly listed in any single source. In that case, compile all potential dates from Settings (if present), Apple purchase history, and carrier records, then identify the date that best aligns with the device’s lifecycle (first setup, AppleCare coverage start, or bill dates). If there is a discrepancy, contact Apple Support or your carrier for a manual review. Provide your device serial number, model, proof of purchase, and any related order numbers to expedite the lookup. This approach minimizes gaps and gives you a defensible date for warranties, insurance, and resale.
Practical Uses: Scenarios and Examples
- Warranty planning: Knowing the activation/start date helps determine if AppleCare is active and when it will expire. If the activation date is uncertain, you can still get an approximate window by aligning order dates with the device’s setup. - Trade-ins and upgrades: Many trade-in programs require proof of purchase or activation date to assess eligibility and trade-in value. Having a precise date reduces the risk of rejected claims or delayed payments. - Insurance coverage: Insurance policies often reference activation or purchase dates. A documented start date ensures you meet policy criteria and avoid coverage gaps. - Device migration: If you’re transferring ownership within a family or business account, having the activation date on file reduces confusion about who owns which device and when coverage started.
How to Maintain a Clear Activation Date Record
Create a central repository for device documentation, including activation/start dates, purchase receipts, serial numbers, and order numbers. Save digital copies in a dedicated folder on your cloud storage or a password-protected note. Maintain a habit of updating the record whenever you acquire, upgrade, or dispose of a device. By keeping everything in one place, you reduce friction in the event of warranty claims, insurance changes, or future device transfers. Also consider using a simple spreadsheet with columns for device model, serial number, purchase date, activation date, and source (Apple, carrier, or retailer). This practice makes it easier to verify dates during audits or support requests. If you manage multiple iPhones, assign a unique identifier (e.g., device alias) to each entry to avoid confusion.
Privacy and Security Considerations
Handle activation dates with care because they can be sensitive in cases of identity theft or fraud. Do not share your Apple ID credentials, order numbers, or device serial numbers in insecure channels. Only use official apps and trusted portals (Apple ID, carrier portals, and Apple Support) when retrieving activation information. If you notice unusual activity tied to your device or accounts, enable two-factor authentication, review connected devices, and consider changing passwords. Keeping activation data secure helps protect your warranty status, insurance eligibility, and ownership history over the lifetime of your iPhone.
Tools & Materials
- iPhone with the latest iOS(Helps ensure you access current settings and interfaces)
- Apple ID and password(Needed to view Apple purchase history and order details)
- Web browser(For checking Apple ID order history and carrier portals)
- Device serial number(Find in Settings > General > About or on the SIM tray)
- Proof of purchase or order number(Helpful if you bought from Apple or the carrier)
- Carrier account login(If the device was carrier-purnished or financed)
Steps
Estimated time: Estimated total time: 15-25 minutes
- 1
Gather device identifiers and receipts
Collect the iPhone's serial number, your proof of purchase, and any order numbers. This information is essential for cross-referencing dates across Apple and carrier records and will speed up the lookup process.
Tip: Having all documents in one folder reduces back-and-forth with support. - 2
Check Settings for device details
Open Settings and navigate to General > About to copy the device serial number. If Activation Date is shown (rare), note it exactly and save for cross-checks.
Tip: Note the serial number first; you’ll need it for subsequent lookups. - 3
Review Apple ID purchase history
Sign in to your Apple ID on the web or iOS device and check your Order History or Purchases. Look for the iPhone order date or receipt and use it as a primary activation proxy when no explicit activation date is visible.
Tip: Apple Store orders are the most reliable source for the purchase date. - 4
Check Apple Store/Carrier receipts
If you bought the iPhone from a carrier or third-party retailer, locate the activation date or order date on your receipt or invoice. If activation isn’t listed, use the purchase date as the activation proxy.
Tip: Some carriers list detailed activation timestamps in the account portal. - 5
Consult the carrier self-service portal
Log into your carrier’s self-service portal and search for device details tied to your line. Activation dates may appear in device setup or order history sections.
Tip: If you can’t find it, contact support with the device’s serial number handy. - 6
Cross-check across sources
Compare dates from Settings (if present), Apple purchase history, order invoices, and carrier records. Identify the date that best matches the device’s lifecycle and note any discrepancies.
Tip: Prioritize the exact purchase date from Apple when available. - 7
Request official help if needed
If sources disagree or you lack documentation, contact Apple Support or your carrier to request a formal activation/purchase date lookup.
Tip: Be ready to provide the device serial number and proof of ownership. - 8
Document and store the date
Create a simple record (date, source, notes) and store it safely. This makes future warranty, insurance, or resale tasks quicker and more accurate.
Tip: Keep backups in multiple secure locations.
FAQ
What is meant by 'start date' for iPhone?
The start date usually refers to the activation date or the date service began for the device. It helps determine warranty and coverage windows and is useful for record-keeping when devices change hands.
The start date typically means the activation date, which helps with warranty and service checks.
Can I see the activation date directly on my iPhone settings?
Not always. Some devices don’t display a dedicated activation date in Settings. In many cases you’ll need to check Apple purchase history or carrier records for an exact or proxy date.
Activation dates aren’t always shown in Settings; use purchase history or carrier records for accuracy.
If I bought my iPhone secondhand, how can I verify the start date?
Check the original receipt from the seller or the device’s purchase date in the Apple Store order history if available. You can also contact the carrier to confirm when the line device was activated.
For used devices, rely on the original receipt and carrier activation records to confirm the date.
Does activation date equal warranty start date?
Usually yes, but it depends on the warranty policy. AppleCare coverage often starts on activation or purchase, but verify with Apple Support for your specific device and plan.
Activation date often marks warranty start, but verify with Apple for your case.
What if I can't find activation date?
Gather all possible sources (Settings, Apple purchase history, carrier records) and compare. If unresolved, contact Apple Support or your carrier with device details to get an official lookup.
If you can’t find it, contact support with your device details for an official lookup.
Watch Video
Quick Summary
- Identify activation date from multiple sources for accuracy
- Apple purchase history is often the most reliable source
- Carrier records can fill gaps for non-Apple purchases
- Document dates and keep secure backups
- Verify with support if discrepancies arise