Locking Apps on iPhone: A Practical Guide
Learn practical steps to lock apps on iPhone using Guided Access, Screen Time, and in-app locks. Discover what’s possible, what isn’t, and how to keep sensitive data safer on your iPhone.

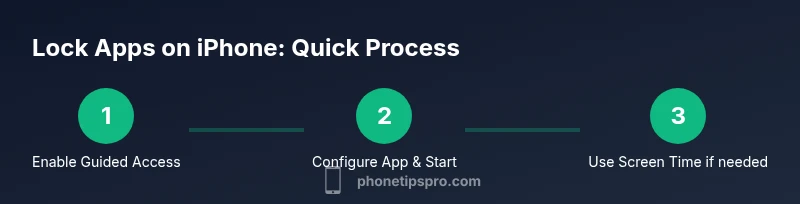
You can’t lock every iPhone app with a single switch, but you can protect apps using Guided Access for a temporary lock, Screen Time for usage limits, and in-app locks where available. Start by enabling Guided Access and Screen Time, then configure per-app options and test with a quick session.
How to approach app locking on iPhone
Locking apps on iPhone isn’t about a single, system-wide switch. The Phone Tips Pro team explains that you have three realistic pathways: (1) Guided Access for temporary, app-specific locking; (2) Screen Time to cap usage and create barriers to access; and (3) built-in in-app locks offered by some apps themselves. Understanding these options helps you tailor privacy protections to your daily needs. In this guide we’ll compare each method, show exact setup steps, and discuss what each approach can and cannot protect. By the end, you’ll have a practical plan for how to app lock on iPhone that fits your usage and security expectations.
What can you realistically lock on iPhone?
On iPhone, there is no universal per-app lock switch that covers every app. However, you can achieve meaningful protection through:
- In-app locks: Some apps (notes, password managers, banking apps) let you lock individual items with a passcode, Face ID, or Touch ID.
- Guided Access: A temporary lock to stay within a single app, ideal for public sharing or demonstrations.
- Screen Time: Per-app limits and restrictions that prevent uninterrupted access after a set period or during certain hours.
- Combined use: Pair in-app locks with Guided Access or Screen Time for layered privacy.
Note: Third-party lock apps cannot lock other apps on iPhone due to iOS sandboxing.
Guided Access: temporary lock to a single app
Guided Access keeps the device within one app and restricts what the user can do inside that app. It’s ideal when you loan your device or want to focus on a task without accidental exits. To use Guided Access, you enable it in Settings > Accessibility > Guided Access and set a passcode. Then start Guided Access from within the target app by triple-clicking the side or home button and configuring the available controls.
When you’re ready to exit, triple-click again and enter the passcode (or use Face ID if configured). This method doesn’t lock the device permanently; it’s a temporary session with enforced app boundaries.
Screen Time: app usage limits and restrictions
Screen Time lets you set app limits and downtime schedules to restrict access after a defined period. This isn’t a true lock, but it creates a barrier that requires a passcode to override. It’s useful for parental controls, personal productivity, or any situation where you want to reduce friction in accessing distractible apps. You can customize allowlists, set time windows, and require a Screen Time passcode to extend access.
In-app locks: built-in privacy controls
Many apps offer their own lock mechanisms, such as Notes, Banking apps, and some password managers. For Notes, you can lock a note with a password, Face ID, or Touch ID. Banking and password apps frequently include biometric protection and device-bound authentication. When possible, enable in-app locks in addition to Guided Access or Screen Time for layered security. The combination usually provides the strongest privacy without needing a separate third-party tool.
Practical setup tips and common pitfalls
To maximize effectiveness, start by identifying which apps you want protected and choose a primary method (Guided Access or Screen Time) as the baseline. Add any relevant in-app locks for critical items (like notes or password vaults). Test your configuration in a controlled setting before relying on it in daily life. Remember that no method is perfect—if you’re away from your device, someone could still access unprotected data through in-app items or by simply restarting the device, so combine strategies for best results.
Scope, limitations, and best practices
Acknowledge the limitations: iOS does not offer a true, system-wide app lock. Per-app locks depend on the app’s own security features; Guided Access is temporary; Screen Time blocks are helpful but can be bypassed by someone with knowledge of the passcode. Best practices include enabling Face ID/Touch ID where possible, setting unique passcodes for Screen Time and guided sessions, and keeping your device software up to date. For sensitive scenarios, use a combination of a built-in in-app lock plus Guided Access or Screen Time to reduce risk.
Authority sources
For further reading, you can consult the following authoritative sources:
- Apple Support: Guided Access overview and setup guidance
- Apple Support: Using Screen Time on iPhone
- Apple Support: Notes app Lock Note feature and workflow
These resources explain the official steps and limitations of iOS privacy features and provide vetted guidance that aligns with standard iPhone usage.
Troubleshooting common issues
If Guided Access won’t start, ensure the feature is enabled in Settings > Accessibility > Guided Access and that you’ve created a Guided Access passcode. If ending a session is slow, confirm you’re using the correct passcode and try exiting from the app’s home or switcher as appropriate. For Screen Time, verify that the app limit is active and that you’re using the correct Screen Time passcode. Regularly updating iOS can fix many minor glitches that affect these features.
Tools & Materials
- iPhone (iOS 14+ recommended)(Keep device updated for best compatibility with Guided Access and Screen Time.)
- Screen Time passcode(Use a distinct passcode separate from your device unlock code.)
- Face ID or Touch ID configured(Biometrics speeds up authentication during lock sessions.)
- Target apps list(If you plan to enforce restrictions, note which apps to focus on.)
- In-app lock capability (Notes, banking apps, password managers)(Enable per-app security when available.)
Steps
Estimated time: 15-25 minutes
- 1
Enable Guided Access and set a passcode
Open Settings, go to Accessibility, select Guided Access, and turn it on. Create a dedicated passcode for Guided Access to end sessions securely. This step is essential for safe exits and prevents accidental termination by others.
Tip: Choose a passcode that is memorable but not easy to guess; consider different numbers from your unlock code. - 2
Choose your target app
Open the app you want to lock for the session. Guided Access is app-specific, so ensure you’ve chosen the correct one before starting.
Tip: If you plan to lock multiple apps, repeat steps for each app or consider Screen Time as a broader control. - 3
Start Guided Access
Within the app, triple-click the side or home button to enter Guided Access. Tap Start in the bottom-right corner after configuring the allowed controls.
Tip: If triple-click doesn’t work, ensure accessibility shortcuts are enabled and you’ve granted the necessary permissions. - 4
Adjust allowed controls
Use the on-screen toggles to disable touch, keyboard, or motion as needed. You can also anchor a visible area to prevent accidental taps.
Tip: Disable hardware buttons only if you don’t need device navigation during the session. - 5
End the session
Triple-click again and enter the Guided Access passcode (or use Face ID if configured) to exit. Return to the normal home screen.
Tip: If the device is shared, ensure the passcode is not written down in obvious places. - 6
Test the setup
Run a quick test by performing typical actions inside the app to confirm the boundaries are correctly enforced.
Tip: Try exiting the app via standard gestures to verify the lock is effective.
FAQ
Can I lock all apps on iPhone with one setting?
No single switch locks every app on iPhone. Use a combination of Guided Access for individual sessions and Screen Time for broader restrictions. In-app locks can provide added protection where available.
No single switch locks all apps; use Guided Access and Screen Time together, plus any in-app locks where available.
How do I enable Guided Access on iPhone?
Enable Guided Access in Settings > Accessibility > Guided Access, then set a dedicated passcode. Open the target app, triple-click the side or home button, and follow prompts to start.
Enable Guided Access in Settings > Accessibility > Guided Access, set a passcode, then start from the app with a triple-click.
Is Screen Time enough to protect apps?
Screen Time provides usage limits and downtime, which acts as a barrier but is not a strict lock. It’s best used with other methods for stronger protection.
Screen Time creates limits, but it isn’t a strict lock; combine with Guided Access or in-app locks for better protection.
Do third-party apps offer full app-lock features on iPhone?
No. iOS restricts third-party apps from locking other apps. Rely on built-in features like Guided Access, Screen Time, and per-app locks.
Third-party lock apps can’t lock other apps on iPhone; use built-in tools instead.
What about data security if someone resets my device?
A device reset removes some local restrictions. Always enable a strong device passcode, biometric locks, and ensure critical data is protected within apps that offer their own locks.
Device reset can bypass some setup; protect data with strong device security and in-app locks.
Watch Video
Quick Summary
- Understand there is no universal iPhone app lock
- Use Guided Access for temporary app locks
- Leverage Screen Time for broader usage restrictions
- Enable in-app locks where offered for stronger protection
- Always test configurations in safe conditions