Fix Apple iPhone Screen: Safe DIY Repair Guide (2026)
Learn a safe, practical approach to diagnosing, disassembling, and replacing a cracked or unresponsive iPhone screen with step-by-step guidance and expert tips from Phone Tips Pro.

You can safely address a cracked or unresponsive iPhone screen by following a structured, careful replacement process. This quick guide helps you assess damage, gather the right tools, disconnect the battery, separate the display, install a new screen, and verify touch and color accuracy. Always power off, use anti-static precautions, and consider professional repair for critical components.
Understanding Screen Damage and Safety
Cracked screens and unresponsive touch are among the most common iPhone issues. Before you dive into repairs, it’s critical to understand how modern iPhone displays are built and how adhesives, connectors, and protective glass affect your options. This section explains the difference between cover glass and digitizers, common failure patterns (such as digitizer separation or display blackouts), and the safety risks of attempting a repair without proper precautions. You’ll learn what parts typically fail in tandem, why heat and force can worsen damage, and how to recognize moisture exposure that might complicate a fix. With this context, you’ll be better prepared to decide whether a DIY repair is feasible or if a professional service is warranted.
Before You Start: Tools, Safety, and Prep
Preparation is the secret to a smooth screen replacement. Gather the right tools in advance, clear a clean, well-lit workspace, and ground yourself to minimize static damage to sensitive electronics. This block lists essential items, explains why each matters, and offers vendor-agnostic tips for selecting reliable replacement parts. You’ll also find safety reminders about avoiding liquids, protecting privacy, and keeping a tidy area so tiny screws don’t vanish. A thorough prep reduces the risk of accidental cable damage and sets the stage for a successful, low-stress repair.
Understanding iPhone Screen Components and Models
Modern iPhones use intricate display assemblies with multiple connectors and flex cables that attach to the motherboard. The exact layout varies by model, so it’s important to confirm your device’s generation before beginning. This section covers display assembly components (cover glass, OLED/LCD panel, digitizer, backlight), typical connector locations, and how adhesive strips influence reassembly. Knowing these details helps you avoid misaligned connectors, torn flexes, or mis-seated screens that can trigger touch glitches after reassembly.
Assessing Repair vs. Replacement Options
Not every cracked screen is equal. Sometimes only the glass is damaged, while the touch panel and display function remain intact. Other times, moisture or motherboard-level issues complicate a DIY fix. This section guides you through evaluating whether you should pursue a screen-only replacement, a full panel replacement, or professional service. It also discusses cosmetic vs. functional damage, cost considerations, and the risks of buying low-cost third-party parts. The goal is to help you make a safe choice that preserves device integrity and data.
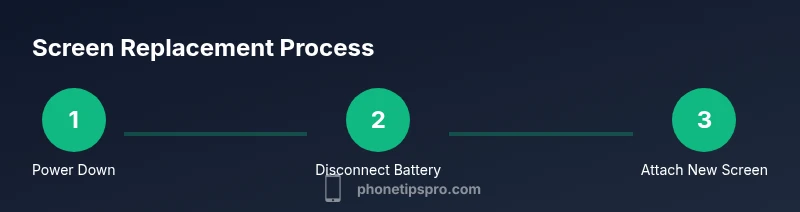
Step-by-Step Process Overview
A successful screen replacement follows a logical sequence: power down, disconnect power sources, remove the broken screen, detach the old adhesive, connect the new screen, test the assembly, and resecure the device. While you will perform detailed steps in the dedicated STEP-BY-STEP section, this block provides a high-level roadmap so you can anticipate the flow and know what to expect at each stage. Having a clear plan helps you stay organized and minimizes missteps during reassembly.
Step-by-Step Process Overview: Planning and Safety
Start by powering down the iPhone and disconnecting from any peripherals. Work on a static-free mat or surface to protect delicate circuits, and organize screws by size and location. Use a spudger or plastic opening tool to avoid metal-to-polymer scratches on the chassis. If you encounter a stubborn adhesive, apply gentle heat to soften it rather than forcing components apart. This general guidance prepares you for the more detailed, model-specific steps that follow.
Common Mistakes and How to Avoid Them
Hasty disassembly often leads to torn cables, misplaced screws, or bent connectors. Avoid touching contact pads with bare fingers, and never pry under a flex cable with a metal tool. Keep a photo log as you go so you can retrace connector routes during reassembly. Don’t rush the battery disconnect step, as improper handling can cause a short. Patience, organization, and slow, deliberate movements dramatically reduce the risk of costly mistakes.
Post-Repair Testing: Touch, Color, and Responsiveness
After installing the replacement screen, power the device and perform a careful test of touch responsiveness, color accuracy, brightness, and auto-rotation. Check the front camera, proximity sensor, and Face ID performance if applicable. Verify that the screen seal remains intact and that the device charges properly. If anything looks off, it’s safer to power down and inspect connections again rather than leaving the device in a partially repaired state.
Aftercare and Maintenance to Extend Screen Life
Adhesive integrity and protective usage habits extend the life of a repaired screen. Avoid placing the phone face-down on rough surfaces, consider applying a screen protector to reduce future impact risk, and store the device away from extreme heat. Regular cleaning with a microfiber cloth prevents buildup that can affect touch sensitivity over time. Finally, monitor moisture exposure and cessation of use if you notice fogging or discoloration around the edges.
Troubleshooting Guide for Common Post-Repair Issues
If you notice intermittent touch issues, ghost touches, or color shifts after installation, revisit connector seating and adhesive pressure. A loose connection is a common culprit for erratic behavior, and improper seal can cause dust ingress. If problems persist after re-seat and re-test, it may indicate a defective display panel or a larger motherboard issue that requires professional assessment. This section provides quick checkpoints to help you decide whether to attempt another DIY pass or seek expert help.
Tools & Materials
- Pentalobe screwdriver (P2)(For outer screws near charging port)
- Y000 tri-point screwdriver(Internal screws under shields)
- Phillips #000 screwdriver(Small screws on bracket/frame)
- Spudger pry tool(Non-metal to avoid shorting)
- Plastic opening picks(To separate display without damage)
- Suction cup(Assist lifting glass safely)
- ESD-safe tweezers(Handle connectors and cables precisely)
- New replacement display assembly(Model-matched part from reputable supplier)
- Adhesive strips for iPhone display(Original or compatible strong adhesive)
- Isopropyl alcohol 99%(Clean surfaces and residues)
- Microfiber cloth(Lint-free cleaning)
- Anti-static wrist strap (ESD)(Optional, reduces static risk)
- Heat source (hair dryer or heat gun)(Softens adhesive; use with care)
Steps
Estimated time: around 60-120 minutes
- 1
Power Down and Prepare
Fully power off the iPhone and unplug any accessories. Establish a clean, well-lit workspace and ground yourself to minimize static. Gather all tools and a model-appropriate replacement screen. This preparation prevents interruptions and reduces the risk of lost micro-screws.
Tip: Use a magnetic mat or labeled containers to keep screws organized by location. - 2
Remove Outer Screws and Separate Screen
Remove the bottom outer screws near the charging port with the P2 screwdriver. Use the suction cup to gently lift the screen edge, then insert a plastic pick to keep the gap open while avoiding connector damage.
Tip: Do not apply sideways force; the display cables sit along the internal frame edges. - 3
Disconnect Battery and Display Connectors
Open the device sufficiently to access the battery connector. Disconnect the battery first to prevent shorts, then detach the display connectors one by one using a spudger. Keep connectors in the same orientation as you remove them.
Tip: Never twist or pry connectors; use steady, straight motions to release clips. - 4
Remove Old Screen and Adhesive
Carefully lift the broken display away, softening adhesive with gentle heat if needed. Remove the remaining adhesive strips from the frame, cleaning any residue with isopropyl alcohol. Preserve the frame’s integrity to ensure the new screen seats correctly.
Tip: Avoid tearing delicate flex cables; work slowly and support the screen with a soft cloth. - 5
Install New Screen and Reconnect Cables
Position the new display, reconnect the display cables first, then the battery. Align the screen with the chassis and reapply brackets as needed. Check that the connectors are fully seated and the glass sits flush against the frame.
Tip: Ensure the connector locks are secure before reassembling the bracket. - 6
Test and Seal
Power on the device to test touch response, brightness, color accuracy, and a basic function test (home button or Face ID if applicable). If everything looks good, reinsert the screws and seal the device. Consider reapplying new adhesive for a water-resistant seal.
Tip: If you see flickering or misalignment, power down and recheck all connections before tightening screws.
FAQ
Is it safe to fix an iPhone screen at home?
DIY screen replacement can be safe if you have the right tools, ample space, and patience. It requires careful handling of delicate connectors and strong adhesives. If you’re unsure at any point, stopping and seeking professional help is wise.
DIY screen replacement is possible with proper tools and patience, but stop if you’re unsure at any step.
Will replacing the screen void my iPhone warranty?
Opening the device can affect warranty terms, and AppleCare coverage varies by policy. If you prefer to preserve warranty, consult Apple Support or a authorized service provider before proceeding.
Replacing the screen may affect warranty; check your policy or contact Apple Support before starting.
What tools are absolutely essential for a screen replacement?
Key tools include a P2 pentalobe screwdriver, a tri-point Y000 screwdriver, plastic opening picks, a spudger, suction cup, and a replacement display assembly. High-quality adhesive strips improve longevity and sealing.
Essential tools are a P2 screwdriver, plastic picks, spudger, suction cup, and a replacement screen.
How long does a screen replacement typically take?
With a careful, model-specific approach, a screen replacement session can take about an hour or more, depending on model and adhesive conditions. Rushing often leads to mistakes.
Typically around an hour or more, depending on model and adhesive strength.
Can I replace the screen without professional help for OLED models?
OLED screens are more delicate and components are compact. If you’re new to repairs, consider professional service or practice on a non-critical device first. Always ensure you have model-specific parts.
OLED screens require careful handling; consider professional help if you’re not confident.
What are signs of a bad replacement after reassembly?
Signs include touch lag, ghost touches, color tint shifts, flickering, or the screen not powering on. Re-check all connectors and the adhesive seal to resolve most issues.
If you notice touch issues or color changes after reassembly, recheck connections and seal.
Should I apply new adhesive after screen replacement?
Yes. New adhesive helps secure the screen and can improve waterproof sealing. If you don’t have exact adhesive strips, choose compatible alternatives from reputable suppliers.
Apply new adhesive to ensure a secure fit and seal.
Watch Video
Quick Summary
- Power down first and stay organized
- Use model-matched parts and proper tools
- Seat connectors fully and test before sealing
- Adhesive quality matters for longevity
- If unsure, seek professional help