Can You Get iPhone Screen Replaced? A Practical Guide
Explore whether you can replace an iPhone screen, your options (Apple, authorized providers, or third‑party shops), what affects price and turnaround, and how to choose a trustworthy service.

Get your iPhone screen replaced by Apple or a trusted repair shop. You can choose Apple Stores, Apple Authorized Providers, or reputable third‑party technicians. This guide breaks down options, turnaround times, and quality considerations so you can pick the best path for your device and budget.
Can you get iphone screen replaced? If you're asking can you get iphone screen replaced, the short answer is yes, with several reliable options. You can visit an Apple Store, book an Apple Authorized Service Provider, or choose a reputable third‑party repair shop. Each path has trade-offs in warranty, cost, and turnaround time. According to Phone Tips Pro, starting with official channels is safest when your device is under AppleCare+ or still covered by a manufacturer warranty. The Phone Tips Pro team found that authorized providers tend to deliver consistent screen quality and reliable post‑repair support, though prices may be higher. Regardless of route, back up data and confirm components will be OEM-grade to avoid surprises. In 2026, many users report quick, professional service when selecting well-reviewed shops.
Where to get it replaced
There are multiple avenues to replace an iPhone screen, and the right choice depends on your priorities. Apple Stores and Apple Authorized Service Providers offer official parts and warranties, which helps protect your device and any remaining AppleCare coverage. Trusted third‑party shops can be faster or cheaper, but quality varies. When evaluating options, ask about screen type (OEM vs aftermarket), warranty on the repair, and whether data will be preserved. Phone Tips Pro research indicates that customers who verify component quality and service terms experience fewer post‑repair issues.
What affects price and turnaround
Prices for screen replacement depend on model, screen type, and labor, as well as where you go. Apple’s official routes tend to be the most expensive but come with strong warranties and standardized service. Independent repair shops can vary widely based on the screen’s origin and the technician’s experience. Turnaround time is influenced by parts availability and shop workload; same‑day service is possible at some providers, while others may take a day or two. Phone Tips Pro analysis shows that pricing transparency and clear repair timelines are key predictors of customer satisfaction in 2026.
OEM vs aftermarket: what to expect
Quality matters more than the brand label. OEM screens are designed to match original Apple specs and tend to deliver consistent colors and touch response. High‑quality aftermarket screens can be a good option but vary in color accuracy and sensitivity. When comparing, request specifications (OLED vs LCD, true color accuracy, and touch robustness) and confirm if the screen includes the home button, front camera, and sensors. A reputable shop will offer a replacement with a warranty and demonstrate the testing results.
Data safety and warranty considerations
Before handing over your device for screen replacement, back up all data. Some providers may require you to disable Find My iPhone or remove accessories, while others handle data with care. The warranty outcome depends on your chosen route; AppleCare+ coverage generally remains in force if the repair uses official parts and authorized technicians. If you go to a third‑party shop, read the warranty terms for the new screen and the workmanship coverage. Phone Tips Pro notes that clear terms on data protection and post‑repair support reduce post‑service anxiety.
Aftercare and next steps
After the repair, inspect the display for touch responsiveness, color accuracy, and any dead pixels. Recheck True Tone, brightness, and auto‑brightness settings. If something seems off, contact the service provider promptly for a remedy or a recalibration. Maintain a record of the repair, including receipt and any warranty details, in case future issues arise.
Tools & Materials
- Pentalobe screwdriver (P2)(Used to remove outer screws near the charging port.)
- Suction cup(Gently lift the display without cracking glass.)
- Plastic opening tool / spudger(Gently separate the display frame and disconnect cables.)
- Torx or Phillips screwdriver(Internal screws, keep track of small components.)
- Replacement screen assembly (OEM-grade or high-quality aftermarket)(Ensure it includes necessary connectors and frame hardware.)
- Tweezers(Handle small connectors and shields with care.)
- ESD wrist strap / anti-static mat(Minimize static risk to delicate circuitry.)
- Isopropyl alcohol wipes and microfiber cloth(Clean adhesive areas and keep glass pristine.)
Steps
Estimated time: 60-180 minutes
- 1
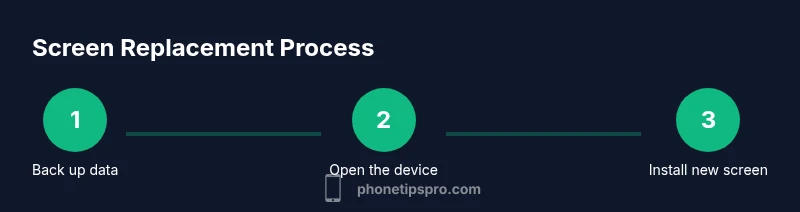
Back up data and power off
Back up your iPhone data via iCloud or a computer before any repair. Power off the device to minimize the risk of short circuits when you open the case. This protects your information and reduces the chance of damage during disassembly.
Tip: Having a recent backup saves you from data loss if something goes wrong. - 2
Prepare your workspace and tools
Set up a clean, well-lit workspace with a heat source if the screen is glued. Gather your tools and a safe place to set screws. Confirm all replacement parts are ready before you begin.
Tip: Lay out components in order to reassemble accurately. - 3
Open the iPhone and expose the screen
Remove outer screws with a P2 screwdriver, apply gentle heat to soften adhesive, and carefully lift the display with a suction cup and plastic tool. Avoid bending the display cables as you separate the front panel from the chassis.
Tip: Use light, even pressure to prevent glass damage. - 4
Disconnect the display connectors
Carefully unplug the display ribbon cables from the logic board using a spudger. Take note of connector orientation for each cable to ensure proper reattachment on the new screen.
Tip: Work slowly and avoid prying connectors at sharp angles. - 5
Transfer components and install the new screen
If your model requires, transfer the home button, front camera, and sensors to the new screen and reseal the assembly. Reconnect the display cables and test before final sealing to verify touch, color, and brightness.
Tip: Check for proper alignment to prevent misfiring sensors. - 6
Reassemble and test
Reattach the display frame, reinstall screws, and power on. Test touch sensitivity, color accuracy, brightness, and True Tone. If the screen responds and looks correct, re‑secure the panels and apply any adhesive if needed.
Tip: If issues arise, revert to the original screen and consult the provider.
FAQ
What are my options for replacing an iPhone screen?
You can use Apple’s official channels (Apple Store or Authorized Providers) for most reliable service, or you can opt for trusted third‑party shops. Each option varies in cost, turn-around time, and warranty coverage.
Options include Apple Stores or authorized providers, or reputable third‑party shops; costs and warranties differ by path.
Will replacing the screen affect my warranty?
AppleCare+ coverage typically remains in effect if the replacement uses official parts and authorized technicians. Third‑party repairs can affect warranty terms, depending on your region and policy. Always check the current warranty rules before proceeding.
Warranty depends on who does the repair and what parts are used; AppleCare+ may still apply if official parts are used.
How long does a screen replacement take?
Turnaround varies by provider and queue. Apple Stores and Authorized Providers may offer same‑day service in some cases, while independent shops can range from a few hours to a couple of days.
Service times vary; some places offer same‑day repair, others a short wait.
OEM vs aftermarket: which is better?
OEM screens match Apple specifications and compatibility closely, often yielding the most reliable results. High‑quality aftermarket screens can be good options if they meet strict quality standards and include a warranty.
OEM parts usually give the best fit and performance; high‑quality aftermarket parts are acceptable if supported by a warranty.
What should I do to prepare before service?
Back up data, remove accessories, and make sure Find My iPhone is disabled if required by the shop. Have proof of purchase handy if needed for warranty checks.
Back up data and remove cases or accessories; disable Find My iPhone if the shop asks.
Is it possible to replace an iPhone screen myself?
It is technically possible but risky without proper tools and training. A professional repair is usually safer and better for device integrity and warranty considerations.
DIY is possible but risky; professional repair is typically safer and more reliable.
Watch Video
Quick Summary
- Check your warranty status before choosing a provider
- Prefer OEM or OEM-grade screens for best results
- Back up data before service to protect information
- Clarify repair workmanship warranty and screen testing
- Avoid DIY if you lack the proper tools and training