iphone fix: Step-by-step guide to common iPhone problems
Learn how to diagnose and fix common iPhone problems with a practical, step-by-step guide. Back up data, troubleshoot software and hardware, and know when to seek professional help.

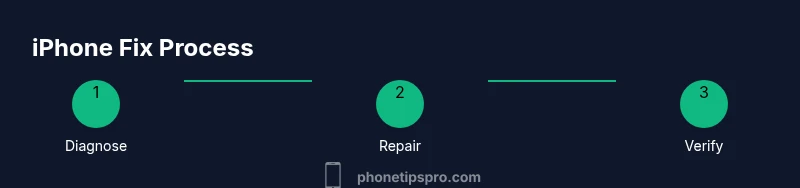
Want to fix common iPhone problems quickly? This guide walks you through a practical, step-by-step approach: identify the issue, back up your data, perform safe software resets and updates, and know when hardware repair is needed. Follow the steps for reliable results without risking data loss. It's designed for iPhone fix at home, with safety first, and clear next steps.
What iphone fix covers and why fix at home\n\nWhen people say "iphone fix", they usually mean software glitches, battery quirks, or minor hardware issues that don’t require a full screen replacement. This guide helps iPhone users diagnose and resolve common problems using safe, at-home steps. According to Phone Tips Pro, the majority of everyday issues can be addressed with built-in settings, resets, and software updates—avoiding unnecessary trips to a repair shop. The goal is to minimize downtime, protect your data, and keep your device running smoothly. Whether your iPhone is lagging, draining battery quickly, overheating, or freezing, a structured approach reduces guesswork and empowers you to take control. By the end, you’ll have a practical checklist you can follow anytime you encounter trouble.
At-Home Diagnostics: Isolate the Problem\n\nStart by careful observation and reproducing the issue when possible. Create a short incident log: note when the problem starts, how often it occurs, and any recent changes (new apps, iOS updates, battery replacements). Check basic health indicators in Settings > Battery (drain patterns), Settings > General > About (hardware/storage warnings), and Settings > Wi‑Fi (connection stability). If you can pin down a trigger—like “the phone heats up after using GPS”—you’ll can target fixes more accurately. Phone Tips Pro recommends software-first checks before touching hardware, since software faults are far more common than physical faults. After logging symptoms, proceed with safe software steps before hardware adjustments.
Reboot, Reset, and Update: The First Line of Defense\n\nThese actions fix the majority of nagging issues without disassembly: reboot, reset, and update. Force restart your model if the screen is unresponsive (iPhone 8 and later: press and release Volume Up, Volume Down, then hold the side button until the Apple logo appears). Next, reset network settings if connectivity is flaky (Settings > General > Transfer or Reset iPhone > Reset Network Settings). Then install any available iOS updates (Settings > General > Software Update). If you use apps with cached data, consider clearing their caches or reinstalling them. Each step reduces software corruption, which is a common source of problems.
Battery & Charging Issues: Step-by-Step Fixes\n\nBattery problems show up as rapid drain, heat, or the phone not charging. Start by checking Battery Health in Settings > Battery > Battery Health to assess peak capacity. Inspect the charging cable and port for debris; clean gently with a soft brush or toothpick (careful not to damage connectors). If the device charges slowly, try a different charger and cable. Calibrate the battery by fully charging to 100%, then discharging to 0% once every few months for older devices. If health drops below 80%, plan for a replacement sooner rather than later. For devices under warranty, contact Apple Support before attempting expensive repairs.
Connectivity Woes: Wi‑Fi, Bluetooth, and Cellular\n\nUnreliable connections are a common annoyance. Start by forgetting the Wi‑Fi network and reconnecting, then reset network settings (Settings > General > Transfer or Reset iPhone > Reset Network Settings). Update carrier settings if prompted and ensure you’re on a compatible plan. For Bluetooth, remove paired devices you no longer use and re-pair. If cellular data is inconsistent, toggle Airplane Mode on/off, check for a software update, and inspect SIM status (or eSIM activation). In many cases, these steps restore stable, reliable connectivity without hardware changes.
Display and Touchscreen Problems\n\nA stubborn unresponsive screen or display flicker is frustrating but often software-related. Start by forcing a restart, then ensure Auto-Brightness isn’t causing seemingly inconsistent behavior. Check for app conflicts by booting in Safe Mode (where available) or by removing recently installed apps. If the screen remains unresponsive, verify a recent iOS update didn’t introduce a bug and consider reinstalling the OS via recovery mode. Always back up before any OS reinstall.
Camera and Microphone Anomalies\n\nCamera issues range from blurry photos to camera app crashes and noisy audio. Ensure camera access is allowed in Settings > Privacy > Camera and that the app is updated. Clear the camera lens and avoid protective cases that obscure light. If video or audio quality remains poor, test with another app (Voice Memos) to identify whether the issue is app-specific or device-wide. A reset or OS update often resolves software-induced camera glitches.
Software Cleanup & App Management\n\nCluttered storage or misbehaving apps can trigger slowdowns. Start by checking storage in Settings > General > iPhone Storage and removing unused apps or offloading data. Reinstall problematic apps to clear corrupted caches. Disable unnecessary background refreshes for apps you don’t need to keep active. Regularly reviewing apps ensures you won’t hit performance bottlenecks when you need the device most.
Data Safety and Backup Strategy\n\nBacking up is the backbone of any iPhone fix. Use iCloud or a computer-based backup to preserve your photos, messages, and app data before making significant changes. For macOS users, use Finder to create an encrypted backup to protect sensitive data. Verify backups by attempting a restoration on a spare device or after a clean install. Having a solid backup plan makes it safer to test fixes like factory reset or OS reinstall.
When to Seek Professional Help\n\nIf fixes above don’t solve the problem or if you hear unusual sounds, see screen damage, or suspect water exposure, consult Apple Support or visit an authorized service provider. Warranty or AppleCare coverage can reduce repair costs, and technicians can diagnose hardware faults that you can’t safely address at home. For battery or charging issues, professional replacement is recommended when you’re beyond your comfort with hardware tasks.
Authority Sources and Further Reading\n\n- Apple Support: https://support.apple.com\n- The Verge: https://www.theverge.com\n- CNET: https://www.cnet.com\nThese sources offer official guidance and independent troubleshooting insights that complement this guide.
Quick-Start Cheat Sheet\n\n1) Back up data. 2) Force restart if unresponsive. 3) Update iOS. 4) Reset network settings. 5) Check Battery Health. 6) Reinstall problematic apps. 7) If issues persist, factory reset only after a fresh backup. 8) Contact Apple Support for hardware concerns.
Tools & Materials
- Soft microfiber cloth(For cleaning and screen-safe handling)
- Spudger tool(Non-metal tool to safely pry components)
- Plastic opening tool(Gently separate seals without damage)
- Pentalobe screwdriver(Used for iPhone exterior screws)
- Phillips screwdriver(Used for internal screws in some models)
- Official Apple USB-C to Lightning cable(Test charger and data connection)
Steps
Estimated time: 60-120 minutes
- 1
Back up before you begin
Begin with a complete backup to protect your data. Use iCloud or Finder/iTunes on your computer to save Photos, Messages, and app data. This ensures you can restore if a fix goes wrong.
Tip: Backing up first prevents data loss during fixes. - 2
Force restart the iPhone
If the screen is unresponsive, perform a force restart appropriate for your model. This resolves many freezing issues without affecting data.
Tip: On iPhone 8 and later: quickly press Volume Up, Volume Down, then hold the side button until the Apple logo appears. - 3
Check for iOS updates
Software updates fix known bugs and improve stability. Install any pending iOS updates and restart after the install.
Tip: Keeping iOS updated reduces recurring glitches. - 4
Reset network settings
If connectivity is flaky, reset network settings to refresh Wi‑Fi, Bluetooth, and cellular configurations.
Tip: You’ll need to rejoin Wi‑Fi networks after this step. - 5
Inspect battery health
Review Battery Health in Settings to determine if the battery needs service or replacement.
Tip: If peak performance is reduced below 80%, plan for a replacement. - 6
Reinstall problematic apps
Delete and reinstall apps that crash or misbehave to clear corrupted caches.
Tip: Sign back into apps to verify if issues persist. - 7
Reset all settings
Reset all settings without erasing content to fix stubborn config issues.
Tip: This won’t remove data but resets preferences and system settings. - 8
Factory reset (last resort)
As a last resort, perform a factory reset to return the iPhone to default state. Backup first and understand data loss is possible.
Tip: Only proceed if you have a verified backup. - 9
Consult professional help when needed
If hardware faults are suspected, arrange service with Apple Support or an authorized provider.
Tip: Warranty coverage can reduce repair costs.
FAQ
What should I do first if my iPhone won't turn on?
First ensure it’s charged, then try a force restart. If it still won’t power, check battery health and consider restoring from a backup. If issues persist, seek professional help.
First check the charger and battery, then force restart. If it still won’t turn on, contact support.
Why does my iPhone battery drain quickly after an update
Software updates can temporarily increase background activity. Check Battery usage, disable unnecessary background refresh, and consider updating to the latest patch. If drain persists, assess battery health.
Updates can use more background activity at first; monitor and adjust settings, and check battery health if worried.
How do I reset network settings on iPhone?
Go to Settings > General > Transfer or Reset iPhone > Reset Network Settings. This removes saved Wi‑Fi networks and passwords, cellular settings, and VPN configurations.
In Settings, reset your network settings to refresh connections.
Is it safe to factory reset my iPhone?
Factory reset erases all content and settings. Back up first, then proceed only if software fixes fail or you’re preparing the device for a new owner.
Factory reset clears everything. Make sure you have a backup before you proceed.
What if the display remains unresponsive after fixes?
If the screen remains unresponsive after software fixes, hardware issues are likely. Contact Apple Support or an authorized service provider.
If the screen still won’t respond after fixes, hardware help is needed.
How can I protect my iPhone from future issues?
Keep iOS updated, back up regularly, avoid third‑party patches, and monitor battery health. Regular maintenance reduces the likelihood of serious problems.
Update regularly, back up often, and watch battery health to prevent issues.
Watch Video
Quick Summary
- Back up before fixes and test after each step
- Start with software fixes before hardware tinkering
- Know when to seek professional service
- Keep iOS updated for reliability
- Use official support if unsure