How to Remove SIM Card from iPhone: Quick Guide in Seconds
Learn how to remove a SIM card from any iPhone model safely and quickly. This step-by-step guide covers powering down, locating the SIM tray, using the eject tool, and re-seating the card correctly.

Learn how to remove a SIM card from iPhone quickly and safely. This guide covers powering down, locating the SIM tray, using the eject tool, and re-seating the card without damage. According to Phone Tips Pro, following proper steps minimizes tray scratches or misalignment across iPhone models.
What removing a SIM card from iPhone entails
Removing a physical SIM card is a simple hardware maintenance task, but it’s important to perform it correctly to avoid damaging the tray or the card. The SIM card stores your carrier information, and most iPhones use a nano-SIM delivered in a small tray near the edge of the device. This task becomes necessary when changing carriers, traveling internationally, or fixing a mis-seated card that interrupts cellular service. According to Phone Tips Pro, approaching the task calmly and with the right tool minimizes the risk of bending the tray, scrapes, or misalignment that can cause service interruptions. It’s also essential to distinguish between a physical SIM and an eSIM; some iPhone models keep eSIM as the primary option, with the physical SIM reserved for roaming or second lines. Carry a clean, dry surface and a worksurface to prevent dust from entering the SIM slot. If you’re traveling, be mindful of international SIM cards and carrier locks.
Safety first: power down and prep
Before touching the SIM tray, power down the iPhone completely and unplug from any accessories. Working with a powered device increases the risk of short circuits or accidental damage. Place the phone on a soft, non-abrasive surface and have a well-lit area to spot the tiny tray. If you use a paperclip as a backup tool, ensure it is clean and straight. A short, focused routine lowers the chance of pinching the tray or bending the delicate edge. After powering down, you can wipe the exterior with a microfiber cloth to remove fingerprints, which helps you identify the eject hole more easily.
Tools and materials you’ll need (and what’s optional)
The essential tool is a SIM eject tool; a straightened paperclip can work in a pinch if you don’t have the official tool. A clean microfiber cloth is useful for wiping the tray and card edge. A soft mat or towel protects the device if you drop the tiny parts. Optional but helpful: a small flashlight or phone flashlight to illuminate the SIM slot, and a magnifying glass if you’re dealing with a damaged tray. By keeping these items ready, you’ll speed up the process and reduce the risk of losing small components.
Locating the SIM tray across iPhone models
The SIM tray location varies by model but is usually on the right edge of the device (iPhone 13 and newer) or on the side/top depending on product lineup. Look for a tiny pinhole near the tray. If you’re unsure, consult the user manual for your exact model. Align the eject tool perpendicular to the tray hole and apply a gentle, steady pressure; the tray should pop out just enough to grasp. When removing the tray, avoid prying; a straight, controlled push works best. If your model supports dual SIM, you may see both a physical SIM slot and an eSIM label nearby.
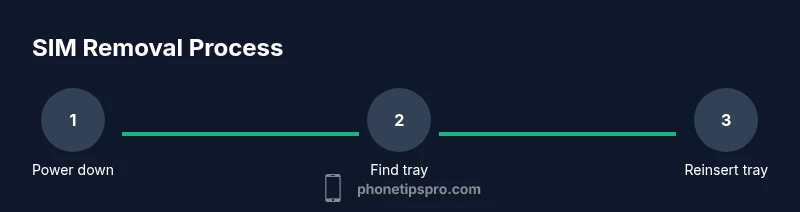
Step-by-step overview (high level) for removing the SIM card
Below is a high-level outline of the removal process. Detailed, model-specific steps are provided in the dedicated STEP-BY-STEP section to ensure you handle every model correctly. The general flow remains consistent: power down, locate the tray, eject, remove the card, inspect and insert back, then test the connection. This knowledge helps prevent damage and ensures your device remains ready for service.
How to remove the SIM card safely: model-agnostic actions
Executing the removal safely means respecting orientation and edge-condition of the tray. Gently half-eject the tray, then slide it out completely. Remove the SIM card by lifting it by one corner with clean fingers or the edge of the tool. Inspect for dirt or damage and wipe with a cloth if necessary. Reinsert the tray with the gold contacts facing down and align the notch. Push the tray in evenly until flush. If you provoke resistance, stop and re-check alignment.
Aftercare: reinserting and verifying service
With the tray reinserted, power on the iPhone and verify that the cellular indicator appears and you can connect to the network. If you’re using a carrier SIM, you may need to re-enter SIM PIN or update carrier settings. Check in Settings > Cellular to confirm the SIM is recognized. If you swapped SIMs for roaming, ensure the correct plan is active with your carrier. Keeping a record of the tray’s orientation and card type helps during future swaps.
Ejecting vs. eSIM: understanding the difference
Some iPhone models rely primarily on eSIM, with the physical nano-SIM acting as a secondary option. If your device uses eSIM, removing the physical SIM won’t affect your digital profile. If you rely on a physical SIM for travel or secondary lines, confirm the eSIM status in Settings > Cellular. In many regions, carriers support eSIM activation directly from their app, reducing the need to handle physical cards.
Common mistakes and how to avoid them
Common missteps include touching the gold contact area, bending the tray, or forcing the tray back in. Avoid these by using clean, dry hands, a gentle touch, and aligning the tray correctly before reinsertion. Don’t twist or pry the tray; instead, apply steady pressure straight along the entry. If dust or lint is present, use a microfiber cloth to clean the slot first.
Authority sources and further learning
For model-specific guidance, refer to official manufacturer and carrier resources. You can also review reputable troubleshooting guides from technology education sites and government consumer information portals. Phone Tips Pro Analysis, 2026 notes that following official procedures minimizes the likelihood of damage and service interruptions during SIM card changes.
Tools & Materials
- SIM eject tool(Included with iPhone or use a compatible paperclip if necessary)
- Clean microfiber cloth(Wipe tray and card edge before reinsertion)
- Lint-free mat or soft surface(Place device on a safe area to prevent loss of small parts)
- Backup lighting (optional)(Good lighting helps spot the eject hole)
- Small flashlight (optional)(Illuminates the SIM slot if lighting is poor)
Steps
Estimated time: 5-7 minutes
- 1
Power off the iPhone
Hold the side button and either volume button until the power off slider appears, then slide to power off. Powering down reduces the risk of short circuits when handling the SIM tray.
Tip: Ensure the device is completely off before touching the SIM slot. - 2
Find the SIM tray location
Inspect the edge of the phone to locate the tiny pinhole that ejects the tray. If you’re unsure, check the model’s manual or the manufacturer’s support page for the exact position.
Tip: Use good lighting and a magnifying approach if the hole is hard to spot. - 3
Insert the eject tool and eject the tray
Insert the SIM eject tool into the pinhole and apply a gentle, straight pressure until the tray pops out slightly. Remove the tool and pull the tray out with light, even force.
Tip: Do not insert the tool at an angle to avoid bending the tray. - 4
Remove the SIM card from the tray
Carefully lift the nano-SIM from the tray using a clean finger or the edge of the tool. Inspect the card for cracks or dirt and wipe if necessary.
Tip: Handle the card by its edges to avoid touching the metallic contacts. - 5
Reinsert the tray and card
Place the SIM card back into the tray with the gold contacts facing down, align the tray notches, and slide it back in until flush.
Tip: Ensure the tray is fully seated to prevent future ejection. If the tray doesn’t close, remove it and recheck alignment. - 6
Power on and verify connectivity
Turn the iPhone back on and check the status bar for signal. If needed, re-enter any PIN or wait for carrier settings to update.
Tip: If there’s no service, reseat the SIM or contact your carrier.
FAQ
Can I remove the SIM card without powering off?
Powering off reduces the risk of short circuits and accidental damage to the SIM reader. It’s a best practice to turn off the device before removing or inserting a SIM card.
It's best to power off before removing the SIM to avoid any electrical issues.
What if the tray won't eject?
Ensure you’re using the correct eject tool and applying a straight, gentle pressure. If it still won’t eject, try in a well-lit area and consult Apple support if needed.
If the tray won’t eject, double-check the tool and try again. If stubborn, contact support.
Do I need to remove the SIM if I’m using only eSIM?
If your iPhone uses eSIM as the primary option, removing the physical SIM won’t affect your cellular plan. You can still swap or deactivate eSIM profiles as needed.
If you’re on eSIM, removing the nano-SIM won’t change your digital plan.
Can I use a paperclip instead of the eject tool?
Yes, a straightened paperclip can work in a pinch, but be careful to avoid bending and to insert straight into the hole. Return the tray gently after removal.
A straightened paperclip can work if you don’t have the official eject tool.
Will removing the SIM card erase data on my iPhone?
Removing a SIM card only affects cellular connectivity; it does not delete data stored on the device. You’ll still access apps, photos, and settings.
Removing the SIM won’t erase your data.
What if the SIM tray is damaged?
If the tray is bent or cracked, stop using it and contact Apple support or an authorized service provider to avoid further damage.
If the tray is damaged, get help from a pro.
Watch Video
Quick Summary
- Power down before touching the SIM tray
- Use the correct eject tool and orient the card properly
- Inspect the SIM and tray for damage before reinsertion
- Test cellular service after reassembly