Can the Back of Your iPhone Be Replaced? A Practical Guide
Explore whether the iPhone back can be replaced, what to expect, and how to choose between DIY or professional repair. Practical tips from Phone Tips Pro.

Yes—it's possible to replace the back glass on many iPhone models, but it's not a simple DIY task. You typically need specialized tools and careful reattachment to restore appearance and functionality. For most users, professional repair at a reputable shop is safer and ensures the device remains water resistant and supports wireless charging.
Understanding back glass construction and why replacement is more than a cosmetic fix
The back panel on most iPhone models is more than decorative. It forms part of the device's structural integrity and works with adhesive seals to help keep components in place. Replacing it isn't just about swapping a pane of glass; you must realign cameras, antennas, sensors, and the wireless charging coil. Poor alignment or a damaged seal can affect touch response, camera quality, and even water resistance. According to Phone Tips Pro Analysis, 2026, improper back-glass replacement increases the risk of moisture ingress and sensor miscalibration. A careful repair preserves aesthetics while maintaining core performance.
Phone Tips Pro Team emphasizes that this operation is delicate: wrong adhesive thickness or misaligned connectors can necessitate additional repairs and may void warranties.
Do you need to replace the back or just repair cracks?
Back-glass replacement means swapping the entire back plate, including the protective outer layer and adhesive seal, to restore a pristine appearance and function. In some cases, cosmetic cracks can be addressed with resin or repair films, but such fixes are temporary and may not restore waterproofing or wireless charging capability. If the goal is structural integrity and full functionality, a full back-glass replacement is often the better long-term solution. If there are no functional issues aside from appearance, a cosmetic cover or replacement of the outer shell might suffice, depending on your model and budget.
Which iPhone models support back glass replacement?
Most modern iPhone models that feature a glass back can have the back glass replaced by a professional repair service. The process can vary by design: some models allow more straightforward panel removal, while newer designs require careful detachment of internal components and precise resealing. The repair outcome largely depends on the model’s adhesive strategy, the availability of compatible back panels, and precision alignment of sensors and antennas. Phone Tips Pro notes that availability of genuine replacement parts and proper resealing are key to preserving performance and water resistance.
DIY vs professional repair: which is safer?
DIY back-glass replacement is feasible only for highly experienced technicians with the right tools and a clean, static-free workspace. For most iPhone owners, professional repair is safer because technicians have calibrated adhesives, set the seals, and tested functionality, including wireless charging and camera alignment. Professional shops also provide warranties on the work, which can be valuable if issues arise after reassembly. Phone Tips Pro recommends weighing cost against risk and opting for a certified repair facility when in doubt.
What to expect when you replace the back
The replacement involves removing adhesives, detaching the back panel, installing a new back glass, and resealing the device. Expect a workflow that includes testing the display, sensors, cameras, and wireless charging after reassembly. Timeframes vary, but most professional repairs take a few hours to complete, including parts handling and testing. The process requires careful handling of fragile glass and battery safety considerations; rushing can lead to additional damage.
Cost considerations and warranty implications
Back-glass replacement costs vary by model, location, and whether you choose a certified service or a third-party shop. In general, expect higher costs for newer models and when replacing complex back assemblies that include antennas or the wireless charging coil. Warranty implications depend on the repair provider; AppleCare+ may cover certain types of damage under terms, while non-original parts or self-repairs can affect warranty eligibility. It’s wise to confirm coverage and part quality before proceeding.
Aftercare: testing, water resistance and reassembly
After installation, technicians test all functions: touch responsiveness, camera focus, sensors, wireless charging, and structural integrity. Water resistance is not guaranteed unless seals and adhesives are correct; insist on a check of IP rating restoration when possible. If your device underwent a back-glass replacement, monitor for any condensation under the panel, unusual screen behavior, or misaligned cameras in the days following the repair. Regular handling and gentle cleaning help maintain the finish.
Tools & Materials
- Pentalobe screwdriver(Choose the correct size for your model.)
- Tri-point screwdriver(Used for internal fasteners.)
- Nylon spudger(Plastic tool to avoid shorting components.)
- Suction cup(To lift the back panel safely.)
- Replacement back glass panel(Compatibility with your iPhone model is essential.)
- Adhesive strips or liquid adhesive(For resealing the back panel.)
- Isopropyl alcohol wipes(For cleaning contact surfaces before reassembly.)
- ESD-safe mat and wrist strap(Recommended for minimizing static damage.)
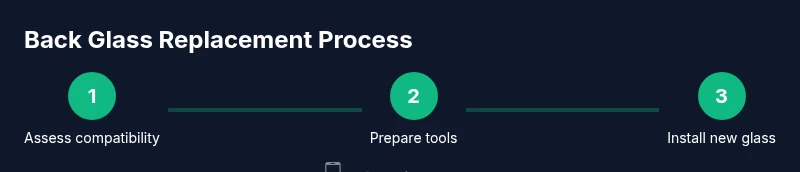
Steps
Estimated time: 2-4 hours
- 1
Power off the iPhone
Shut the device down completely to prevent short circuits during disassembly. Do not attempt replacement while the device is powered on. Why: Powering off reduces the risk of electric shock to internal components and helps protect the battery during handling.
Tip: If the device is unresponsive, press and hold the side button with a volume button to access the shutdown slider. - 2
Remove the back panel screws and prepare to lift
Using the appropriate screwdriver, remove the screws near the bottom edge that secure the back plate or periphery components. Prepare your suction cup and spudger for gentle separation of the back panel from the chassis. Why: Proper screw removal prevents stripping and supports safe panel separation.
Tip: Keep screws in labeled containers so you know which goes where during reassembly. - 3
Loosen adhesive and separate the back panel
Apply controlled heat (gentle) around the edges to soften adhesive, then use a plastic spudger to gently release the back panel from the frame. Avoid prying too aggressively to prevent glass breakage. Why: Softened adhesive reduces the chance of shattered glass and internal damage.
Tip: Work in small sections and keep the glass supported to avoid cracking. - 4
Detach the old back glass and clean the frame
Carefully remove the damaged back glass, taking care not to damage underlying sensors or antennas. Clean any residue from the frame using isopropyl wipes to ensure a clean bonding surface. Why: A clean bonding surface ensures the new panel adheres properly and lasts longer.
Tip: Inspect the frame for any bent tabs or damaged seals before continuing. - 5
Apply adhesive and align the new back glass
Apply an even bead or adhesive tape around the frame edge, then carefully align and place the new back glass. Press firmly along the edges to ensure full contact with the adhesive. Why: Even bonding prevents gaps that could trap moisture or affect fitment.
Tip: Use even pressure and avoid twisting the glass, which can cause micro-fractures. - 6
Reassemble and test
Reconnect any cables, reattach the back plate and screws, then power on the device. Test touch sensitivity, camera alignment, speakers, microphones, and wireless charging to verify proper operation. Why: Functional testing confirms the repair was successful and helps catch issues early.
Tip: Run a simple drop simulation by testing grip and fit; ensure no rattling panel.
FAQ
Can I replace the back of any iPhone myself?
DIY replacement is technically possible on some older models, but modern iPhones require specialized tools and expertise. A misstep can damage components or compromise waterproofing.
DIY replacement is possible on some models, but it's risky; professional help is safer.
Will replacing the back affect water resistance?
Yes, if seals and adhesives aren’t correctly replaced, water resistance can be compromised. A professional repair generally aims to restore the seal.
Back replacement can affect water resistance if seals aren’t properly resealed.
Is back glass replacement covered by AppleCare+?
AppleCare+ may cover certain accidental damages, but coverage depends on the plan and terms. Check your specific policy for details.
Coverage depends on your plan; check your AppleCare+ terms.
How can I tell if the replacement was done correctly?
Look for proper camera alignment, consistent gaps, no condensation, and full wireless charging function. If any sensor malfunctions, revisit the repair.
Check alignment, seals, and function—list any issues to your technician.
What are the risks of attempting a DIY back glass replacement?
Risks include damaging battery, screen, or internal cables, and losing water resistance if seals are not restored.
DIY carries battery and component risks and can ruin water resistance.
How long does back glass replacement typically take?
In shops, it can take a few hours, depending on model availability of parts and technician schedule. Home repairs may take longer.
Most shops complete it in a few hours, depending on parts.
Watch Video
Quick Summary
- Back glass replacement is possible but technical.
- Professional repair helps maintain water resistance.
- Model compatibility and adhesive quality matter.
- Warranty terms vary; verify coverage before proceeding.
- Test all functions after reassembly to confirm success.