How to Get iPhone Ready for Trade-In: A Practical Guide
Learn how to prepare your iPhone for trade-in with a complete, beginner-friendly checklist. Back up data, sign out of accounts, erase content, clean the device, and gather accessories to maximize value.

In this guide you will learn how to get iPhone ready for trade in by wiping data, removing accounts, restoring to factory settings, cleaning the device, gathering accessories, and documenting the device condition. You'll need a charger, a SIM eject tool, and your Apple ID credentials. Follow the steps for a smooth trade-in.
Understanding Trade-in Readiness and Program Requirements
Before you commit to a trade-in, you should understand what programs consider ready and what might disqualify a device. Trade-in programs typically look at data security, device condition, activation status, and whether the device is locked to an account or carrier. For iPhone users, the most important factors are that the device is unlocked (or carrier-appropriate), Find My iPhone is disabled, and that all personal data has been removed. According to Phone Tips Pro, a clean device with verified backups and clear documentation tends to yield higher offers. The goal is to present a device that the buyer can activate immediately with minimal risk of data exposure. Also make sure you have the original accessories; some programs credit more for boxes and cables.
Data Security: Wiping vs Backups
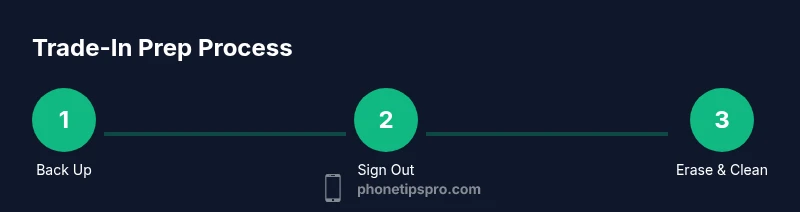
Data security is the backbone of any trade-in. A proper prep involves both securing your personal data and preserving a usable copy for yourself if you need to transition to a new device. Start by backing up to iCloud or a local computer, then sign out of iCloud and iTunes (Finder on macOS). After that, erase all content and settings to return the phone to a fresh state. The order matters: you don’t want to lose precious photos or messages, and you don’t want to leave behind active accounts or activation locks. Phone Tips Pro Analysis, 2026 notes that many trade-in issues begin with incomplete backups or a failed sign-out, so follow the steps in sequence to minimize risk.
Prepare Your iPhone: Clean, Inspect, and Document
Small cosmetic issues can impact value, so start with a gentle wipe of the screen and body using a microfiber cloth. Inspect for screen cracks, loose buttons, water damage indicators, or battery swelling. Take clear photos from multiple angles, both close-up and with a wider shot, and note the device’s serial number and model. Keep a checklist handy: screen, cameras, ports, case, and the box. A well-documented device helps prevent disputes during the appraisal and ensures you receive a fair offer. Presenting organized evidence can also speed up the appraisal process.
Sign Out and Account Prep
Before erasing, sign out of all services and remove devices from your Apple ID. Go to Settings, tap your name, and sign out of iCloud; you may also need to sign out of iMessage and FaceTime. Turn off Find My iPhone and Activation Lock to prevent delays for the next owner. If you use two-factor authentication, you’ll still retain access to your Apple ID after the reset, but you should remove the device from your trusted list. This step reduces risk and speeds up the checkout process.
Factory Reset and Restoration Steps
Resetting is the final barrier between your data and the new owner. On iPhone, go to Settings > General > Transfer or Reset iPhone > Erase All Content and Settings. If asked, enter your passcode and Apple ID password to disable Activation Lock. After the reset completes, the phone should boot to the iOS setup screen. Do not set up the device as new; simply power it off and wait for the next user. This ensures your data is not recoverable and helps protect your privacy during the trade-in.
Packaged Accessories and Packaging Tips
To maximize the trade-in value, include the original charging cable, power adapter, and the box if possible. Accessories in good condition signal to buyers that the device was well cared for. If the original accessories are missing, consider offering a compatible spare cable or adapter. Include any documentation that came with the phone, such as the manual, SIM eject tool, and warranty information you still have. Secure packaging helps prevent transit damage and speeds up the processing step at the trade-in center.
How to Get the Best Trade-in Value
Value hinges on battery health, storage capacity, age, and cosmetic condition. If your battery health is lower than expected, note that some programs offer battery-related credits. Keep the device unlocked and free of passcodes to speed inspection. Avoid water exposure and ensure the screen is responsive. If you have performed a factory reset, provide a clean slate that allows the appraiser to easily verify the device’s history. Additionally, check whether you are eligible for carrier offers or promotional deals that might boost credit. A clear, well-documented report of the device history helps you receive a higher valuation.
After Trade-in: What to Expect
Once the trade-in is accepted, you’ll receive confirmation and credit or payment according to the program’s policy. Some programs deposit funds to your original payment method or issue a gift card; others provide a credit toward a new device. Processing times vary; track the status through the program’s portal and keep a copy of any receipt or tracking number. If the offer seems lower than expected, revisit the device condition notes and consider submitting to an alternative program. Always preserve your documentation for potential disputes.
Authoritative Sources and Quick Tips
Below are authoritative references and concise tips to reinforce best practices during trade-in prep. Remember, the goal is data security, clarity of device condition, and ease of the buyer’s process. For deeper guidance, consult the sources listed at the end of this article.
Authoritative Sources and Quick Tips (continued)
- Apple Trade In overview: https://www.apple.com/trade-in/
- Privacy and selling or donating your smartphone (FTC): https://www.consumer.ftc.gov/articles/0003-keep-your-privacy-when-selling-or-donating-your-smartphone
- Apple Support for general device handling and erasure: https://support.apple.com/
Tools & Materials
- iPhone device(Model and storage vary by target trade-in value)
- Lightning to USB-C cable or USB-C to USB-C cable(For backups or charging during prep)
- Original charger brick (if available)(Helpful for quick checks and consistency)
- SIM eject tool(Needed to remove SIM during preparation)
- Microfiber cleaning cloth(For screen and body cleaning)
- Original box and documentation (optional)(Can boost value if available)
- Printed checklist or note pad(Track condition and accessories)
Steps
Estimated time: Total time: 30-60 minutes
- 1
Back up your iPhone
Back up your data to iCloud or a computer. Ensure photos, messages, contacts, and app data are safely stored. This protects your information and makes it easy to transition to a new device.
Tip: If you use iCloud, enable iCloud Backup and confirm the backup completed before proceeding. - 2
Sign out of iCloud and Find My iPhone
Sign out of iCloud and disable Find My iPhone to remove Activation Lock and prevent issues for the next user. You may also need to sign out of iMessage and FaceTime.
Tip: Double-check that your Apple ID is no longer linked to the device by reviewing the list of devices on your account. - 3
Erase all content and settings
Go to Settings > General > Transfer or Reset iPhone > Erase All Content and Settings. Enter passcodes as prompted and sign out of any accounts if asked.
Tip: If asked, disable Activation Lock to ensure a smooth transfer. - 4
Clean and inspect the device
Wipe the exterior with a microfiber cloth, check for scratches or damage, and photograph the phone from multiple angles. This helps verify condition during the appraisal.
Tip: Document any cosmetic flaws in writing or with timestamped photos. - 5
Prepare accessories and packaging
Gather charger, cable, box, and any manuals. Include SIM tool and warranty papers if you have them to maximize perceived value.
Tip: Bundle everything together in a protective sleeve to avoid transit damage. - 6
Final verification and handoff
Review that the device is powered off after reset and that the screen shows the setup prompt. Confirm you have all items ready for the trade-in submission.
Tip: Keep a copy of any trade-in receipt or tracking number for future reference.
FAQ
What data should I erase before trade-in?
Back up your data, sign out of iCloud, disable Find My iPhone, and then erase all content and settings to ensure privacy and a clean slate for the next owner.
Back up your data, sign out of iCloud, disable Find My iPhone, then erase all content and settings.
Do I need to remove the SIM card?
Yes, remove the SIM card and keep it safe. The trade-in unit does not require your SIM to function after transfer, and the new owner may need their own SIM.
Yes, remove your SIM card before handing the device over.
Can I trade in a device with a broken screen?
Many trade-in programs accept devices with cosmetic damage, but the value may be lower. Be honest about the condition and provide photos to avoid disputes.
Most programs take damaged devices, but expect a lower offer and be clear about the condition.
Should I disable Find My iPhone before trading in?
Yes. Disabling Find My iPhone helps prevent Activation Lock for the next owner and speeds up the processing.
Yes, disable Find My iPhone to avoid delays.
Is a factory reset required for trade-in?
A factory reset is strongly recommended to wipe personal data and present a clean device to the evaluator.
Yes, perform a factory reset to wipe all data.
When will I receive trade-in credit?
Credit timing varies by program; some offer immediate credit while others apply it after inspection. Check the program’s terms for details.
Credit timing varies by program; check the terms for details.
Watch Video
Quick Summary
- Back up data before erasing.
- Sign out of iCloud and disable Find My iPhone.
- Erase all content securely and verify Activation Lock is off.
- Include original accessories to maximize value.