How to Get Started on iPhone: A Practical Beginner's Guide Today
Learn essential steps to get started on iPhone: setup, Apple ID, privacy, apps, and personalization. A practical, beginner-friendly guide with actionable tips.

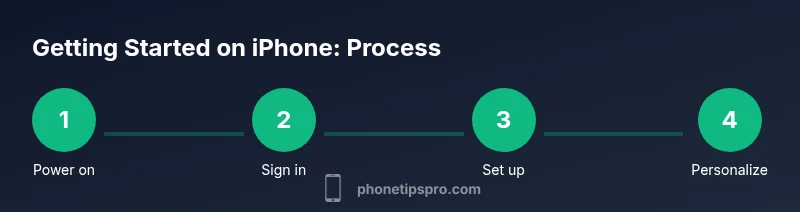
By the end of this guide, you’ll be able to start up, sign in, and begin using your iPhone with confidence. This getting-started plan covers setup, essential settings, app installation, and personalization. According to Phone Tips Pro, a clear, structured start saves time and reduces common frustrations for new iPhone users.
Essential prerequisites for getting started
Before you touch your iPhone, make sure you have a charged device, a stable internet connection, and your Apple ID ready. These prerequisites prevent mid-setup interruptions and ensure you can sign in, enable key features, and start downloading apps without delay. According to Phone Tips Pro, preparing the right context at the start helps you avoid common stumbling blocks and accelerates progress as you learn the basics. In addition, gather a quiet workspace, a comfortable chair, and a small notebook to jot down queries as they arise. Clear expectations about what you want to accomplish—setting up mail, messaging, and essential apps—will keep you focused and reduce backtracking.
What you’ll accomplish depends on your goals: a clean setup, reliable backups, privacy controls, and a personalized home screen. If you’re transitioning from an older iPhone, you’ll want to plan data transfer and app reinstallation, so you don’t lose important information. This section sets the stage for a smooth start by outlining the mindset and materials you’ll need. Keep this list handy as a quick reference during setup, and revisit it if you hit a snag.
Prepare your device and environment
Create a calm, distraction-free setup space. Charge your iPhone to at least 80% and connect to a steady Wi‑Fi network to avoid interruptions during downloads and backups. Have your charging cable and power outlet within reach, and consider enabling a Do Not Disturb window for uninterrupted setup time. A clean device with recent data stays faster and more reliable during initial configuration. If you’re using a case, ensure it doesn’t obstruct the ports or buttons, which could slow you down during setup. This preparation helps you work through the setup flow with fewer errors and less frustration.
For best results, place your iPhone at a comfortable eye level and near a power source. Keep a notepad handy to record important questions such as your Apple ID credentials and any security questions. If you’re migrating from another device, place both the old and new devices within reach to facilitate Quick Start transfers or iCloud backups. A distraction-free space reduces mistakes and accelerates your progress through the setup prompts.
Set up your Apple ID and iCloud basics
Your Apple ID is the gateway to iCloud, App Store, and many iPhone services. If you already have one, sign in and review the linked devices and trusted phone numbers. If you don’t have an Apple ID, create one during setup using your email address and a strong password. Enable two-factor authentication for added security and set up trusted devices for easier sign-ins. Once signed in, verify your contact information and enable iCloud Drive to keep your documents, photos, and app data in sync across devices.
During this step, you’ll also be prompted to review privacy and location settings. Decide which apps should access your location, contacts, and photos. You can adjust these later, but getting a sensible default helps protect your data while giving you a smoother experience with Maps, Messages, and other services. Remember to save your Apple ID credentials in a secure place—if you use a password manager, store a 2FA backup code there as well.
Navigate the iPhone interface: essential gestures
Familiarize yourself with the Home screen, Dock, and App Library. Learn core gestures: swipe up to access the home screen on newer models, swipe between apps with a flick, pinch to zoom photos, and long-press to rearrange icons. Use the back gesture (on supported models) to navigate within apps, and swipe down from the top-right to reach Control Center for quick settings like brightness, volume, and Wi‑Fi. Understanding these gestures reduces confusion and helps you access features faster.
Create a simple mental map of essential apps: Messages, Phone, Mail, Safari, and Camera. Consider organizing a small group of essential apps on the first page for easy access. If you’re coming from a different ecosystem, give yourself a day or two to adapt to the iPhone’s navigation style. Practicing these gestures will make day-to-day use more seamless and enjoyable.
Privacy, security, and accessibility settings you should enable
Security starts with a strong passcode and biometrics (Face ID or Touch ID). Set up Face ID/Touch ID during the initial setup, and enable a six-digit passcode as a fallback. Review privacy controls for apps: limit ad tracking, disable unnecessary location sharing, and manage contacts access. Enable two-factor authentication for your Apple ID and create a recovery key or trusted phone number. Also explore accessibility features such as Text Size, Bold Text, and VoiceOver to ensure comfort and readability in different lighting conditions or for different vision needs.
“As you configure privacy and security, you’ll gain peace of mind knowing your data is protected while still enjoying personalized experiences,” notes Phone Tips Pro. Make a habit of periodically reviewing these settings after major iOS updates or when you install new apps.
Install apps and organize your home screen
Open the App Store and install essential apps for communication, productivity, and entertainment. Start with Messages, Mail, Maps, and a web browser if you don’t rely on Safari. Install a password manager, a notes app, and a photo/video editor to cover everyday tasks. Sign into apps with your Apple ID to sync preferences and data across devices.
Organize your home screen to reduce clutter: keep the most-used apps on the first page, create folders for related apps, and place rarely used apps in the App Library. Turn on automatic app updates to keep everything current and secure. As you install apps, periodically review permissions to ensure apps only access what they truly need.
Manage storage and battery life for beginners
Check storage usage under Settings > General > iPhone Storage. Remove unused apps and offload rarely used data to make room for new downloads. Enable Optimize iPhone Storage for Photos if you use iCloud Photos to save space. Battery health matters too: review Battery Health in Settings > Battery and enable Low Power Mode during long days away from a charger.
When transferring data from an older iPhone, be mindful of what you migrate—media-heavy old backups can consume space quickly. Regularly review large attachments and conversation histories in Messages to reclaim storage. A light, organized device runs smoother and reduces the likelihood of performance slowdowns and unexpected updates.
Personalize with widgets, Focus, and notifications
Widgets bring key information to your Home Screen, so add weather, calendar, or reminders widgets to stay on top of your day. Use the Focus modes to minimize distractions during work, study, or sleep by filtering notifications. Customize notification settings per app to prevent overload: set banners, sounds, and notification grouping for clarity.
Explore the App Library to discover newly installed apps and switch themes to reflect your personality. Periodically review widgets and Focus profiles to ensure they match your routine. Personalization enhances both efficiency and enjoyment, turning your iPhone into a tailored tool rather than a generic device.
Backups, Find My iPhone, and data transfer basics
Backups safeguard your data. Enable iCloud Backup under Settings > your name > iCloud > iCloud Backup and perform a manual backup to verify it works. If you migrate from an old iPhone, use Quick Start or restore from the appropriate backup to ensure a seamless transition. Activate Find My iPhone to locate a lost device and enable Location Services for app functionality. Keeping backups and device tracking enabled protects your information and minimizes risk during loss or theft.
If you upgrade devices in the future, know that Apple Support provides guided steps for restoring from backup on a new device. Practice with a test backup and restore to gain confidence in the data recovery process. This practice helps you recover quickly in case of accidental data loss.
Troubleshooting getting started hiccups
If setup stalls on “Verifying” or apps fail to install, verify your internet connection and power source. If you forget your Apple ID credentials, use Apple’s account recovery process or trusted devices to regain access. For location or privacy prompts that seem intrusive, revisit settings and adjust permissions to a comfortable balance between privacy and convenience. If you encounter unexpected battery drain, check which apps are consuming power and adjust background activity accordingly. Remember that iOS updates can temporarily affect performance; a quick restart can fix many issues.
When in doubt, consult Apple Support or reputable sources for troubleshooting steps. A calm, methodical approach helps you solve problems without frustration and ensures a consistent learning path as you continue to explore the iPhone’s capabilities.
AUTHORITY SOURCES and further learning
For deeper guidance and official references, these sources provide reliable information:
- https://support.apple.com (Apple Support – official setup, backups, and security guides)
- https://www.theverge.com (Major publications with practical iPhone tips and reviews)
- https://www.wired.com (In-depth explainers and how-tos on iPhone features and updates)
Tools & Materials
- iPhone (any model)(Ensure it’s charged or connected to power during setup.)
- Charger and cable(Use the original cable if possible for reliability.)
- Stable Wi-Fi network(Needed for iCloud backups and app downloads.)
- Apple ID and password(If you don’t have one, create during setup.)
- Computer or iPad (optional)(Helpful for backups or data transfer via iCloud/Find My.)
- Headphones or AirPods(Optional for testing audio and setup confirmations.)
- Notebook or password manager(Record credentials and important prompts.)
Steps
Estimated time: Total time: 60-90 minutes
- 1
Power on and begin setup
Press and hold the side button until the Apple logo appears. Follow the on-screen prompts to select language, region, and a Wi‑Fi network. Enable location services if you need maps and Find My iPhone later. This first step sets the foundation for a smooth install.
Tip: Have your Apple ID ready or create one during setup. - 2
Sign in with Apple ID or create one
Enter your Apple ID credentials or create a new account. Enable two-factor authentication for security and link trusted devices. This step unlocks iCloud, the App Store, and cross-device syncing.
Tip: Use a strong, unique password and save it securely. - 3
Set up biometrics and passcode
Configure Face ID or Touch ID to secure your device and speed sign-ins. Choose a 6-digit passcode as a fallback. These measures protect your data while keeping access convenient.
Tip: Use a passcode you will remember but is not easy to guess. - 4
Enable iCloud backups and Find My iPhone
Turn on iCloud Backup and Find My iPhone during setup. This provides data protection and device-tracking capabilities if the phone is misplaced.
Tip: Make sure you have enough iCloud storage for backups. - 5
Configure essential settings
Review and adjust privacy, location, and system preferences. Set screen brightness, enable auto-lock to save power, and tailor notifications to reduce interruption during work.
Tip: Balance privacy with convenience by enabling only necessary permissions. - 6
Install essential apps
Visit the App Store and install core apps for messaging, email, browsing, and productivity. Sign in to these apps with your Apple ID to sync data across devices.
Tip: Start with a core set of apps you’ll use daily. - 7
Organize home screen and apps
Move essential apps to the first page, create folders, and enable App Library. This reduces clutter and makes important apps easy to reach.
Tip: Dock your most-used apps for quick access. - 8
Set up storage and battery optimization
Check iPhone Storage, remove unused apps, and enable Optimize iPhone Storage for photos. Review Battery Health and enable Low Power Mode during heavy-use days.
Tip: Regularly review storage to avoid surprises. - 9
Personalize and test features
Add widgets, set Focus modes, and fine-tune notifications. Test these features to ensure a smooth daily workflow and a personalized experience.
Tip: Experiment with one feature at a time to gauge impact.
FAQ
What is the first thing I should do when I get a new iPhone?
Power on the device, follow setup prompts, sign in with Apple ID, and enable essential services like iCloud and Find My iPhone.
Power on, follow the prompts, sign in with your Apple ID, and enable iCloud and Find My iPhone.
Do I need an Apple ID to use an iPhone?
Yes. An Apple ID unlocks iCloud, App Store access, and synchronization across devices.
Yes, you need an Apple ID to use iCloud, download apps, and sync across devices.
How do I back up my iPhone?
You can back up via iCloud in Settings > your name > iCloud > iCloud Backup, or back up to a computer using Finder/iTunes depending on your OS.
Backup can be done with iCloud or a computer, depending on your setup.
What if I forget my Apple ID password?
Use the Apple ID account page to reset your password, verify your identity, and update trusted devices.
Reset your Apple ID password using the official account page and verify your identity.
How can I transfer data from an old iPhone to a new one?
Use Quick Start or restore from an iCloud/iTunes backup to migrate apps, photos, and settings.
Use Quick Start or restore from a backup to move data to your new iPhone.
Is Find My iPhone necessary?
It’s highly recommended for locating a lost device and protecting data in case of loss or theft.
Find My iPhone helps you locate or protect your device if it’s lost.
Watch Video
Quick Summary
- Get started with essential setup: Apple ID, Wi‑Fi, and backups.
- Learn the home screen and gestures to navigate efficiently.
- Protect your device with a strong passcode and biometrics.
- Install core apps and organize your home screen for quick access.
- Regularly review storage and backup settings to maintain performance.