Getting Started with iPhone 16e: A Practical Guide
Learn how to start using iPhone 16e with this step-by-step guide. From unboxing and setup to essential features, accessibility, and safety basics—perfect for new users.

By the end, you’ll have a fully functional iPhone 16e ready for everyday use. This quick-start guide walks you through unboxing, activating, signing in with your Apple ID, updating iOS, and enabling core features like Messages, Mail, Find My, and Privacy settings. You’ll also learn essential tips to protect your data and get the most from your new device.
How to get started with iphone 16e: a beginner's roadmap
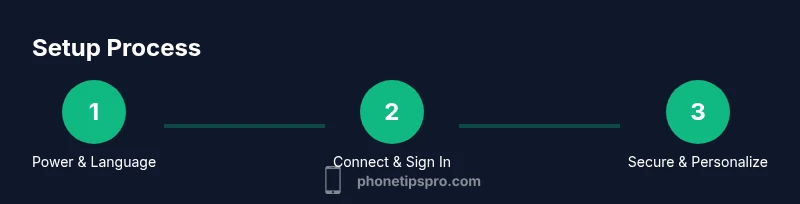
How to get started with iphone 16e is best approached as a three-part process: prepare the device, set up your Apple ID and connectivity, and tailor the experience to your daily routines. According to Phone Tips Pro, beginning with a calm, organized setup reduces friction and helps you unlock the phone's core capabilities faster. This guide is designed for new users who want to avoid common hiccups and start using essential features with confidence. You’ll learn how to activate the device, sign in with Apple ID, enable privacy controls, and customize Home Screen layouts so your most-used apps are easy to reach. By following these steps, you’ll build a solid foundation that scales as you discover more advanced features and accessories.
In addition, this article emphasizes practical tips and safety basics to protect your data from day one. The approach is action-oriented, with clear steps you can reproduce in under an hour, depending on your pace and prior familiarity with iPhone devices.
-1 part? null because this is a single string
Tools & Materials
- iPhone 16e device(Fully charged or connected to power during setup)
- Wi‑Fi network access(Needed for activation, iCloud, and updates)
- Apple ID and password(Required to sign in and access iCloud services)
- USB-C power adapter and cable(For charging during initial setup if not charged)
- Optional: backup storage/PC for manual backup(Useful if you prefer Finder/iTunes or want a local backup)
Steps
Estimated time: 45-75 minutes
- 1
Power on and start the setup
Press and hold the side button until the Apple logo appears. Follow the on-screen prompts to choose language, region, and a temporary password. Connecting to a stable Wi‑Fi network during this step helps with activation and later updates.
Tip: If you’re connecting to a public network, consider using a personal hotspot instead to keep setup secure. - 2
Connect to Wi‑Fi and sign in with Apple ID
Join your home or trusted network, then sign in with your Apple ID. If you don’t have one, create it on screen. This step enables iCloud, Find My, and App Store access.
Tip: Enable two-factor authentication for better security during setup. - 3
Choose restore option (new iPhone or from backup)
Decide whether to set up as a new device or restore from a previous backup. Restoring preserves apps and data, while starting fresh can help with performance on older backups.
Tip: If you’re unsure, start as a new device and migrate later to avoid clutter. - 4
Update iOS to the latest version
Check for available software updates and install them. Keeping iOS current improves security, performance, and compatibility with apps.
Tip: Keep your device plugged in during the update to avoid interruptions. - 5
Set up security and privacy basics
Configure a strong passcode or Face ID, and enable Find My iPhone. Review privacy settings to control app permissions like location and contacts.
Tip: Limit apps’ access to location when not needed to protect privacy. - 6
Personalize display and accessibility settings
Adjust brightness, enable dark mode, set up Reachability if you prefer one-handed use, and tailor notifications to reduce distractions.
Tip: Experiment with widgets and a simplified Home Screen layout for easy access. - 7
Install essential apps and organize the Home Screen
Add messaging, email, browser, and camera apps you use daily. Create folders and prioritize your most-used apps on the first page.
Tip: Use app library to keep secondary apps out of the main screen while staying accessible. - 8
Set up backups and daily maintenance
Choose iCloud backup or a local backup on a computer. Enable automatic backups and set reminders to review your settings periodically.
Tip: Regular backups protect data if the device is lost or damaged.
FAQ
Do I need an Apple ID to start using the iPhone 16e?
Yes. An Apple ID is needed to sign in, access iCloud, and download apps from the App Store. If you don’t have one, you can create it during setup.
Yes. You’ll need an Apple ID to sign in and use services like iCloud and the App Store.
How can I transfer data from an old iPhone to the iPhone 16e?
Use Quick Start to copy data directly, or restore from an iCloud/backup. You can also transfer specific items manually after setup.
You can transfer data with Quick Start or restore from a backup, or move items manually after setup.
Is it necessary to update to the latest iOS on first setup?
Updating to the latest iOS version improves security and compatibility with apps. It’s recommended during the initial setup or as soon as you connect to Wi‑Fi.
Yes, updating to the latest iOS is recommended for security and best app support.
How do I enable Find My iPhone on the new device?
Go to Settings, tap your name, then Find My, and turn on Find My iPhone. This helps locate or remotely erase the device if needed.
Open Settings, tap your name, choose Find My, and turn on Find My iPhone.
What should I customize first for a smoother start?
Prioritize a secure passcode or Face ID, privacy settings, and notification preferences to reduce distractions and protect data.
Start with security and privacy settings, then tailor notifications to your routine.
How often should I back up my iPhone 16e?
Aim for regular backups—monthly at least, or after major changes—using iCloud or your computer for safety.
Back up regularly, at least once a month, to protect your data.
What if I’m stuck during setup?
Check your internet connection, ensure power, and retry steps. If problems persist, consult Apple Support or the Phone Tips Pro help guide.
If you’re stuck, check connectivity and retry setup or contact support.
Watch Video
Quick Summary
- Start with basic activation and Apple ID setup
- Keep iOS updated and enable backups
- Personalize security and privacy early
- Organize Home Screen for quick access
- Regularly review backups and app permissions