How to Get Started with iPhone 14: A Beginner's Guide
A step-by-step beginner's guide to starting with iPhone 14: unboxing, setup, data transfer, essential settings, and daily-use tips from Phone Tips Pro.

By the end of this guide you’ll have a ready-to-use iPhone 14, from powering it on and linking your Apple ID to transferring data, installing essential apps, and configuring core settings. You’ll also learn best practices for privacy, security, and daily maintenance. Follow the steps to get started quickly and confidently, with tips from Phone Tips Pro to avoid common setup pitfalls.
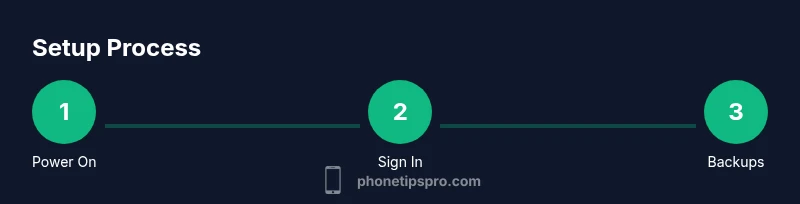
Unboxing and powering on
A smooth start begins with a calm unboxing experience. Check that you have the iPhone 14, the USB‑C to Lightning cable, and a compatible charger. Before you power on, ensure the device has a comfortable charge (at least 20–30%). Press and hold the side button until the Apple logo appears, then follow on-screen prompts for language, region, and accessibility options. If you’re new to iPhone, take a moment to skim the setup screens so you don’t miss important choices like face recognition, screen time, and emergency SOS. Keeping the device clean and free of debris also helps the cameras and sensors function optimally. Brand Tip: Phone Tips Pro recommends keeping your iPhone in a protective case during the initial setup to avoid accidental drops.
Initial hardware checks and first boot
During the first boot you’ll be asked to connect to Wi‑Fi, sign in with or create an Apple ID, and enable basic services like Location and Find My. Verify that the SIM card is properly installed (if you’re using a physical SIM) or set up eSIM as guided by your carrier. If you encounter a delay during activation, confirm you have an active internet connection and that Apple’s servers aren’t momentarily down. Avoid skipping essential security prompts; enabling Face ID or a strong passcode immediately helps protect your data. Pro Tip: Leave a backup plan ready—either a Mac/PC with Finder/iTunes or iCloud access—so you can restore later if needed.
Connect to Wi‑Fi and sign in with Apple ID
Connecting to Wi‑Fi is not just about internet access; it enables activation, app downloads, and iCloud syncing. Sign in with your Apple ID, or create one if you don’t already have one. Two‑factor authentication improves security and makes recovery easier. If you’re migrating from an older iPhone, keep your credentials handy because you’ll use them to enable Quick Start, iCloud, and iMessage continuity. Ensure you’re connected to a trusted network, preferably private and secure, rather than public hotspots for initial setup.
Transfer data from your old iPhone
You have several options to move data: use Quick Start for a direct device-to-device transfer, restore from an iCloud backup, or restore from a computer using Finder/iTunes. Quick Start is typically the fastest path and preserves most apps and data, but a recent backup works well too. After transfer, verify that essential items—contacts, messages, photos, apps—appear on the new iPhone. If you encounter issues, you can always reset and retry the transfer via Settings → General → Transfer or Reset iPhone.
Update iOS and manage essential settings
After the initial setup, check for the latest iOS update (Settings → General → Software Update). Updates fix bugs, improve performance, and strengthen security. Review essential settings such as Privacy, Location Services, and Analytics to balance convenience with privacy. Turn on Automatic Updates so your device stays current. It’s also a good time to configure iCloud settings, ensure your Photos are backed up, and enable Find My iPhone for security.
Personalize your home screen, widgets, and controls
Customize your home screen with apps you use most and arrange widgets for quick info (weather, calendar, reminders). Use App Library to keep your home screen clean while maintaining easy access. Explore Control Center (Settings → Control Center) to add shortcuts like flashlight, timer, or screen recording. If you rely on accessibility features, tailor Display & Text Size, Bold Text, and Motion settings for a comfortable viewing experience. In short, make the device feel like yours while keeping essential tools within reach.
Core security and privacy essentials
Security starts with a strong passcode and Face ID, then extends to privacy settings. Review app permissions, restrict location access for apps that don’t need it, and disable unnecessary background data. Enable two-factor authentication on your Apple ID, and consider enabling iCloud Keychain for password management. Regularly review privacy settings, including Ad Tracking and Analytics sharing, to minimize data collection. A proactive approach reduces risk as you explore new apps and services on iPhone 14.
Battery health, charging, and efficiency tips
To maximize battery life, enable Optimized Battery Charging (Settings → Battery) and minimize screen brightness when appropriate. Use a quality charger and avoid keeping the device plugged in at 100% for extended periods. If you notice rapid drain, check which apps are consuming power in Settings → Battery and adjust usage accordingly. Enabling Low Power Mode during heavy tasks helps conserve charge when you’re away from a charger. Regularly updating iOS also optimizes battery management.
Backups, Find My, and maintenance routines
Set up iCloud Backup (Settings → [your name] → iCloud → iCloud Backup) and perform periodic backups so you can recover data easily. Turn on Find My iPhone to locate the device if lost and enable Activation Lock for added protection. Schedule monthly checks of storage usage (Settings → General → iPhone Storage) and clean up unused apps to free space. Establish a simple maintenance routine: monthly iCloud backup check, weekly photo backup, and quarterly privacy review.
Tools & Materials
- iPhone 14(Ensure device is charged and functional)
- USB-C to Lightning cable(For charging and data transfer)
- Charger (20W or higher)(Fast charge recommended)
- Stable Wi‑Fi network(Needed for activation and updates)
- Apple ID credentials(Needed for iCloud, App Store, and Find My)
- Backup option (Mac/PC or iCloud)(Optional for data migration or restore)
Steps
Estimated time: 45-60 minutes
- 1
Power on and begin setup
Press and hold the side button until the Apple logo appears. Follow prompts for language, region, and accessibility options. Keep the device charged and ready for the full setup flow.
Tip: Have a charged battery and a stable surface to avoid drops during setup. - 2
Connect to Wi‑Fi and sign in with Apple ID
Choose a trusted Wi‑Fi network and sign in with your Apple ID or create one. Enable two-factor authentication for account security and future recovery options.
Tip: Write down your Apple ID email and password in a secure place. - 3
Transfer data from old iPhone
Use Quick Start for a direct transfer or restore from iCloud/ computer backup if needed. Verify that key data (contacts, messages, photos) appeared on the new device.
Tip: If you have a recent backup, restore from it to minimize setup time. - 4
Set up security features
Configure Face ID or a strong passcode and review privacy prompts. Enable Find My iPhone during the process for device recovery.
Tip: Use Face ID where supported for quick and secure authentication. - 5
Update iOS and adjust essential settings
Check for the latest iOS version (Settings → General → Software Update). Review Privacy, Location Services, and Analytics settings.
Tip: Enable Automatic Updates to stay current without manual checks. - 6
Personalize the home screen
Add your most-used apps, arrange widgets, and utilize App Library for a tidy layout. Customize Control Center with quick shortcuts.
Tip: Group apps into folders to keep the home screen organized. - 7
Set up iCloud and backup routines
Turn on iCloud backups and decide what to sync (Photos, Contacts, Notes). Ensure Find My iPhone is enabled for security.
Tip: Regularly backup to avoid data loss after device issues. - 8
Privacy and accessibility refinements
Review app permissions, adjust Display settings, and enable accessibility features you may need, such as larger text or Bold Text.
Tip: Experiment with True Tone and Dark Mode for readability. - 9
Finish with a quick maintenance routine
Run a final check on storage, battery health, and essential apps. Create a simple monthly routine for updates, backups, and privacy checks.
Tip: Keep a short checklist to maintain consistency over time.
FAQ
What should I do first when setting up my iPhone 14?
Begin with unboxing, powering on, selecting language/region, and linking your Apple ID. Enable security features like Face ID and a strong passcode as early as possible.
Start by powering on, choosing your language and region, and signing in with your Apple ID. Enable Face ID and a strong passcode for security.
How do I transfer data from an old iPhone to the iPhone 14?
Use Quick Start for device-to-device transfer or restore from iCloud/computer backup. Verify that contacts, messages, and photos have migrated correctly.
Use Quick Start to transfer directly, or restore from a backup. Check that your important data moved over.
Is an Apple ID required to use the iPhone 14?
Many features require an Apple ID, including iCloud, App Store, and Find My. Some basic features may work without one, but you’ll miss syncing and backups.
An Apple ID unlocks most features like iCloud, App Store, and Find My; you can still use basics without one, but with limited functionality.
How can I protect my privacy on this device?
Review app permissions, limit Location Services to necessary apps, and enable two‑factor authentication. Regularly audit privacy settings in iOS.
Check app permissions and location settings, enable two‑factor authentication, and review privacy controls routinely.
How do I back up my iPhone 14?
Enable iCloud Backup and/or back up to a computer regularly. Backups protect your data in case of device issues or loss.
Turn on iCloud Backup or back up to your computer regularly to keep your data safe.
What if I run into activation or setup issues?
Ensure you have a stable internet connection and correct Apple ID credentials. If problems persist, contact Apple Support or visit iforgot.apple.com for account recovery.
Check your internet and Apple ID details; if problems continue, contact Apple Support or use iforgot for account help.
Watch Video
Quick Summary
- Set up iPhone 14 with a charged battery and Wi‑Fi.
- Sign in with Apple ID and enable security features.
- Transfer data and verify critical items are present.
- Update iOS and customize privacy settings.
- Back up regularly and maintain device health.