How to Get Started with iPhone 13: A Practical Guide
Learn how to get started with iphone 13 with a practical, step-by-step guide covering setup, data transfer, iCloud, privacy, and everyday tips for new users.

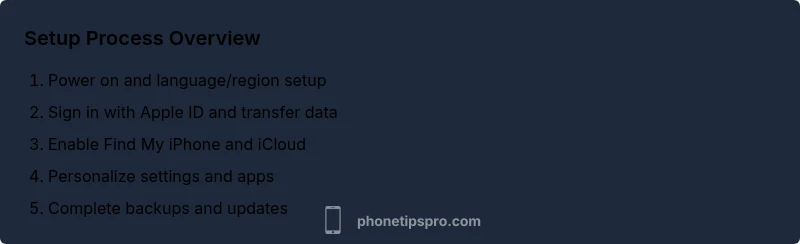
You will learn how to get started with iphone 13, from powering on and joining Wi‑Fi to signing in with your Apple ID, transferring data, enabling Find My iPhone, and configuring iCloud and privacy settings. This guide provides a practical, step‑by‑step path you can follow right away, with clear prerequisites and realistic time estimates.
Before you begin: how to get started with iphone 13 basics
If you’re new to the iPhone 13, the best way to start is with a simple plan. This guide explains the core concepts and the exact steps you’ll perform in the coming sections. According to Phone Tips Pro, a solid foundation today prevents confusion tomorrow, especially when configuring Apple IDs, iCloud, and Find My iPhone. You’ll also learn how this device compares to earlier iPhone models and what you can expect in the first 24 hours of use. By understanding the basics, you’ll reduce setup anxiety and gain confidence as you customize settings for your daily routines.
- Key idea: start with the essentials and expand as you go.
- Quick win: connect to Wi‑Fi, sign in with your Apple ID, and enable Find My iPhone as early as possible.
Note: This section uses the exact keyword how to get started with iphone 13 to anchor search relevance and guide your reading right from the top.
Prerequisites and environment you’ll need
Before you begin, gather a few essentials to ensure a smooth setup. A charged iPhone 13, a reliable Wi‑Fi network, and access to your Apple ID credentials are the backbone of a frictionless start. If you’re migrating from an older iPhone, have your previous device handy for a quick data transfer. A quiet workspace helps you follow each step without interruption, reducing the chances of skipping important settings. The right environment makes the process feel less overwhelming and more rewarding.
- Battery at least 50% or keep the device on charge during setup.
- Stable Wi‑Fi to download updates and apps.
- Your Apple ID email and password (or create one on the spot).
Tip: Turn on Do Not Disturb during setup to avoid distractions and notification interruptions.
Step 1: Power on, inspect, and begin setup
Power on the iPhone 13 and follow the on-screen prompts to begin the setup wizard. If you’re assembling the device fresh, you’ll be guided through language, region, and accessibility options. Take a moment to inspect the device for any physical issues and ensure the screen is responsive. This first step sets the tone for a smooth experience and reduces problems during data transfer and app installation.
- Make a quick physical check: screen, buttons, camera, and surroundings for any shipping damage.
- Choose your language and region carefully; this affects keyboard layouts and date formats.
- Enable Quick Start if you’re moving from another iPhone to speed up the transfer.
Pro tip: If your device asks to update iOS during setup, allow it to install before proceeding to data transfer.
Step 2: Sign in with Apple ID and set up basics
Your Apple ID unlocks the full ecosystem, including iCloud, App Store, Messages, and Find My iPhone. Sign in during setup, or skip and sign in later if you prefer. After signing in, you’ll configure fundamental options like Siri, Screen Time, and privacy settings. This step lays the groundwork for a personalized and secure experience on day one.
- Create or sign in with your Apple ID; enable two‑factor authentication for security.
- Review and customize Siri, if you use voice commands regularly.
- Review privacy settings and choose what data you share with Apple and apps.
Tip: If you can’t remember your Apple ID password, use the “Forgot Apple ID or password” option to recover access securely.
Step 3: Data transfer: move from old iPhone or Android
If you’re switching from an old iPhone or from Android, now is the time to transfer data. Apple’s Move to iOS app and iCloud backups provide reliable pathways. The exact method you choose depends on what you have available: a recent iCloud backup, or a direct device-to-device transfer. Plan for a stable Wi‑Fi connection or a charger if the transfer is large.
- From iPhone to iPhone: use Quick Start or restore from iCloud backup.
- From Android: use Move to iOS to migrate contacts, messages, photos, and apps.
- Expect a few minutes of time for a complete transfer; larger libraries take longer.
Caution: Keep both devices connected to power or have ample battery during transfer.
Step 4: Set up iCloud, Find My iPhone, and privacy basics
With data in place, set up iCloud to sync photos, contacts, and documents across devices. Enable Find My iPhone for location tracking and security in case the device is lost. Review privacy settings to control app permissions, location sharing, and analytics. A well-tuned configuration helps protect your data and maintain a smooth user experience across apps and services.
- Turn on Find My iPhone in iCloud settings and enable iPhone Location services.
- Review app permissions and disable anything that seems unnecessary.
- Enable iCloud Photos or My Photo Stream if you want pictures on all devices.
Pro tip: Regularly review iCloud storage usage to avoid unexpected overages and ensure ongoing backups.
Step 5: Personalize display, sounds, and accessibility
Personalization makes your iPhone 13 feel like your own. Adjust Display & Brightness, choosing a light or dark appearance, and set up True Tone for natural color balance. Modify sounds and haptics, including ringtone and notification styles, to match your preferences. Explore accessibility options such as larger text or bold fonts if you have visual needs.
- Enable Night Shift for comfortable evening viewing.
- Customize control center to access frequently used actions quickly.
- Adjust text size and bold text for readability.
Note: If you have specific accessibility needs, enabling VoiceOver or magnification can be valuable later in the setup process.
Step 6: Organize apps and home screen for productivity
A clean Home Screen helps you stay focused and efficient. Decide which apps deserve a permanent dock, group related apps into folders, and consider using widgets for quick information at a glance. Don’t overcrowd the screen; a simple layout reduces distraction and makes it easier to find important tools like Messages, Photos, and Settings.
- Create folders like “Products,” “Finance,” and “Communication.”
- Place frequently used apps in the Dock for quick access.
- Add a widget or two for weather, calendar, or reminders.
Tip: Use App Library to hide less-used apps while keeping them installed.
Step 7: Battery and charging basics for longevity
Battery health matters from day one. Understand charging etiquette: avoid letting the battery stay at 0% for long, and use optimized charging when available to extend lifespan. Learn about charging ports, cables, and adapters that meet Apple’s guidelines. Keep the device updated to benefit from performance improvements that influence power efficiency.
- Use a USB‑C to Lightning cable for faster charging when available.
- Enable Optimized Battery Charging to reduce aging.
- Avoid extreme heat or cold that can degrade battery performance.
Pro tip: If you use wireless charging, ensure it’s supported by your charger and avoid charging on soft surfaces that insulate heat.
Step 8: Security and passcodes: strengthen your defense
Security begins with a strong passcode, Face ID, and reliable authentication methods. Set a six-digit or alphanumeric passcode, enable Face ID, and require authentication for sensitive actions. Turn on two-factor authentication for your Apple ID, and review trusted devices. Regularly review your security settings to keep your data safe.
- Create a passcode that isn’t easily guessable.
- Enroll Face ID for quick, secure unlocking.
- Enable two-factor authentication for your Apple ID and recovery options.
Warning: Avoid reusing passwords, and never share them over insecure channels.
Step 9: Apps, updates, and ongoing maintenance
After the initial setup, install essential apps and ensure they have the right permissions and notifications. Check for iOS updates and app updates to keep your device secure and running smoothly. Establish a routine for backing up data, whether via iCloud or a local backup on a computer. Regular maintenance helps you avoid performance slowdowns and data loss.
- Install core apps for productivity and communication.
- Keep iOS and apps up to date.
- Schedule periodic backups to minimize loss.
Tip: Review app permissions quarterly to ensure apps only access what they truly need.
Step 10: Troubleshooting common hiccups
New users run into small snags—like missing data, slow performance, or connectivity issues. When problems arise, start with a soft reset, confirm network settings, and check storage space. If a problem persists, consult Apple Support resources or dedicated community forums. A calm, methodical approach reduces frustration and speeds resolution.
- Confirm you’re on a stable Wi‑Fi connection during updates.
- Check for available storage and clear space if needed.
- Use Apple Support resources for device-specific guidance.
Pro tip: If you notice unusual battery drain or app crashes, consider a backup and restore as a last resort.
Step 11: Next steps: building a routine with your iPhone 13
With the basics in place, you’re ready to build a personal routine that leverages iPhone 13 features. Create automation with Shortcuts, set up Focus modes for different contexts, and explore accessibility shortcuts if needed. As you become more proficient, you’ll discover efficient workflows for work, home, and travel that keep you productive and connected.
- Experiment with Shortcuts to automate repetitive tasks.
- Use Focus modes to minimize distractions during work or sleep.
- Review privacy settings periodically to stay in control of your data.
This ongoing practice helps you maximize the device’s potential and reduces the likelihood of feature gaps.
Tools & Materials
- iPhone 13 device(With a charged battery and iOS 15+ (or newer) to ensure compatibility with setup features)
- Lightning to USB-C cable(For charging and data transfer during initial setup)
- Stable Wi‑Fi network(Needed for activation, iCloud, and app downloads)
- Apple ID credentials(Essential for iCloud, App Store, and device services)
- Backup data from old device(Helpful for a quick data transfer)
- Optional: USB-C power adapter(Speeds up charging during setup)
Steps
Estimated time: 60-90 minutes
- 1
Power on and inspect
Power on the iPhone 13 and follow the on-screen prompts to begin setup. Inspect the device for any shipping damage and ensure the screen responds to touch. This step lays the foundation for a smooth experience and helps you decide whether you want to restore from a backup or start fresh.
Tip: If you detect any hardware issue, contact support before proceeding. - 2
Connect to Wi‑Fi and update
Join a stable Wi‑Fi network to download necessary updates and sign in. Check for the latest iOS update and install it if available to ensure you have the newest features and security fixes.
Tip: Avoid relying on cellular data for large updates to prevent overages. - 3
Sign in with Apple ID
Sign in with your Apple ID to access iCloud, App Store, and other services. If you don’t have an Apple ID, create one during setup and enable two-factor authentication for security.
Tip: Use a strong, unique password and set up recovery options. - 4
Data transfer from old device
Choose a transfer path (iCloud, Quick Start, or Move to iOS for Android) to migrate contacts, photos, messages, and apps. Ensure both devices are ready and keep them near each other during the transfer.
Tip: Prefer a wired transfer if your Wi‑Fi is unstable. - 5
Enable Find My iPhone and location services
Turn on Find My iPhone and Location Services to protect your device and locate it if it’s lost. This step also enables activation and security features across devices.
Tip: Keep Find My iPhone enabled even after setup for ongoing protection. - 6
Set up Face ID and passcode
Configure Face ID for quick unlock and set a strong passcode for backup security. This pairing improves both convenience and protection against unauthorized access.
Tip: Choose a passcode that isn’t easily guessable and avoid simple patterns. - 7
Configure iCloud backups and Photos
Set up iCloud to back up your data automatically and decide whether to enable iCloud Photos. This ensures important memories and information are protected across devices.
Tip: Regularly review iCloud storage usage to avoid cap limits. - 8
Organize apps and home screen
Arrange apps, create folders, and consider widgets to keep essential tools within reach. A tidy layout improves efficiency and reduces distractions.
Tip: Use App Library to declutter without deleting apps. - 9
Customize notifications and focus modes
Fine-tune notification settings so you’re not overwhelmed. Explore Focus modes to tailor alerts for work, personal time, and travel.
Tip: Limit critical alerts during Focus periods to stay productive. - 10
Battery health and charging practices
Understand charging habits and enable Optimized Battery Charging to extend lifespan. Avoid exposing the phone to extreme heat or cold during charging.
Tip: Use a cable rated for fast charging to optimize power delivery. - 11
Install essential apps and updates
Install productivity, messaging, and security apps, then check for app updates. Keep the device up to date to maximize performance and security.
Tip: Keep essential apps updated to prevent compatibility issues. - 12
Troubleshooting and next steps
If you encounter problems, reboot, check network settings, and verify storage. When in doubt, consult Apple Support resources or the community for guidance.
Tip: Document any error messages to speed up support.
FAQ
Do I need to update iOS before starting the setup?
It’s best to install the latest iOS version available during setup. Updates include security fixes and new features that improve stability.
Yes. Install the latest iOS update during setup to ensure you have the newest features and security fixes.
Can I transfer data from Android to iPhone 13?
Yes. Use Move to iOS or follow Move to iOS steps in Settings to migrate contacts, messages, photos, and app data.
Yes, you can transfer data from Android using Move to iOS during setup.
What should I do if I forget my Apple ID password?
Use the Apple ID account page to reset the password and enable two-factor authentication for extra security.
If you forget your Apple ID password, reset it on Apple’s account page and enable two‑factor authentication.
Is Find My iPhone required for security?
Enabling Find My iPhone is highly recommended for locating a lost device and protecting data.
Find My iPhone is highly recommended for security and recovery if the device is lost.
How long does setup usually take?
A typical initial setup can take 30–60 minutes depending on data transfer and app installation.
Setup usually takes about 30 to 60 minutes, depending on transfers.
Can I customize the home screen and widgets easily?
Yes. You can organize apps, create folders, and add widgets for quick access to information you use daily.
You can customize the home screen and add widgets for quick access.
Watch Video
Quick Summary
- Start with essential setup steps to avoid later confusion
- Transfer data carefully to preserve contacts and media
- Enable security features early to protect your device
- Organize home screen for quick access and focus
- Regularly back up data to prevent loss