What to Do on iPhone 17: A Practical Step-by-Step Guide
A practical, expert guide from Phone Tips Pro on setting up iPhone 17, migrating data, optimizing battery, and personalizing settings for new users.

You're aiming to set up and maximize the new iPhone 17. This guide walks you through the essential steps—from unboxing and initial setup to data migration, battery optimization, and privacy tweaks. By following a structured plan, you’ll start using the iPhone 17 confidently in under an hour. According to Phone Tips Pro, a guided setup helps improve performance and security from day one.
Getting Oriented with iPhone 17: What’s New and What to Do
The iPhone 17 builds on a familiar design with refined workflows and better efficiency. If you're wondering what to do iphone 17 first, begin with a quick orientation: review the new Control Center options, check the camera features, and confirm you are on the latest software. This orientation saves time by helping you focus on the features you’ll actually use. Phone Tips Pro notes that starting with a clean setup reduces friction and helps you unlock the device’s potential quickly, especially if you're upgrading from an older model.
A key goal is to establish a solid baseline: ensure you know where the main controls live, how to access new features, and how to protect your data from the start. This section sets the stage for a thoughtful, not hasty, setup that translates into real-world benefits—from faster app launches to smoother multitasking. For readers seeking context, this approach aligns with best practices recommended by Phone Tips Pro, emphasizing deliberate preparation over rushed configurations.
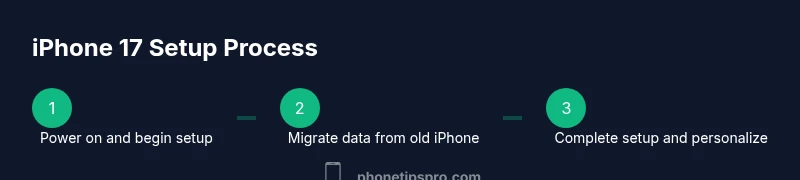
Quick Start: First 30 Minutes with iPhone 17
During your first half hour, you'll perform the core setup steps and verify critical services. Begin by charging the device and turning it on, then connect to a reliable Wi-Fi network. Follow the on-screen prompts to select your language and region, sign in with your Apple ID, and enable two-factor authentication. These steps lay the foundation for a smooth experience and keep your data safe. For users updating from an older iPhone, the Quick Start option offers a wireless migration path, reducing manual transfers. The aim is to have a usable device for calls, messages, and essential apps within thirty minutes, with more customization to come later.
Having a stable initial setup reduces the risk of missing essential settings. If you encounter prompts about transferring data, decide whether you want to restore from a recent backup or start fresh and install apps later. Either way, keep your credentials secure and avoid sharing device codes with others.
Data Migration: Move from Old iPhone to iPhone 17
Data migration is a critical phase for a seamless transition. You can migrate using Quick Start, iCloud backups, or a wired transfer from a Mac or PC. If you choose Quick Start, hold your old iPhone next to the new one and follow the on-screen prompts. If you rely on iCloud, ensure you have a recent backup and enough storage. A wired transfer can be faster when you have a reliable cable and a machine nearby. Regardless of method, verify that photos, messages, and key apps have synced before you continue.
Migration is a one-shot step for most users, so plan for an uninterrupted window. If you run into issues, retry with a fresh backup or consider starting with a clean install and then selectively restoring apps. This approach minimizes post-migration troubleshooting and keeps essential data intact.
Battery Life and Charging: Optimize on iPhone 17
Battery endurance is a common concern for new devices. Begin by enabling Optimized Battery Charging and Review Battery Health in Settings. Turn off background activity for apps that don’t need it, and manage location services to reduce drain. Use Low Power Mode during heavy usage or charging slowdowns. Regularly update apps, as new versions can improve efficiency. A clean charging setup and avoiding heat can extend usable hours, especially when you’re away from a charger for long periods.
Adopt a routine of checking battery health monthly and adjusting settings to match your daily rhythm. Small changes—like limiting background refresh for rarely used apps—can yield noticeable gains without sacrificing usability.
Privacy, Security, and Settings: A Secure Setup
Security starts with a strong passcode or biometric authentication, plus two-factor authentication for your Apple ID. Turn on Find My iPhone and activate Activation Lock, which protects your device if it’s lost or stolen. Review app permissions and limit access to sensitive data, including location and contacts. Consider using a password manager for unique credentials, and enable iCloud Private Relay or a similar privacy feature where available. This approach helps safeguard your data while keeping important services accessible.
A disciplined privacy posture reduces risk without locking you out of essential features. Regularly audit app permissions and keep your OS up to date to mitigate newly discovered vulnerabilities.
Personalization and Productivity Tips
Personalization helps you work faster. Organize the Home Screen with app folders and widgets that reflect your daily routines. Enable Focus Modes to minimize distractions while driving, working, or studying. Use Shortcuts to automate routine tasks, such as sending a message to a group at a specific time. Explore Safari’s features, including pinned tabs and reading list, to streamline research. Regularly review settings for notifications, privacy, and storage to maintain optimal performance.
Tiny adjustments—like grouping apps by usage and using Focus for work—can dramatically improve efficiency during the day. When in doubt, start with a small layout change and expand as you grow comfortable with the new interface.
Maintenance and Backups: Keeping iPhone 17 in Top Shape
Regular maintenance keeps your device responsive and secure. Back up frequently using iCloud or a computer, and verify that backup timestamps align with your usage. Clean the screen with a microfiber cloth and consider a protective case to reduce wear. Monitor storage usage to avoid app cache buildup and delete unused files or apps periodically. Schedule periodic reviews of security settings, software updates, and battery health to ensure long-term reliability.
A proactive maintenance routine reduces surprises. Set a monthly reminder to review backups, storage, and updated security settings so you can enjoy a smooth experience without sudden data loss or performance dips.
Tools & Materials
- iPhone 17 device(Fully charged before starting setup)
- USB-C power adapter(PD fast charging supported)
- USB-C charging cable(MFI-certified preferred)
- Apple ID and password(Needed for iCloud and App Store)
- SIM ejector tool(If transferring a physical SIM)
- Screen protector(Optional to protect display)
- Microfiber cleaning cloth(For screen cleaning before setup)
Steps
Estimated time: 60-90 minutes
- 1
Power on and prepare
Unbox the iPhone 17 and hold the side button to power on. If possible, plug in the device to start charging before you begin the setup wizard. Take a moment to confirm you have the essential credentials and that the device is within easy reach of a reliable Wi‑Fi network.
Tip: Charge to at least 40% before starting to ensure uninterrupted setup. - 2
Choose language and region
Follow the on-screen prompts to select your language and region. This determines formats for date/time, keyboard layouts, and regional services. You’ll also connect to a Wi‑Fi network to download updates and continue.
Tip: Connect to a secure Wi‑Fi network to protect your data during setup. - 3
Sign in with Apple ID and enable security
Sign in with your Apple ID, enable two-factor authentication, and review your security questions. This creates your account for iCloud, App Store, and device recovery. Ensure you have access to your trusted devices or phone number.
Tip: Use two-factor authentication for stronger protection and easier account recovery. - 4
Choose migration method
Decide whether to migrate data from your old iPhone via Quick Start, iCloud backup, or wired transfer. Each method has trade-offs in speed and completeness. Prepare the source device if you plan to migrate.
Tip: If both devices are on iOS 17, Quick Start is usually the fastest wireless option. - 5
Update to the latest iOS
After setup completes, check for software updates to ensure you’re on the newest iOS 17 build. Updates include important security fixes and feature improvements. Allow the device to download and install any pending updates.
Tip: Keep the device plugged in during updates to avoid battery drain interruptions. - 6
Set up biometric and passcode
Configure Face ID or Touch ID and set a strong passcode. This secures device access and supports authentication for apps and Apple Pay. If you use multiple methods, consider enabling both biometric and passcode options.
Tip: Choose a passcode that's not easily guessable and avoid common patterns. - 7
Enable essential services
Turn on Find My iPhone, Activation Lock, iCloud backups, and key privacy features. Review app permissions and tailor them to protect sensitive data while preserving usability.
Tip: Enable Find My iPhone and Activation Lock before installing many apps for added protection. - 8
Organize apps and customize Home Screen
Create folders, add widgets, and configure the Dock for quick access to your most-used apps. Consider Focus modes to minimize interruptions during work or study.
Tip: Keep essential apps on the first home screen for faster access and efficiency. - 9
Create a backup and verify data
Run an initial backup to iCloud or a computer. Verify data such as contacts, photos, and messages transferred correctly. This creates a safety net in case you need to restore later.
Tip: Label this backup with the date to distinguish it from future backups.
FAQ
What should I do first after unboxing the iPhone 17?
Begin with a full charge, connect to Wi‑Fi, and set up your Apple ID. Enable two-factor authentication and review privacy settings before installing apps.
First, charge the device and connect to Wi‑Fi. Sign in with your Apple ID and review key privacy settings.
How do I transfer data from an older iPhone to iPhone 17?
You can use Quick Start for a wireless migration, restore from an iCloud backup, or perform a wired transfer via a computer. Choose based on available backups and bandwidth.
Use Quick Start for wireless transfer, or restore from iCloud. A wired transfer via computer is fastest if you have the cable handy.
Is USB-C charging standard on iPhone 17 and what accessories are compatible?
Yes, iPhone 17 uses USB-C. Use a USB-C charger and cables that are certified for iPhone to ensure safety and performance.
iPhone 17 uses USB-C. Use certified USB-C cables and chargers for safe charging.
How can I extend battery life on iPhone 17?
Enable Optimized Battery Charging, limit background app refresh for nonessential apps, and use Focus modes to reduce background activity during busy times.
Turn on Optimized Battery Charging and use Focus modes to save power.
What should I do to secure privacy on iPhone 17?
Use a strong passcode or biometrics, enable two-factor authentication, review app permissions, and enable Find My iPhone for device recovery.
Strengthen security with biometrics and a strong passcode, enable Find My iPhone.
How do I back up iPhone 17 regularly?
Set up automatic iCloud backups or schedule periodic backups to a computer. Verify that backups complete successfully after each session.
Set automatic iCloud backups or back up to your computer and verify they finish.
Watch Video
Quick Summary
- Plan a complete setup session to avoid missed steps.
- Migrate data securely using recommended methods.
- Protect privacy with strong credentials and Find My iPhone.
- Back up regularly to prevent data loss.