How to Use a New iPhone: Quick Setup and Tips
Learn how to set up a new iPhone step by step, from unboxing to essential settings, data transfer, and personalization for productive daily use and privacy tips

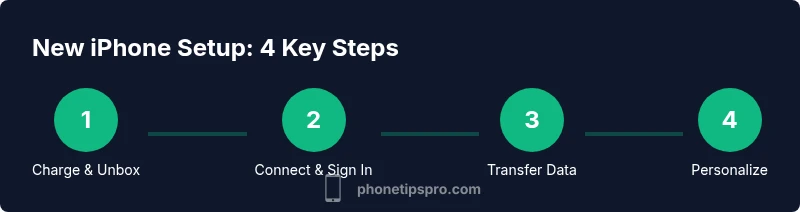
This guide explains how to set up a new iPhone, transfer data, configure core settings, and personalize the device for daily use. You’ll follow a clear, step-by-step process to get up and running quickly after unboxing, including backup planning, Wi‑Fi setup, iCloud and Find My iPhone basics, and app installation.
Understanding how to iphone is new
Setting up a brand-new iPhone is more than turning it on and tapping icons. It’s about establishing a reliable foundation for daily use, security, and data continuity. The phrase how to iphone is new reflects the journey from an empty hardware experience to a personalized tool. In this guide, you’ll learn the mindset for a smooth start, with emphasis on planning data transfer, configuring core services, and preserving privacy as you begin. According to Phone Tips Pro, the most successful setups begin with a quick check of the basics: battery, connectivity, and account access. Before you dive into steps, take a moment to decide how you’ll handle backups, what advice you’ll follow for privacy, and which essential apps you’ll want first. This upfront thinking saves time and reduces backtracking later.
Next, understand that iPhone setup is a process of layered decisions. The initial phase focuses on hardware readiness (charging and protection) and account readiness (Apple ID access and two-factor authentication). The middle phase concerns data transfer choices, whether you restore from a backup or start fresh, and how to tailor settings for your environment. The final phase centers on personalization and security — choosing preferences that balance convenience with privacy. Phone Tips Pro’s approach emphasizes clarity: you should complete each step with purpose, verify at each checkpoint, and document any changes for future reference. By treating setup as a short, deliberate project, you’ll avoid common headaches and enjoy a reliable, productive device from day one.
Preparing your hardware and account
Before you ever unlock the screen, gather what you need and ensure your account is ready. Inspect the packaging for any signs of damage and confirm you have a compatible charger and cable. A clean, well-lit workspace helps you stay organized and reduces the risk of misplacing small accessories. From Phone Tips Pro’s perspective, starting with clean hands and a charged battery is a small but powerful habit that speeds up setup and reduces interruptions. Have your Apple ID credentials handy, enable two-factor authentication if possible, and verify your email and trusted devices so you can sign in seamlessly. Finally, consider applying a screen protector and a protective case in advance to safeguard the new device as you begin personalization.
With hardware confirmed, turn to your account. This is the backbone of your iPhone experience: signing in with your Apple ID, ensuring your trusted phone numbers are up to date, and verifying your device is linked to Find My iPhone for lost-device recovery. The goal is to create a stable, secure baseline so you can move through the rest of the setup with confidence. Pro tip: if you’re transferring from an old iPhone, prepare the old device to back up data and keep it nearby in case you need to copy settings manually later.
Choosing a backup approach (iCloud vs. computer)
When you set up a new iPhone, you’ll decide how to restore data from a previous device or start fresh. The two most common options are restoring from an iCloud backup or transferring data via a computer or direct device-to-device transfer. iCloud backups are convenient and automatic, but they depend on your cloud storage plan and network speed. A computer-based restore can be faster for large data sets and lets you manage backups with Finder or iTunes. If you’re moving from Android, Apple’s Move to iOS tool provides a guided transfer pathway to migrate contacts, messages, photos, and more, though some app data may not transfer perfectly.
Phone Tips Pro recommends evaluating your backup strategy before you begin. If you have limited Wi‑Fi or you want a fresh start, you may choose to set up as new and selectively add apps later. If you do restore, ensure your backup is recent and that you have a stable connection. This decision affects how you curate your apps and settings, so take a moment to weigh speed, completeness, and privacy implications before proceeding.
Beyond data transfer, consider privacy implications. A fresh start presents an ideal moment to review permissions for apps, decide what to share with location services, and enable Find My iPhone at the outset. By aligning your backup method with your goals for privacy and performance, you’ll enjoy a smoother setup and fewer post-setup surprises.
Data transfer and iOS setup basics
The actual onboarding sequence begins with a few essential steps: selecting a language and region, joining a Wi‑Fi network, and signing in with your Apple ID. If you’ve chosen to restore from backup, the system will guide you through selecting the source and validating your credentials. You’ll be prompted to set up a device passcode, which is a prerequisite for enabling biometric authentication like Face ID or Touch ID. During this phase, you’ll also be asked to enable or customize services such as iCloud backups, iCloud Photos, and Mail; these decisions shape your available content and continuity across devices. If you’re starting fresh, you’ll be offered options to restore apps and data later and to sign into services as needed. Staying attentive during this phase helps prevent missing critical settings that impact security and accessibility.
As you progress, you’ll be encouraged to configure more personal controls, including screen time, notifications, and privacy settings. This is a good time to decide which apps should have access to location data, camera, microphone, and contacts. Thoughtful permission choices prevent unnecessary data sharing while preserving a streamlined user experience. If you encounter prompts you don’t understand, pause and review the rationale behind each permission. A well-executed setup reduces friction later when you install apps or use new features.
Privacy, security, and essential settings
Privacy and security should be central to any new iPhone setup. Start by securing your device with a strong passcode and enabling biometric authentication. Turn on Find My iPhone and iCloud for location tracking and data protection. Review privacy settings to limit ad tracking and enable options that protect your data, such as limiting app permissions and enabling two-factor authentication for Apple ID. It’s also wise to review Safari/privacy settings, enable password monitoring, and consider using a privacy-focused browser or extensions where available. Regularly updating iOS is a simple, effective way to maintain security; enable automatic updates so you don’t miss important protections.
To maintain ongoing privacy and security, create a simple backup plan. Automatic iCloud backups ensure your data remains safe even if your device is lost or damaged. If you use a computer, set up regular backups via Finder or iTunes. In addition, review security questions and ensure your trusted devices are up to date. Phone Tips Pro emphasizes making privacy decisions clear and reversible—if you change your mind, you can adjust settings with minimal disruption.
Finally, consider accessibility and ease of use. Enable features like larger text, bold fonts, or reduced motion to improve readability and comfort. These adjustments don’t just help you see better; they can make the whole experience feel smoother and more personal. A thoughtful approach to privacy and security sets the tone for a confident, long-term iPhone experience.
Personalization and daily-use settings
Personalization is where your iPhone becomes truly yours. Start with the Home Screen: arrange your most-used apps, create folders, and consider adding widgets for quick at-a-glance information. Customize Control Center to access frequently used controls, such as flashlight, brightness, and music playback. Gestures, haptics, and 3D Touch (if available) can speed up navigation; experiment with gestures like swipes and taps to discover the most intuitive workflow for you. Configure Siri, Shortcuts, and automations to streamline repetitive tasks and save time throughout the day.
Another important area is notifications. Tailor how and when apps alert you, prioritizing essential messages while quieting less critical reminders. Enabling Focus modes can help you manage interruptions during work, study, or leisure. Don’t forget to review battery health and storage settings; turning on iPhone’s recommended optimizations can keep your device performing smoothly and prevent storage-related slowdowns. Practical customization, when done thoughtfully, yields a more efficient and enjoyable day-to-day experience.
Finally, tailor your apps and services to your routine. Add essential apps first, set up your email and calendar, and organize your dock for easy access. A deliberate, patient approach to personalization makes the device feel like an extension of your daily life rather than a generic gadget.
Apps, services, and daily-use tips
With the basics in place, it’s time to start building your daily routine around your iPhone’s capabilities. Install essential apps for communication, productivity, navigation, and media. Take advantage of iCloud to keep documents, photos, and files in sync across devices. Set up Wallet and Apple Pay if you use them for secure, convenient transactions. Explore built‑in tools like Notes, Reminders, and Safari to improve everyday workflows. Consider enabling Find My iPhone’s features for extra peace of mind while you begin to add your most-used apps.
A practical approach is to gradually add apps based on your actual needs rather than installing every available option at once. This helps you avoid clutter and ensures you learn each app’s features as you go. Organize your home screens to keep essential apps within reach and place less-used tools in folders. Remember to manage notifications so nonessential apps don’t disrupt your day. By building a lean, well-organized setup, you’ll experience faster access to what matters and a cleaner digital environment.
Finally, establish a quick method for updates and health checks. Schedule times to review app permissions, check for software updates, and reassess your privacy settings. Small, regular maintenance keeps your iPhone secure, responsive, and tailored to your evolving needs.
Final checklist for a fresh iPhone
Before you declare victory on your new iPhone setup, run through this quick checklist to verify you’ve covered the essentials. Confirm you can sign in with your Apple ID and complete two-factor authentication. Ensure Find My iPhone is enabled and that iCloud backups are active for the data you value most. Check that essential apps are installed and organized, with notifications tuned to your preference. Review privacy settings to limit unnecessary data sharing and confirm you’ve enabled important security features like a strong passcode and biometric authentication. Finally, perform a quick data transfer test if you used a backup so you can verify contacts, photos, messages, and calendars appear as expected. Keeping this checklist handy helps ensure you start strong and avoid missing key steps later.
Authoritative sources
- https://support.apple.com
- https://us-cert.cisa.gov
- https://www.nist.gov
Tools & Materials
- iPhone (new)(Fully charged before setup)
- Charger and cable(Original Apple charger or certified alternative)
- Stable Wi-Fi network(2.4 GHz or 5 GHz network with internet access)
- Apple ID and password(Two-factor authentication enabled preferred)
- Backup medium (optional)(iCloud, computer, or external drive)
- Computer with Finder/iTunes (optional)(Useful for explicit backups or transfers)
- Screen cleaning cloth(Lint-free microfiber recommended)
Steps
Estimated time: 45-60 minutes
- 1
Unbox and charge
Unbox the device, inspect for damage, and connect to a charger to reach a healthy battery level before first power-on. This reduces the risk of startup interruptions and ensures a stable setup experience.
Tip: Use the original charger or a certified alternative to protect the battery health. - 2
Connect to Wi-Fi and sign in with Apple ID
Power on the iPhone, choose language and region, then connect to a trusted Wi‑Fi network. Sign in with your Apple ID, or create one if you don’t have one yet, and enable two-factor authentication for security.
Tip: Keep your Apple ID credentials in a safe, accessible place during setup. - 3
Choose transfer method
Decide whether to restore from a backup or set up as new. If you’re moving from an old iPhone, use Quick Start for a smoother transition. If you’re starting fresh, install apps later and customize from scratch.
Tip: If speed matters and you have a recent backup, restoring can save time. - 4
Set up security features
Create a device passcode and enable Face ID or Touch ID. This protects data and enables quick, secure access. If you plan to use Apple Pay or sensitive apps, biometric authentication adds a strong layer of security.
Tip: Choose a passcode that isn’t easily guessable and avoid reusing codes from other services. - 5
Enable Find My iPhone and iCloud basics
Turn on Find My iPhone and set up essential iCloud services like Photos and Backups. These features help recover the device and keep content synchronized across devices.
Tip: Ensure your trusted phone numbers are up to date for account verification. - 6
Install essential apps and organize
Install core apps you’ll use daily and arrange them on the Home Screen. Group related apps into folders and add a few widgets for glanceable information.
Tip: Limit app clutter by starting with only your must-haves and adding others gradually. - 7
Review privacy settings
Adjust app permissions, location services, and analytics sharing. Configure Safari privacy controls and consider enabling password monitoring for extra protection.
Tip: Disable permissions you don’t need to minimize data sharing. - 8
Create a backup plan
Set up automatic iCloud backups or schedule manual backups to a computer. Regular backups prevent data loss and simplify recovery if needed.
Tip: Test a quick restore to verify your backup works as expected.
FAQ
Do I need a computer to set up a new iPhone?
No. You can set up directly on the device using Wi‑Fi and an Apple ID. A computer may help for backups or advanced transfers.
You can set up without a computer; a computer can help for backups or transfers.
Can I transfer data from Android to iPhone?
Yes, using Move to iOS during setup or data transfer options after setup. Some app data may not transfer perfectly.
Yes, you can move data from Android using Move to iOS.
How do I enable Find My iPhone?
Open Settings, tap your name, select Find My, and turn on Find My iPhone and iCloud Settings.
In Settings, enable Find My iPhone.
What should I do if I forget my Apple ID password?
Use the account recovery or password reset page on appleid.apple.com; follow steps to regain access.
Go to Apple's password reset page to recover.
Is it safe to enable Siri and Analytics?
You can enable Siri with privacy-aware settings and disable personalized analytics if desired. Review in Settings -> Privacy and Siri.
Customize Siri and analytics in Settings for privacy.
How often should I back up my iPhone?
Back up regularly, ideally automatically via iCloud or on a chosen schedule with your computer.
Back up regularly, preferably automatically via iCloud.
Watch Video
Quick Summary
- Back up early and often.
- Secure your Apple ID with two-factor authentication.
- Enable Find My iPhone for quick recovery.
- Personalize settings for daily use.
- Keep software updated for security.