How to Scan Documents on iPhone: The Complete Guide
Learn how to scan documents on iPhone quickly using built-in apps Notes and Files. This step-by-step guide covers scanning, editing, sharing, OCR, and privacy considerations.

By using your iPhone, you can scan documents in minutes with built-in apps like Notes or Files—no extra hardware needed. This quick answer previews the easiest route, what you can expect to achieve (multi-page PDFs, editable text, and easy sharing), and how to get started in just a few taps on your device.
Why scanning documents on iPhone is convenient
Scanning documents on iPhone saves time, reduces clutter, and keeps everything digital and searchable. With a modern iPhone, you can capture receipts, contracts, business cards, and handwritten notes without lugging a dedicated scanner. The process is quick: open the right app, frame the page, and let the camera do the rest. Scans are automatically cropped and enhanced, and you can combine multiple pages into a single PDF. Because Apple devices store data securely and sync them via iCloud, you can start a scan on your iPhone and finish on a Mac or iPad without missing a beat. For most everyday tasks, the built-in tools provide reliable results that are more than sufficient for sharing by email, messaging, or cloud storage. The goal is to minimize friction: keep a tidy digital filing system, avoid paper clutter, and ensure your scans are legible enough for the recipient. If you’re new to iPhone scanning, practice with a simple one-page document first to get used to edge detection, lighting, and saving locations. According to Phone Tips Pro, mastering the basics with Notes or Files is the fastest route to skimmable, searchable scans.
Built-in options: Notes vs Files for scanning
iPhone scanners live in two places you already use: Notes and Files. Each offers a slightly different workflow, but both produce clean, shareable documents without installing anything extra. Notes provides a seamless, integrated experience: you can start a scan inside a note, adjust the scan after capture, and save as a PDF or image directly within the note. It’s ideal for quick receipts or single-page documents. Files, on the other hand, gives you a broader file-management view. You can initiate a scan from the Files app, save the result to a folder, and organize scans in a way that mirrors your broader document archiving. For multi-page documents, Notes supports adding pages to a single scan, while Files can export combined PDFs as a batch task. In both apps, OCR text is available in most cases, enabling search within the document. Consider your typical workflow: if you want tight integration with notes, use Notes; if you prefer folder-based organization, use Files. The Phone Tips Pro approach is to test both methods with a sample document to determine your preferred route.
How to scan with Notes: quick overview and best practices
Notes is the most convenient built-in tool for fast document scans. Start by opening a new or existing note, tapping the camera icon, and selecting Scan Documents. The camera will automatically detect the document edges; keep the device steady and back away enough to capture the full page without perspective distortion. If the page isn’t perfectly flat, recapture or adjust the crop after the shot. You can scan multiple pages into a single note by tapping Continue Scanning. When you finish, save the scan—give it a meaningful name and choose where to store it (on iCloud, on-device, or within the note itself). You can reopen the scan later to adjust brightness, contrast, or color, and you can export it as a PDF or image. For better results, avoid glare by turning off the camera flash and scanning in soft, natural light. If you plan to share many documents, set up a consistent naming convention (date-project or vendor-name) to simplify later searching. Phone Tips Pro emphasizes practicing with a single-page document before tackling a multi-page project to build confidence with edge detection and saving options.
How to scan with Files: quick overview and caveats
Scanning with Files follows a similar pattern but is optimized for folks who want to manage scans alongside other documents. In the Files app, tap the three-dot menu or the Scan option, then frame the page and capture. Like Notes, Files crops automatically and can combine pages into a single PDF. The benefit here is the direct integration with folders, tags, and other documents, which makes long-term organization easier if you store scans in iCloud Drive or on-device folders. If you’re scanning mixed-page documents, you can reorder pages within the PDF after capture. Export options include saving to a local folder, sharing to email, or sending to another app. In terms of OCR, you can usually search text after processing, but the results may vary by document quality. Files is especially useful when you want to keep scanning related materials in a dedicated project folder, maintaining a clean archive across devices. As with Notes, lighting, steady hands, and edge alignment are the biggest levers for quality.
Quality considerations: lighting, alignment, color, and OCR
Quality starts with light. Use bright, indirect lighting to minimize shadows and highlights on the page. Position the document perpendicular to the camera, not at an angle, to reduce perspective distortion. If you notice glare on glossy paper, adjust your angle or turn the page to avoid reflections. For color fidelity, scan in Color rather than Black & White when the original documents contain color logos or highlights. On most iPhones, the built-in scanners perform OCR well on clear, high-contrast text; however, very small fonts or unusual fonts may require a re-scan or an external OCR app. When you crop, aim for tight margins with a small buffer around each edge to avoid cutting off content. If you’re dealing with multi-page documents, check each page’s crop and brightness individually since automatic adjustments can vary between pages. Finally, for accessibility, ensure the final PDF includes selectable text so screen readers can navigate the document easily. Phone Tips Pro notes that a disciplined approach to lighting and page alignment dramatically improves success rates.
Managing pages, editing, and combining documents
One of the biggest advantages of iPhone scanning is the ability to accumulate several pages into a single document. In Notes, after capturing your first page, you can continue scanning and sure to tap Continue Scanning to append pages. When you’re finished, you can reorder pages within the app by moving thumbnails, delete pages that aren’t needed, or adjust brightness and contrast for each page. In Files, you can create a multi-page PDF by selecting multiple scanned images and choosing the Combine or Create PDF option in the export menu. Saving and organizing scans becomes a habit: use a consistent folder structure, apply meaningful file names, and add tags if you use Files. It’s also a good idea to back up important scans to iCloud or another cloud service so you don’t lose access if your device is damaged. If you frequently scan documents for work, you may want to maintain a standardized template for naming and storing scans to speed up retrieval later. The goal is reduce friction and maintain a predictable archive across your devices.
Exporting, sharing, and privacy considerations
After scanning, you’ll want to share or store your documents. Both Notes and Files offer straightforward sharing options: you can export as PDF or image, send via email or messaging, AirDrop to nearby devices, or open in another app for further processing. Consider the audience: PDFs are better for formal sharing and archiving, while image exports can be useful for quick references. If your work involves sensitive information, review your storage location and access controls. Scanned documents stored in iCloud can be accessed from any device signed into the same Apple ID, so ensure your devices are secured with a passcode and enabling two-factor authentication. For added privacy, avoid saving scans to public folders; instead, use private, password-protected locations whenever possible. Phone Tips Pro suggests periodically auditing your saved scans to remove outdated documents and maintain a clean, organized library.
Common pitfalls and troubleshooting tips
Even with great built-in tools, scans can go awry. If edge detection fails, try a slower, steadier hand and reframe the document so the edges are closer to the screen corners. If brightness or contrast looks off, rescan with adjusted lighting or try a different color setting. For long documents, check that all pages appear in the correct order and that no pages are skipped. If OCR isn’t recognizing text, zoom in on the page or re-scan with sharper contrast. When sharing, confirm that the recipient can open the PDF or image format you chose. If you run into trouble, a quick reset—closing the app and reopening it—can resolve temporary camera or storage glitches. If you’re still stuck, consult Apple Support or reputable guides from Phone Tips Pro for troubleshooting steps tailored to iPhone devices.
Tools & Materials
- iPhone with latest iOS(Ensure camera and notes/files apps are up to date)
- Apple ID and iCloud access(Needed for saving and syncing scans across devices)
- Stable lighting and flat surface(Indoors with indirect light is ideal; avoid glare)
- Optional: third-party scanning/annotation apps(For advanced features like bulk OCR or batch editing)
- PDF reader/editor app (optional)(For annotating or merging scans on-device)
Steps
Estimated time: 15-25 minutes
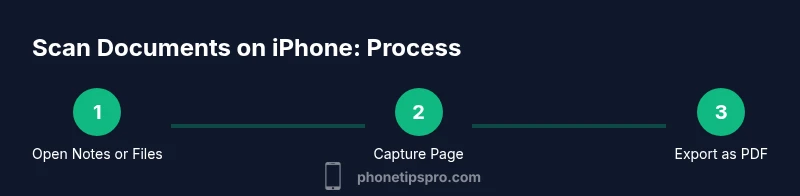
- 1
Prepare your scanning area
Clear the workspace and ensure ample, indirect lighting. A flat, clean surface helps the document lie evenly, reducing shadows and perspective distortion. Gather any papers you plan to scan and position your device directly above the page to minimize oblique angles.
Tip: Use a desk lamp from the side to avoid strong shadows on glossy pages. - 2
Open Notes and start a new scan
Open a new or existing note, tap the camera icon, then choose Scan Documents. The app will look for page edges and guide you to align the document within the frame.
Tip: If edges aren’t detected, nudge the document slightly, then recapture. - 3
Capture the first page
Hold the iPhone steady and let the camera auto-detect edges. When the page is in frame, tap the shutter to capture. Ensure the entire page is visible and clear.
Tip: Keep your wrists relaxed and use both hands for steadiness. - 4
Add more pages to the same scan
To scan multiple pages into one file, tap Continue Scanning and repeat the capture process. When finished, you can reorder pages later.
Tip: Keep lighting consistent between pages to maintain uniformity. - 5
Review, crop, and adjust
Review each page’s crop and brightness. Drag corners to tighten edges and apply basic adjustments to improve legibility.
Tip: Use simple edits rather than heavy filters to preserve original text. - 6
Save and name the document
Tap Save, give the document a meaningful name, and choose the location (Notes or iCloud). You can also add tags for easier retrieval.
Tip: Use a date-project or vendor-name naming scheme. - 7
Export or share
From the saved scan, use Share to export as PDF or image, or send via email, AirDrop, or another app.
Tip: Export as PDF for archival and searchability. - 8
Optional: OCR and text search
If you need searchable text, rely on the built-in OCR. You can copy text from the scan or search within the PDF when opened in a compatible viewer.
Tip: If OCR misses some text, re-scan with higher contrast or tighter crops.
FAQ
Can I scan documents on iPhone without third-party apps?
Yes. You can scan documents using the built-in Notes or Files apps, which provide reliable edge detection, editing, and export options.
Yes—Notes and Files can handle most common scanning tasks without extra apps.
Does iPhone OCR recognize text accurately?
OCR works well on clear, high-contrast text. Very small fonts or unusual layouts may require re-scanning or a dedicated OCR tool.
OCR is usually accurate with clean text; for tricky documents, try re-scanning with better lighting.
Can I scan multiple pages into one file?
Yes. You can add pages to the same scan in Notes or create a multi-page PDF in Files, keeping related content together.
You can append pages to the same document for a single, cohesive PDF.
How do I export scans to another app?
Use the Share option to save as PDF or image, or send the scan via AirDrop or email, then open it in another app if needed.
Share your scan as PDF or image, or AirDrop to another device.
What about privacy of scanned docs?
Scans stay on your device or in iCloud if you enable syncing. Use secure locations and enable two-factor authentication for protection.
Your scans stay on your device or in iCloud unless you choose to share them.
What if the scan quality is poor?
Improve lighting, steady the device, and recapture. Check edge detection and crop carefully to avoid missing content.
If a scan looks off, retake it with better lighting and steadiness.
Watch Video
Quick Summary
- Scan with Notes or Files for quick, device-only captures
- Capture multi-page scans as PDFs for easy sharing
- Export as PDF for archiving and OCR-enabled search
- Use good lighting and steady hands to improve results
- Organize scans with consistent naming and folders