How to Scan on an iPhone: A Complete Step-by-Step Guide
A practical, step-by-step guide on scanning on an iPhone using built-in tools (Notes, Live Text, Camera) and tips to save, organize, and share scanned documents, QR codes, and more.

Learn how to scan on an iPhone using built-in tools (Notes, Live Text, Camera) and reliable third-party apps. This guide covers document scans, QR codes, and business cards, plus tips for saving, sharing, and organizing your files. According to Phone Tips Pro, smooth scanning starts with the right app choice and a clean workspace.
Why scanning on an iPhone matters
Scanning on an iPhone is a practical skill for keeping documents, receipts, and business cards organized without bulky scanners. With Apple’s built-in tools and a growing ecosystem of third-party apps, you can convert physical pages into searchable PDFs, images, or text you can copy and share instantly. This capability is especially valuable for students, professionals, and small business owners who want fast, portable workflows. According to Phone Tips Pro, mastering scanning on your iPhone begins with knowing which apps to use and how lighting and edges affect capture quality. In this section, we’ll explore why scanning on iPhone devices saves time, reduces clutter, and improves accessibility of information across devices and cloud services.
What you can scan with your iPhone
Your iPhone can scan a wide range of content beyond simple documents. You can capture printed pages, receipts, business cards, QR codes, and even handwritten notes with varying degrees of accuracy depending on lighting and contrast. Documents captured with Notes or third-party apps can be saved as PDFs or images and then organized in Files or Photos. QR codes are quickly parsed by the Camera app, while Live Text enables extraction of text from images for copy-paste or translation. This versatility makes the iPhone a compact, all-in-one scanner for day-to-day tasks.
Built-in scanning options you already have
You don’t always need a separate scanner or expensive software. The Notes app includes a built-in document scanner that detects edges and crops automatically. Live Text, introduced in iOS 15, lets you interpret and copy text from photos and screenshots. The Camera app also supports scanning QR codes and, with Live Text enabled, the extracted content becomes selectable text. Third-party apps can offer advanced features like multi-page PDF exports, OCR in multiple languages, and direct cloud storage integration. In this section, we’ll compare these options and show practical choices for different use cases.
Step-by-step: scanning documents with the Notes app
Notes provides a straightforward workflow to scan and save documents as PDFs. Open Notes, start a new note, and tap the camera icon to choose Scan Documents. Align the document so the camera captures the full page and tap Save when ready. You can add multiple pages to the same note and export the result as a PDF. For multi-page documents, keep pages stacked and sorted; you can reorder pages later in the preview. This approach is perfect for receipts, contracts, and class handouts that you want to digitize quickly.
Scanning QR codes and business cards with Camera and Live Text
The iPhone Camera app can instantly recognize QR codes when pointed at them, opening the linked content without requiring a separate app. Live Text lets you extract information from business cards or printed contact sheets by simply pointing the camera at the text and tapping to copy. When you need structured data (like contact fields), third-party apps can export information as vCards or add to contacts directly. Use good lighting and a steady hand to improve recognition accuracy for best results.
Managing and exporting your scans: organizing for quick access
After scanning, organizing files matters as much as capturing them. Save PDFs to Files in a well-labeled folder, or sync photos and PDFs to iCloud Drive or other cloud services. Create separate folders for receipts, contracts, and notes to simplify later retrieval. Default file naming helps; include date and a short descriptor (e.g., 2026-03-11_Invoice_AcadiaCorp). For collaboration, share links or attach PDFs in email, notes, or messaging apps. Consistent naming and folder structure speed up workflows.
Troubleshooting common scanning issues
If edges aren’t detected or crops are awkward, re-capture with steadier hands and better lighting. Move the document closer or further away to adjust focus, and ensure the document is straight within the frame. If OCR misses words, re-scan with crisper text or try a different app with stronger OCR. Update iOS to benefit from improved scanning performance and new features. When using third-party apps, verify permissions and privacy settings before uploading sensitive documents.
Tools & Materials
- iPhone with latest iOS(Ensure you have the latest security and OCR improvements.)
- Clean, flat scanning surface(Plain white or light background helps edge detection.)
- Printed documents, receipts, or QR codes(Have 1-2 items ready for a test capture.)
- Notes app or Camera app(Notes supports exporting to PDF; Camera + Live Text enables text extraction.)
- Good lighting(Natural light is ideal; avoid harsh shadows.)
- Optional: Third-party scanning app(For multi-page exports or advanced OCR features.)
Steps
Estimated time: 15-25 minutes
- 1
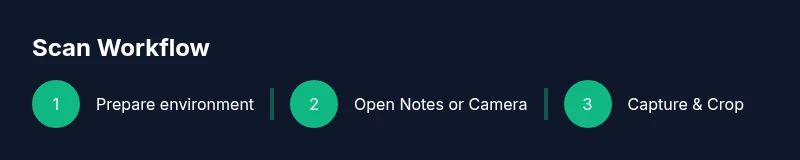
Prepare your environment
Clear your workspace, turn on good lighting, and gather the items you plan to scan. A tidy background reduces edge detection errors and helps you get clean captures on the first try.
Tip: Set up on a flat surface about arm’s length away for stability. - 2
Open the right app
Open Notes for document scans or use Camera for quick QR captures. If you’re extracting text later, Live Text is enabled by default on supported iOS versions.
Tip: In Notes, create a new scan to keep all pages together. - 3
Position and capture
Align the document edges within the frame and tap to focus. Hold steady until the capture completes, then preview the scan for edge alignment.
Tip: Use a tripod or steady surface if you have one. - 4
Review and adjust
Crop, rotate, or reorder pages as needed. Apply color adjustments sparingly to preserve legibility, especially for receipts and contracts.
Tip: Retake if the text is not legible after enhancement. - 5
Save and export
Save the scan as a PDF or image and choose a location in Files or Photos. Rename with a concise, descriptive title to simplify later searching.
Tip: Always export to PDF for multi-page documents when possible. - 6
Share or integrate
Share directly from the app or attach the file to emails, notes, or cloud drives. If needed, convert to a text file or copy OCR data for pasting elsewhere.
Tip: Use iCloud or your preferred cloud service for syncing across devices.
FAQ
What apps can I use to scan on iPhone?
Notes provides built-in scanning, Live Text extracts text from images, and third-party apps can offer advanced OCR and multi-page PDFs.
Notes and Live Text cover most needs, with third-party apps for extra features.
Can I scan multiple pages into a single PDF on iPhone?
Yes. Notes lets you add pages to a scan, and many third-party apps export multi-page PDFs for easy sharing.
Yes—add pages in Notes or use a dedicated scanning app for multi-page PDFs.
Is scanning on iPhone secure for confidential documents?
Stored locally or in iCloud depending on settings; enable device passcode and review cloud sync preferences to minimize exposure.
Security depends on your settings; use device passcodes and controlled cloud syncing.
How do I scan a QR code without extra apps?
Point the Camera at the QR code; the link opens automatically if recognized. No extra app is needed.
Just use the Camera app to scan QR codes.
Can I scan business cards and extract contact info?
Yes, Live Text or compatible OCR apps can extract contact fields and save them to Contacts or notes.
Yes—Live Text helps capture contact data quickly.
Do I need an internet connection to scan?
Scanning itself works offline; exporting or cloud syncing may require internet access.
Offline scanning is possible; some exports may need internet.
Watch Video
Quick Summary
- Use built-in tools first to scan quickly.
- Organize scans in files with clear naming.
- Lighting and edge alignment are critical for quality.
- QR codes scan instantly with Camera; text can be extracted with Live Text.
- Export as PDF for multi-page documents.