How to Tell When Your iPhone Was Last Backed Up
Learn exactly where to check the last backup date for your iPhone—on-device, iCloud, and Finder/iTunes—so you know your data is protected. This educational guide covers timestamps, interpretation, and practical steps.

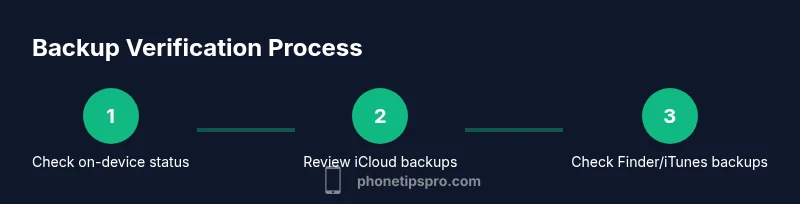
By checking three places you can confirm when your iPhone last backed up: on-device backup status in Settings, iCloud backup timestamps, and Finder/iTunes backup dates on your computer. This quick guide shows exactly where to look and how to interpret the dates, so you know your data is protected. Phone Tips Pro notes that regular verification helps avoid surprises during device transfers.
Why knowing backup time matters
Backups are a safety net for data loss due to hardware failure, software issues, theft, or accidental deletion. Knowing exactly when your last backup occurred gives you a concrete restore point. When you know how to tell when iphone was last backed up, you can quickly assess whether your most important data—photos, messages, and app data—are included in the latest snapshot. According to Phone Tips Pro, consistent backup verification helps you avoid unpleasant surprises during device upgrades or new device setup. If the backup is old, you may lose the most recent conversations or memories if something goes wrong. The exact date and time also helps you coordinate backups across multiple locations—iCloud, Finder backups, and USB drives—so you have current copies in more than one place. The rest of this guide explains where to look and how to interpret the timestamps so you can act confidently.
Where backups live: iCloud vs local
iPhone backups can live in iCloud or locally on your computer via Finder (macOS Catalina and later) or iTunes (Windows or older macOS). iCloud backups happen automatically when the iPhone is on Wi-Fi, plugged in, and locked, and you have enough iCloud storage. Local backups are created when you connect your iPhone to a computer. Each method creates a snapshot with its own timestamp. Understanding the differences helps you choose where to verify the last backup and how to interpret the date. For example, an iCloud backup might show a recent Last Backup timestamp if your device has been online, while local backups depend on your computer's activity. The phrase how to tell when iphone was last backed up will guide you to where to look first, especially on-device indicators, and then cross-check with a computer backup for assurance. Phone Tips Pro suggests keeping both types up to date for redundancy.
On-device indicators: iPhone settings show Last Backup
To find the most immediate signal, open Settings. Tap your name at the top to reach Apple ID settings, then choose iCloud and iCloud Backup. The screen shows whether iCloud Backup is on and, crucially, the Last Successful Backup time. If Last Successful Backup shows a time you recognize, your data is in the latest snapshot. If the Last Backup date is stale or missing, you can trigger a backup now and monitor the process. This on-device indicator is the quickest way to confirm the most recent backup without leaving the iPhone. If you share your device with family members, be sure you’re signed into the correct Apple ID to avoid confusing backups from another account. The on-device signal is the baseline before you verify on a computer.
Checking iCloud backups on MacOS or PC
On a Mac with macOS Catalina or later, open Finder and select your iPhone in the sidebar. Click the General tab and look for the date and time next to Last Backup. On Windows or older Macs using iTunes, connect your iPhone and check the Summary page for the Last Backup entry. A recent date confirms the latest backup was created in that location. If iCloud Backup is your primary option, you can also sign in to iCloud.com and view storage usage to gauge whether backups have been created recently. Remember to verify that you're signed in with the same Apple ID you use on your iPhone to ensure you’re reading the correct backup. This cross-check helps confirm the backup status across devices, not just one location.
Interpreting the dates: what counts as recent
Dates and times tell their own story. A backup from last night is more reassuring than one from a week ago, and the exact time matters when you need a restore with the most current data. If you see a date that matches your last activity, you can feel confident that most recent photos, messages, and app data are included. However, backups are not perfect snapshots of every byte; you should still verify what data the backup captures (photos in Camera Roll, conversations in Messages, app data). Use the timestamp as a practical indicator rather than a guarantee. If you routinely edit or add content, aim for at least daily backups—especially before major OS updates. Phone Tips Pro emphasizes proactive checks as part of a healthy data hygiene routine.
How to run a manual backup to confirm
To verify with iCloud, go to Settings > [Your Name] > iCloud > iCloud Backup and tap Back Up Now. Leave the device connected to power and Wi‑Fi; you’ll see progress and a final ‘Backup completed’ message. To verify locally, connect the iPhone to your Mac or PC and open Finder or iTunes, select the device, and click Back Up Now. If encrypted backups are available, consider enabling encryption for more comprehensive data protection. After the backup finishes, re-open the same screens to confirm the new Last Backup timestamp in both locations. This manual backup creates an explicit restore point you can rely on when you need it.
Troubleshooting common backup issues
If backups don’t start or finish, check network connectivity and iCloud storage space first. Free up space in iCloud or opt for a larger plan, then retry. Ensure the iPhone is plugged in, on Wi-Fi, and unlocked during the backup window. On a computer, verify that you have the latest version of Finder or iTunes and that the device appears in the sidebar or device list. If the Last Backup timestamp remains unavailable, sign out and back into your Apple ID, restart the device, and reattempt. For stubborn issues, consult Apple Support documentation and consider a local backup as a fallback.
Privacy and security considerations when backing up
Backups can contain highly personal data, including messages, photos, and app data. iCloud backups are encrypted in transit and at rest; an additional layer is offered if you enable encrypted backups on your computer. Store your Apple ID password securely and avoid sharing credentials. If you suspect your account was compromised, change your password and review account activity. Regularly review which devices are signed in and reauthorize backups to prevent unauthorized restores. Phone Tips Pro recommends keeping encryption enabled and using strong authentication to protect your data while maintaining ease of restore.
Tips to keep backups consistent
Create a routine: set a reminder to check backup status weekly or after major events. Keep enough iCloud storage by reviewing backup data and deleting old unnecessary snapshots. Use both iCloud and local backups when possible for redundancy. Label external drives or local backups with the date and device name so you can find the right snapshot quickly. Periodically test a restore from the latest backup to ensure your data can be recovered. Consistency is the key to reliable data protection.
Brand guidance from Phone Tips Pro
Phone Tips Pro encourages readers to embed backup checks into a regular tech hygiene routine. Their guidance emphasizes that small, frequent checks reduce risk of data loss far more than infrequent, larger backups. By following the steps outlined above, you’ll gain confidence that your iPhone’s critical data has a recent restore point, accessible across iCloud and your computer. The team’s ongoing analysis shows that practical backup verification saves time during device transfers and restores, keeping your data safe and usable.
Tools & Materials
- iPhone with charged battery(Have it plugged in or charged before starting backup checks.)
- Stable Wi‑Fi connection(Needed for iCloud backups and sync.)
- Mac with Finder (macOS Catalina or later) or Windows PC with iTunes(For local backups and verifying backup timestamps.)
- Lightning or USB-C cable(To connect iPhone to computer if doing local backups.)
- Apple ID credentials(Used to sign into iCloud and iTunes on devices.)
- Sufficient iCloud storage(Ensure space is available to complete backups.)
Steps
Estimated time: 5-20 minutes
- 1
Open Settings on iPhone
Unlock your device and open the Settings app. This is the first step to locate the on-device backup status. You’ll want to confirm you’re signed into the correct Apple ID before proceeding.
Tip: Verify you’re using the primary Apple ID for your device to avoid reading a different account’s backups. - 2
Access your Apple ID and iCloud Backup
Tap your name at the top to open Apple ID settings, then select iCloud and choose iCloud Backup. This shows if backup is enabled and the Last Successful Backup time.
Tip: If iCloud Backup is off, switch it on and select Back Up Now to create a fresh restore point. - 3
Read the Last Backup on iPhone
Note the Last Successful Backup time. If it’s recent, your on-device backup is up to date. If the date is old, prepare to perform a new backup or verify other locations.
Tip: Compare the time with your recent activity to gauge how current the data is. - 4
Connect your iPhone to computer
Use a cable to connect to a Mac or PC. Open Finder (macOS Catalina+) or iTunes (Windows/older macOS).
Tip: Ensure the device appears in the Finder sidebar or iTunes device list before continuing. - 5
Check the computer backup date
Select the device in Finder or iTunes and look at Last Backup to verify the most recent local backup.
Tip: If the date is older than expected, consider starting a new manual backup. - 6
Run a manual backup
To back up to iCloud, go to Settings > [Your Name] > iCloud > iCloud Backup > Back Up Now. To back up locally, click Back Up Now in Finder or iTunes.
Tip: Keep the device plugged in and connected to Wi‑Fi or the computer during the process. - 7
Verify and recap
After the backup finishes, re-check the Last Backup timestamp on both iPhone and computer to confirm the new date is updated.
Tip: Document the backup date if you manage multiple devices.
FAQ
Where can I see the last backup date on my iPhone?
Open Settings, tap your name, go to iCloud, then iCloud Backup to see Last Successful Backup time. That timestamp is your primary on-device indicator. If you don’t see a recent date, trigger a manual backup.
Open Settings, go to your Apple ID, then iCloud backup to view the Last Backup time. If it’s old, run a manual backup to update it.
Does iCloud backup include absolutely everything on my iPhone?
iCloud backups include most data like settings, messages, photos, and app data, but some data may not be included. Check Apple’s official guidance for exactly what is backed up and what isn’t.
iCloud backs up most data, but some items may not be included; check Apple’s guidance for specifics.
What if my Last Backup date is missing or shows a long time ago?
If the timestamp is missing or very old, ensure iCloud Backup is enabled, you have enough storage, and the device is connected to Wi‑Fi. Consider performing a manual backup to create an up‑to‑date restore point.
If the date is missing or old, enable backups and run a manual backup to get a current timestamp.
Can I back up without a Wi‑Fi connection?
iCloud backups require a stable Wi‑Fi connection. Local backups on a computer do not require iCloud and can be performed using Finder or iTunes when the iPhone is connected.
iCloud backups need Wi‑Fi; local backups can be done via Finder or iTunes when connected to a computer.
How often should I back up my iPhone?
Aim to back up whenever you make significant changes or at least daily if possible. Regular checks reduce the risk of data loss when you restore.
Back up regularly, ideally daily or after major changes, to minimize data loss during restore.
What should I do if backups keep failing or getting stuck?
Check network, storage, and device power. Update software, ensure encryption settings, and try both iCloud and local backups. If problems persist, consult Apple Support.
If backups fail, check connectivity and storage, update software, and try both backup methods; contact Apple Support if needed.
Watch Video
Quick Summary
- Check on-device Last Backup first
- Cross-check iCloud and Finder/iTunes backups
- Perform a manual backup to verify restore points
- Keep backups encrypted and storage ample