Voice Record for iPhone: A Complete How-To Guide
Learn how to use Voice Memos on iPhone to record, edit, share, and back up your audio with best practices from Phone Tips Pro. Step-by-step instructions, tips, and troubleshooting for reliable voice recording on iPhone.

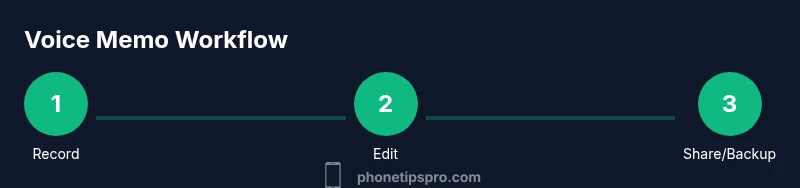
You can perform a voice record for iphone using the built-in Voice Memos app on your iPhone. This guide walks you through starting a recording, selecting settings for clarity, labeling files, editing, organizing, sharing, and backing up your memos while safeguarding your privacy. Whether you’re capturing lectures, interviews, or reminders, this article covers everything you need to know to produce high-quality audio and keep it organized.
What is voice recording on iPhone and why use Voice Memos
Voice recording on iPhone is one of the simplest ways to capture ideas, lectures, interviews, or notes while on the go. The built-in Voice Memos app provides a straightforward interface for quick capture and later editing. According to Phone Tips Pro, most users rely on this tool because it offers reliable audio, automatic saving, and seamless syncing with iCloud when enabled. In practice, you can start a new memo with a single tap, name it, and label sections within the file for easy navigation. Beyond simple capture, Voice Memos includes editing tools such as trim to refine recordings without requiring third-party software. For teachers, students, journalists, or remote workers, mastering Voice Memos can save time and improve note-taking consistency. This article uses practical language and examples to help you implement a reliable voice-recording routine on your iPhone.
Getting started: locating Voice Memos and set up
To begin, locate the Voice Memos app on your iPhone. If you can’t find it, pull down on the home screen and search for “Voice Memos.” The app is preinstalled on most iPhones, and Phone Tips Pro recommends confirming the app has microphone permission and that iCloud syncing is configured if you want automatic backups. Go to Settings > Privacy > Microphone and ensure Voice Memos is allowed to record. If you plan to organize memos by project or topic, consider creating folders (supported on newer iOS versions). Verify you’re connected to Wi‑Fi or cellular data for backups and that your device has sufficient storage. Once setup is complete, you’re ready to start capturing your first memo.
Recording quality and settings you should know
Quality starts with hardware, environment, and configuration. Use a quiet space, keep the microphone at a consistent distance (about 6–12 inches) from your mouth, and speak clearly. If you have a good internal microphone, it is often sufficient for casual notes; for interviews or field recordings, an external mic connected via a compatible adapter can noticeably improve clarity. Voice Memos provides basic editing tools and waveform visuals that help you monitor levels during recording. Avoid rapid speech or noisy backgrounds, especially when you’re recording longer sessions. Phone Tips Pro reminds users to prefer clean audio environments and to back up important memos regularly to prevent data loss.
Managing recordings: organizing, labeling, and metadata
Organization is essential to keep memories accessible. Rename each memo with a clear, concise title that includes the topic and date if possible. Use the built-in folders feature to group related recordings by project, meeting, or topic. Consider adding a short note to the file name or the memo’s description (where supported) so future you understands context at a glance. Consistent naming and folder structure reduce search time and make exports simpler. Phone Tips Pro advocates a simple taxonomy: date-topic, location, and source to make long-term retrieval effortless.
Sharing, exporting, and backing up recordings
Voice Memos makes sharingeasy with built-in share actions. Tap the memo, then the share button to send via Messages, Mail, AirDrop, or save to Files. For long-term accessibility, back up memos to iCloud or your computer using Finder/Explorer or iTunes/Finder backups. If you work across devices, enable iCloud Drive so memos appear on all your Apple devices. When exporting, choose formats and destinations that preserve audio quality and metadata, especially for research or collaboration purposes. Regular backups help ensure you don’t lose important recordings.
Privacy, storage, and security considerations
Recording privacy matters. Review microphone access permissions and understand who can access shared memos via your backup location. If you share memos containing sensitive information, choose trusted destinations and consider removing any identifying data before share. Keep an eye on storage usage, as high-volume recordings can consume significant space; manage older memos or back up to external storage to free up device space. Phone Tips Pro emphasizes maintaining a routine for archival and deletion policy to protect personal data while keeping essential memos accessible.
Common issues and quick fixes
If a memo has no sound, verify the microphone isn’t blocked and that you didn’t disable the mic permission by accident. If a recording stops unexpectedly, check your battery level and available storage, then try again in a quieter environment. If you cannot locate a saved memo, ensure you’re looking in the correct folder and that iCloud syncing is enabled. For sharing issues, confirm your selected destination supports audio files and that you have a stable network connection. When problems persist, restart the device and re-open Voice Memos to reset the session.
Advanced tips for longer recordings and interviews
For longer sessions, plan a rough structure and consider adding timestamps or chapter markers to your memos for easier navigation later. When interviewing, use an external microphone for consistent input and gather ambient notes in a separate memo for context. If you need higher fidelity, experiment with different microphones and test recordings before the actual session. Finally, develop a routine: start with a quick test recording, review the waveform, and adjust mic position and environment to maximize clarity.
Tools & Materials
- iPhone with latest compatible iOS(Voice Memos is preinstalled on most devices)
- Voice Memos app(Built-in for quick recording and editing)
- Earphones or external microphone (optional)(Helpful for reducing background noise and improving clarity)
- Stable backup solution (iCloud or computer)(Backups protect recordings from device loss)
- Quiet recording environment(Minimize echo and background sounds)
- Power source for long sessions(Keep device charged during lengthy recordings)
Steps
Estimated time: 15-25 minutes
- 1
Open Voice Memos and verify permissions
Unlock your iPhone and locate the Voice Memos app. Open Settings > Privacy > Microphone to ensure Voice Memos has permission to record. This guarantees your audio is captured and saved locally or synced to the cloud if enabled.
Tip: If prompted, grant microphone access immediately to avoid missed moments. - 2
Start a new recording
Tap the red Record button to begin. Speak clearly at a steady pace, and maintain a consistent distance from the microphone to keep level audio. Use headphones with a microphone if ambient noise is a concern.
Tip: Pause briefly between ideas to reduce long, unusable segments. - 3
Pause or stop recording when needed
Use Pause to halt recording without creating a new file, or Stop to end the memo entirely. Playback the memo to check for clarity and background noise before saving.
Tip: If you hear noise, resume recording after moving to a quieter spot. - 4
Rename the memo
From the memo list, tap the name field and enter a descriptive title that includes topic and date. A clear name makes future retrieval faster.
Tip: Use a consistent naming convention, like YYYY-MM-DD_topic. - 5
Edit or trim the recording
Use the built-in editing tools to trim unwanted sections or silence. Save changes to keep the final version clean and concise.
Tip: Trim off long pauses at the beginning or end to save storage space. - 6
Share or back up the memo
Tap the share button to export to Files, Messages, or AirDrop, or back up to iCloud/Computer for safekeeping. Choose a destination that preserves audio quality.
Tip: For archival, store a copy in a dedicated folder labeled by project.
FAQ
How do I rename a recording in Voice Memos?
Open Voice Memos, select the memo, and tap the name field to enter a new title. This makes it easier to identify later.
Open Voice Memos, tap the memo, tap the name, and type the new title.
Can I edit a voice memo after recording?
Yes. Use the trim and editing tools to cut sections, adjust start/end points, and save a refined version.
You can trim parts of the recording and adjust the start and end points after recording.
Where are my voice memos stored by default?
Memorandums live in the Voice Memos app and can be backed up to iCloud if enabled.
Memos stay in Voice Memos and can be backed up to iCloud if you’ve turned that on.
How do I share or export a memo?
Select the memo, tap the share icon, and choose your destination, such as Messages, Mail, or Files.
Choose the memo, hit Share, then pick where you want to send or save it.
How can I back up voice memos?
Back up memos using iCloud or copy them to a computer through Finder/Explorer for safekeeping.
Back up memos with iCloud or copy them to your computer.
What should I do if I can’t record due to microphone access?
Check Settings > Privacy > Microphone to ensure Voice Memos has permission; re-enable if needed.
Make sure Voice Memos has microphone permission in Settings.
Watch Video
Quick Summary
- Record with a quiet environment and clear mic technique.
- Rename and organize memos for easy search.
- Back up memos regularly to prevent loss.
- Share/export memos using trusted destinations.
- Review privacy and permissions before recording.