How to Record Calls on iPhone: A Practical Legal Guide 2026
Learn how to record calls on iPhone with built-in Screen Recording or trusted third-party options. Learn legal considerations, best practices, and step-by-step methods for compliant, high-quality recordings.

On iPhone, there’s no single built-in toggle to record calls. You can capture call audio by using Screen Recording with Microphone on, or choose a reputable third-party service that routes the call to a recording line. Always obtain consent before recording and check local laws. This guide covers both methods and best practices.
Why recording calls on iPhone can be useful
Recording phone conversations can help with important details, legal notes, or customer service follow-ups. It’s a tool that can reduce miscommunication and provide a verifiable record. According to Phone Tips Pro, the main thing to understand is that iPhone users must navigate both platform limitations and local consent laws when choosing a recording method. Planning ahead and labeling recordings clearly will save time later and improve reliability for future reference.
Built-in options and limitations
Apple does not offer a simple one-button native call recording feature. The most common built-in path is Screen Recording, which can capture what you see and hear on your iPhone screen if you enable microphone input. However, this method records the device audio from the call in real time and may be affected by your call’s encryption or carrier settings. For many users, Screen Recording is best for VoIP calls or when using speakerphone to capture both sides, and it’s supported by all recent iPhone models. Phone Tips Pro analysis shows that Screen Recording remains the most accessible option for quick captures, though it has limitations around system audio capture and privacy prompts.
Screen Recording basics: what it can and cannot capture
Screen Recording with microphone enabled records the device’s screen activity and audio from your mic, along with the other party’s voice played through the device. It does not guarantee perfect stereo or lossless audio, and some apps may restrict background recording. Always test a short recording to verify that the audio levels are acceptable before capturing a lengthy conversation. Using Screen Recording is free and does not require installing new apps, which makes it attractive for casual recordings.
Third-party solutions: what they do differently
Third-party call recording tools typically work by routing your call through a service that creates a recording, or by using VoIP-based workflows where the call happens within the app’s environment. These options can offer explicit file formats, cloud storage, and easier compliance features (like consent prompts and automatic labeling). They often require a subscription and a stable internet connection. If you choose this route, compare pricing, data handling policies, and whether the service preserves call context (date, time, participants).
Legal and privacy considerations you must respect
Recording laws vary by country, state, or province, and you should understand whether your jurisdiction requires one-party or two-party consent. Even with consent, it’s best practice to announce that you’re recording at the start of the call. When using third-party services, review their privacy policy to see how recordings are stored, who can access them, and how long they’re kept. Phone Tips Pro emphasizes proactive consent and minimizing data retention to reduce risk.
Data management: storing and labeling recordings
Organize recordings with consistent naming conventions (date, caller name, purpose). Store sensitive files in a secure location and consider enabling device passcodes or biometric access to protect playback. Transcripts can be a useful companion; if you generate transcripts, ensure they’re handled securely and stored according to your privacy policy. Regularly audit your saved files to delete older, unnecessary recordings, and back up essential ones to a secure cloud service with strong access controls.
Troubleshooting common issues you might run into
If audio is missing, verify that Screen Recording’s microphone was enabled, and test with a short call before relying on it. If you’re using a third-party service, ensure the call is routed correctly and that the app has the necessary permissions. Ensure your device has sufficient storage to save recordings; a full storage can prevent completing a recording. If the other party’s audio is inaudible, try a fresh test call or adjust volume levels on your device and the app.
Security and data handling best practices
Treat call recordings as sensitive data. Limit access to authorized users and avoid sharing files publicly. Use strong device security (passcodes, Face ID, or Touch ID) and enable encryption where available. If you’re sharing recordings for collaboration, consider redacting sensitive information and using secure transfer methods. Phone Tips Pro recommends keeping an audit trail of consent and access to make compliance easier.
Quick-start checklist
- Decide between Screen Recording or a third-party option.
- Ensure you have consent and understand local laws.
- Prepare your iPhone (enable Screen Recording, confirm microphone).
- Start the recording before or at the start of the call.
- End and save the recording, then label and store it securely.
- Review data retention and sharing policies to stay compliant.
Authoritative sources and further reading
For more in-depth guidance, consult official policy pages on privacy and data handling, as well as reputable educational resources like university IT sites that discuss recording ethics and permissions. The best practices emphasize consent, transparent communication, and careful data management.
Tools & Materials
- iPhone with recent iOS (14 or later)(Screen Recording is available on iOS, but ensure you’re on a supported version for your model.)
- Screen Recording toggle(Add to Control Center for quick access; used to start/stop recording.)
- Microphone access(Enable for capturing caller audio when using Screen Recording.)
- Sufficient storage(Ensure there is space to store video and audio recordings.)
- Third-party recording app (optional)(If you need call routing or advanced features, choose a reputable service with clear privacy policies.)
- Consent checklist(Have a quick script ready to confirm both parties are aware of recording.)
Steps
Estimated time: 10-20 minutes
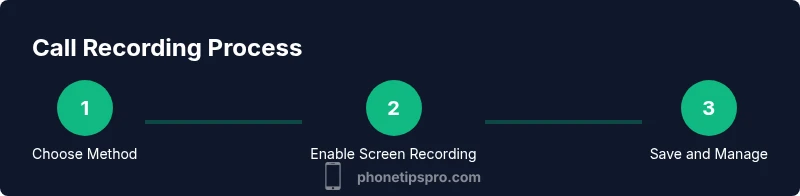
- 1
Choose recording method
Decide whether to use Screen Recording with mic or a trusted third-party service that handles call routing. This choice affects audio quality, legality, and storage.
Tip: If you’re unsure, start with Screen Recording to test feasibility before introducing a service. - 2
Prepare Screen Recording
Open Control Center, press the Screen Recording button, and fan out options to enable Microphone Audio. Ensure the button shows a red recording indicator when active.
Tip: Test a short recording to verify both screen and mic audio are captured. - 3
Start the call and begin recording
Place or join the call, then start Screen Recording before you begin speaking. If using a third-party app, initiate the call through that service.
Tip: Keep the call within speaker mode if you rely on mic capture for all participants. - 4
End recording and save
End the recording and locate the file in Photos or the app’s library. Save or export to your chosen secure storage location.
Tip: Rename the file with the date and participants for easy retrieval. - 5
If using a third-party solution
Set up the account, verify call routing, and confirm where files are stored. Run a short test to ensure quality and legibility.
Tip: Review data retention settings to minimize unnecessary storage. - 6
Review and organize
Label and categorize recordings. Create a simple folder structure for quick access and compliance checks.
Tip: Document consent for each recording in a notes file or metadata. - 7
Secure handling and sharing
Only share recordings with authorized people and use encrypted transfer when needed. Consider redacting sensitive details before sharing.
Tip: Set a retention window and delete old files regularly.
FAQ
Is it legal to record iPhone calls?
Recording laws vary by jurisdiction. In many places, at least one party must consent; in others, all parties must consent. Always check local regulations and obtain explicit consent before recording.
Laws vary by place, so get consent and check local regulations before recording.
Can I record calls without the other person's knowledge?
In some jurisdictions, recording without consent is illegal or requires notification. Even where it is allowed, it’s best practice to inform the other party to maintain trust and transparency.
Usually not advised and often illegal; always inform the other party.
What are reliable apps for iPhone call recording?
Look for apps with clear privacy policies, documented consent flows, and encryption. Cross-check user reviews and ensure the app complies with your local laws and platform policies.
Choose apps with strong privacy and clear consent prompts.
Does iPhone support recording meetings via Screen Recording?
Yes, Screen Recording can capture a meeting when the mic is enabled, but it may not capture all system audio in some apps. Test in advance to verify audio fidelity.
Screen Recording can work, but test audio capture first.
How should I store and share recordings securely?
Store recordings in encrypted locations, limit access, and implement a retention policy. Redact sensitive details before sharing and document consent in your records.
Use encryption, access controls, and redaction when sharing.
What if the recording quality is poor?
Check microphone status, test with a short call, and ensure sufficient storage. If using a third-party app, verify network stability and ensure the service supports your device.
Test audio, check mic, and verify storage and network.
Watch Video
Quick Summary
- Record calls lawfully: always obtain consent where required.
- Screen Recording is a free, built-in option with mic enabled.
- Third-party services offer more features but require careful privacy review.
- Label, store, and protect recordings to reduce risk.