Block Website on iPhone: Step-by-Step Guide
Learn proven methods to block websites on iPhone using Screen Time, DNS filtering, and browser controls. A practical step-by-step guide for parents and productivity-minded users.

You can block a website on iPhone by using Screen Time restrictions or DNS-based filters. This quick method lets you prevent specific domains from loading in Safari and most apps. You’ll enable Content & Privacy Restrictions, add the sites you want to block, and test the result to ensure the block sticks across Wi‑Fi and cellular networks.
Why blocking websites on iPhone matters
According to Phone Tips Pro, blocking websites on iPhone is a practical way to reduce distractions, protect younger users, and enforce study or work boundaries. By blocking specific domains, you control what can be accessed in Safari and many apps that rely on web content. This approach is especially helpful for parents, students, and professionals who want to maintain focus and minimize data usage. The exact phrase block website on iPhone captures the core goal: limit access to websites that pull attention away from tasks. In this guide you’ll learn why this matters and how to implement it with built-in tools and trusted third-party options. This knowledge helps you stay productive without sacrificing essential browsing capabilities.
As you read, you’ll see practical steps, caveats, and tested tips that make blocking websites on iPhone straightforward. The information here aligns with what Phone Tips Pro finds most effective for everyday users who want predictable results across apps and browsers.
What you’ll learn in this guide
- When to use Screen Time vs DNS-based filtering
- How to block specific domains and entire categories
- How to test and verify blocks across Safari and other apps
- Common pitfalls and how to avoid bypasses
- Privacy considerations when using any blocking method
Definitions you should know
- Screen Time: Apple’s built‑in parental controls and restrictions framework that can block web access for specified content.
- DNS filtering: An alternative approach that blocks requests at the network level, often across multiple apps and devices.
- Content Restrictions: A subset of Screen Time controls focused on what content can be loaded in web views and browsers.
- Never Allow vs Allowed Websites Only: Two common modes that determine what a user can visit.
Built-in options: Screen Time and Content Restrictions
The core method to block websites on iPhone without third-party apps is Screen Time. Within Screen Time, Content & Privacy Restrictions let you control web access. You can choose to limit adult websites or specify particular sites to Never Allow. This approach is simple, stays within the iOS ecosystem, and supports Family Sharing for guardianship and oversight. The strength of this method lies in its integration with the system and its ease of rollback if needed.
Block specific websites via Screen Time: a practical walkthrough
Blocking specific websites on iPhone via Screen Time is straightforward but requires attention to detail. You’ll navigate to Settings > Screen Time > Content & Privacy Restrictions > Content Restrictions > Web Content. From there, you can select either 'Limit Adult Websites' or 'Allowed Websites Only' and add exact URLs to Never Allow or Always Allow as appropriate. This targeted approach helps you block websites that frequently derail focus, while allowing access to essential resources. This method works well for most standard browsers and in many apps that rely on Safari’s web engine.
DNS-based blocking and network-wide strategies
If you want broader protection that extends beyond a single device or account, DNS-based blocking can be a powerful tool. By configuring a DNS provider with filtering rules, you can block categories or domains on all devices that use the same network. Keep in mind that DNS blocks may introduce latency and can be bypassed if devices switch to cellular data. For most households, DNS filtering is a good complement to Screen Time, especially when multiple devices must be controlled simultaneously.
Third-party apps and mobile device management (MDM)
For organizations or families with more complex needs, third-party parental-control apps or an MDM solution offer deeper control. These tools can enforce website blocks across multiple apps, devices, and user profiles, and they often provide reporting and remote administration. While powerful, these options introduce additional setup complexity and ongoing maintenance. Always verify compatibility with your iPhone model and iOS version before committing.
Testing and verification: make sure the block sticks
Testing is essential after configuring any block. Open Safari (and other browsers if applicable) and attempt to load the blocked domain. If using Screen Time, you should see an access denied screen or a block message. For DNS filtering, test both Wi‑Fi and cellular connections to ensure the domain remains blocked across networks. If a site remains accessible, revisit restrictions to ensure the correct URL was added and that the proper mode (Never Allow vs Allowed Websites Only) is selected.
Common pitfalls and how to avoid bypasses
- Some apps use their own embedded browsers and may bypass Safari restrictions. Consider DNS filtering to cover additional cases.
- Private or incognito modes may circumvent certain blocks; rely on device-wide controls rather than per‑app modes when possible.
- Complex bypass attempts can occur if passcodes are weak or shared; protect your Screen Time passcode and review sharing settings regularly.
- Block lists require updates; periodically audit blocked domains to avoid unnecessary blocking or leakage.
Privacy, security, and long-term maintenance
Blocking websites on iPhone should balance safety with usability. Always review the privacy implications of any third-party tool, especially DNS providers that see your domain requests. Keep iOS updated to ensure you have the latest security fixes, and consider documenting changes for accountability within a family or organization. Regular maintenance helps prevent accidental over-blocking and keeps blocks effective over time.
Tools & Materials
- iPhone with latest iOS(Ensure Screen Time is available and up to date)
- Apple ID and Screen Time passcode(Needed to configure and modify restrictions)
- Stable internet connection (Wi‑Fi or cellular)(Testing blocks requires online access)
- DNS provider account (optional)(For network-wide blocking across devices)
- Parental-control app or MDM (optional)(Use for multi-device or corporate-provisioned environments)
Steps
Estimated time: 10-15 minutes
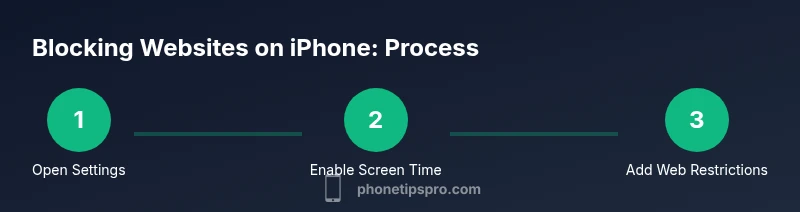
- 1
Open Settings
Launch the iPhone Settings app and locate Screen Time as the starting point for website blocking. This centralizes controls and makes changes auditable.
Tip: If you’re short on time, use the iPhone search bar in Settings to jump directly to Screen Time. - 2
Set or confirm Screen Time passcode
Create a Screen Time passcode to prevent other users from changing restrictions. This step is crucial for maintaining your blocks over time.
Tip: Choose a passcode you can remember but others can’t guess. - 3
Enable Content & Privacy Restrictions
Turn on Content & Privacy Restrictions to access the web-blocking settings. Without this, changes to web access won’t be enforceable.
Tip: If you use Family Sharing, ensure you have administrator permissions on the organizer’s device. - 4
Configure Web Content restrictions
Navigate to Web Content and choose either 'Limit Adult Websites' or 'Allowed Websites Only'. Then add the exact domains you want to Never Allow or set a whitelist.
Tip: For targeted blocking, add the exact URL (including www) and test with a private browser session. - 5
Test the block across networks
Open Safari and try visiting the blocked site. If the block works, you’ll see a blocked-page message or a navigation error.
Tip: Test on both Wi‑Fi and cellular to confirm coverage. - 6
Optional: set up DNS-based blocking
If you want broader protection, configure a DNS provider with content filtering and apply it to your home network. This can block domains even if apps use alternative browsers.
Tip: Be aware this can affect other devices on the same network; document changes for your household.
FAQ
How do I block a specific website on iPhone?
Use Screen Time Content & Privacy Restrictions to add specific domains to Never Allow. For broader control, pair with DNS filtering.
Block a site using Screen Time or combine with DNS filtering for broader protection.
Will blocking a site affect other apps?
Blocking through Screen Time mainly affects web access in Safari and apps that rely on web content. Some apps may enforce their own filters.
It mostly impacts Safari and similar browsers; some apps may have their own blockers.
Can I block websites without Screen Time?
Yes, via DNS-based blocking or third-party parental-control apps, though setup is more involved and network-specific.
Yes, but it’s usually more complex and may require network setup.
How do I unblock a site later?
Return to Screen Time > Content & Privacy Restrictions and remove the site from Never Allow. You’ll need the Screen Time passcode.
Go back to restrictions and remove the site from the blocked list.
Is DNS blocking more secure than Screen Time?
DNS blocking can cover more traffic but may introduce latency and bypass risks if not configured carefully. Screen Time is simpler for most users.
DNS can be broader but needs careful setup; Screen Time is easier.
Will blocking websites affect private browsing mode?
Blocking typically applies to standard browsing; private or incognito sessions may circumvent some restrictions depending on the app.
Private mode can bypass some blocks depending on the app.
Watch Video
Quick Summary
- Block websites on iPhone effectively with Screen Time and DNS options
- Test blocks across networks to ensure consistent results
- Combine built-in controls with optional DNS filtering for coverage
- Protect your passcodes and review settings regularly