How to Ban Websites on iPhone
Learn practical methods to ban websites on iPhone using Screen Time, DNS filtering, and router controls. This Phone Tips Pro guide provides step-by-step setup, testing tips, and safety considerations for families and individuals.

On iPhone you can ban websites by using Screen Time, DNS filtering, or router-level controls. This guide walks you through practical steps for iOS 16+ to block certain domains, restrict all access in Safari, and apply parental controls consistently across apps. You’ll learn quick method pros/cons, safety notes, and how Phone Tips Pro recommends choosing the right approach for your family or personal use.
What blocking websites on iPhone means
Blocking websites on iPhone controls access to specific domains in Safari and across apps that rely on the device's network settings. The goal is to prevent accidental taps or deliberate visits to unwanted sites while preserving legitimate browsing. This often involves a mix of on-device restrictions and network-level filters. Phone Tips Pro highlights how different approaches balance convenience, privacy, and enforcement, especially for families with varied ages and tech savvy.
Methods to block websites on iPhone
- Screen Time (on-device restrictions): simple, private, and resilient to casual overrides; best for individual devices or families sharing one account.
- DNS-based filters: enforce blocks across all apps that use that DNS; great for multi-device homes or when you want broader coverage beyond Safari.
- Router-based controls: extend protection to all devices on your home network; useful for devices outside your iPhone but connected to your Wi‑Fi.
- VPN-based blockers or third-party apps (with caution): offer flexible rules but may introduce privacy considerations and potential bypass if misconfigured. As you compare these options, remember that Phone Tips Pro emphasizes choosing a method that fits your risk level, device management style, and whether you share devices with others.
Step-by-step: Screen Time approach
Screen Time is the most straightforward way to ban websites on iPhone for many users. This section walks you through configuring restrictions so that Safari and other apps respect your rules. You’ll learn how to restrict content, add custom websites, and ensure settings survive device restarts. Quick tip from the Phone Tips Pro team: set a separate Screen Time passcode to prevent easy override by family members.
Step-by-step: DNS filtering setup
DNS filtering works at the network level, blocking domains before traffic reaches your device. To enable it on iPhone, connect to Wi‑Fi, go to Settings > Wi‑Fi > [your network] > Configure DNS > Manual, and add the DNS provider addresses. Then install or sign in to the provider’s family/parental controls app to customize the block lists. Test by loading blocked domains in Safari or other apps to verify the filter applies.
Step-by-step: Router-level blocking
Router-based blocking provides a centralized way to ban websites for all devices on your home network. Access your router’s admin panel (usually at 192.168.1.1 or similar), locate Parental Controls or DNS settings, and set the preferred DNS provider or enable URL filtering. Apply changes and reboot the router if required. This method helps when a user has multiple devices or when a DNS change on the iPhone alone isn’t enough.
Verification, caveats, and privacy
After implementing blocks, test across Safari, other browsers, and apps. Some apps use in-app browsers that may bypass simple Safari blocks; DNS filters reduce this risk but aren’t perfect in all configurations. If you need stronger enforcement, combine Screen Time with DNS filtering and router controls. Be mindful of privacy, and avoid over-blocking content that is legitimately useful. Phone Tips Pro also notes that none of these methods guarantees 100% blocking, especially with VPNs or enterprise apps.
Verdict and best practices
Blocking websites on iPhone is most effective when you combine methods: use Screen Time for device-level control, add DNS filtering for network-wide coverage, and reinforce with router-level rules for home networks. This layered approach minimizes bypass opportunities and provides consistent enforcement across services. The Phone Tips Pro team’s verdict is to tailor the setup to your goals, scroll behavior, and the age of users involved, then review settings every few months to adapt to changing sites and apps.
Authority sources
- U.S. Federal Trade Commission: https://www.consumer.ftc.gov/articles/0070-internet-safety-smart-parenting
- FCC: https://www.fcc.gov
- Apple Support (official guidance): https://support.apple.com
Tools & Materials
- iPhone with latest iOS(Ensure iOS is updated to access current Screen Time controls)
- Stable Wi‑Fi or cellular data(Needed to access Settings and DNS/app setup)
- DNS provider account/app(e.g., Cloudflare Family DNS or NextDNS; configure with family safety profiles)
- Router with parental controls (optional)(For home network-wide blocking beyond the iPhone)
- Testing checklist(Plan 20–40 minutes to verify blocks across apps and browsers)
Steps
Estimated time: Estimated total time: 25-40 minutes
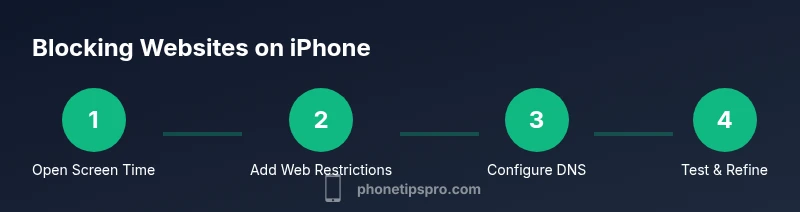
- 1
Open Screen Time and enable restrictions
Open Settings, scroll to Screen Time, tap Content & Privacy Restrictions, and switch on restrictions. This establishes a baseline for on-device control over Safari and other apps. Think of this as the foundation before adding any block lists.
Tip: Set a separate Screen Time passcode to prevent bypass. - 2
Block specific websites or categories
In Content & Privacy Restrictions > Web Content, choose 'Limit Adult Websites' or 'Allowed Websites Only' and add custom sites to Never Allow. This creates a targeted block for Safari traffic without affecting other apps.
Tip: Test blocks by attempting to load a restricted site in Safari after saving changes. - 3
Configure DNS filtering on iPhone
Connect to Wi‑Fi, go to Settings > Wi‑Fi > [your network] > Configure DNS > Manual, and add the DNS provider’s addresses. Set the provider’s app to enforce family-safe blocks and fine‑tune the block lists.
Tip: Keep DNS profiles organized by device or home network in the provider app. - 4
Apply router-level blocking for home devices
Log into your router’s admin panel, locate Parental Controls or DNS settings, and enable the DNS-based filter used above. This covers all devices on your network, not just your iPhone.
Tip: If your router supports guest networks, consider applying blocks there as well to minimize bypass risks. - 5
Test across apps and browsers
Open Safari and alternative browsers, plus note any apps with built-in browsers. Confirm that blocked domains fail to load and that allowed sites still work. If something slips through, revisit each layer’s configuration.
Tip: Use a mix of private/incognito sessions to verify consistent blocking. - 6
Refine, document, and review
Document the blocks and review them every few months as sites change. Update lists as needed and track any user feedback. Regular maintenance keeps blocks effective without unnecessary friction.
Tip: Publish a simple guideline so trusted users know what is blocked and why.
FAQ
Can I block all websites on iPhone?
Yes, you can effectively block all websites by using Screen Time with the 'Allowed Websites Only' option and carefully managing the allow lists. This approach is strict and should be monitored for usability.
You can block all sites by using Screen Time's Allowed Websites Only setting and careful list management.
Will website blocks affect apps on my iPhone?
Blocking domains can affect apps that rely on web access. Screen Time blocks Safari traffic, while DNS filters affect traffic across apps that use that DNS. Some apps may still fetch data via in-app browsers.
Most blocks affect Safari and apps using the same DNS. Some apps might bypass if they use their own browsers.
Can I block a specific site on iPhone?
Yes. In Screen Time, you can add specific domains to the never-allow list. Additionally, DNS providers let you blacklist domains and customize categories.
Yes—add the site to Never Allow in Screen Time, or use DNS to block it.
What about bypassing blocks with VPNs?
A VPN or proxy can bypass DNS-based blocks unless you control the VPN outside the iPhone. For stronger enforcement, combine Screen Time with router-based controls.
Yes, VPNs can bypass DNS blocks; use router controls for stronger protection.
Will blocks carry over to other devices?
If you use iCloud-based Screen Time sharing, blocks can apply across linked devices. For independent devices, configure per device.
Blocks can carry over if you use Screen Time across devices via iCloud.
How often should I review blocked sites?
Review blocks every few months or after major site changes. Update lists as needed to maintain relevance and usability.
Review blocks every few months and update lists as sites change.
Watch Video
Quick Summary
- Use Screen Time for straightforward device-level control.
- DNS filtering broadens protection across apps and networks.
- Router-based blocking extends coverage to all home devices.
- Test blocks across browsers and apps and adjust as needed.
- Document rules and review them periodically.