Email Settings on iPhone: Setup, Signatures, and Troubleshooting
Learn how to configure email settings on iPhone, add accounts, choose fetch vs push, customize signatures, and troubleshoot common issues across iCloud, Gmail, and Exchange with practical steps and best practices.

To set up and manage email on iPhone, add your account in Settings > Mail > Accounts, then choose IMAP/Exchange and enter server details if required. Configure fetch, push, notifications, and per‑account settings for signatures and VIP alerts. This guide covers setup, syncing options, and common troubleshooting to keep mail reliable on iPhone.
Understanding email settings on iphone
Email settings on iphone are the backbone of how you receive and send messages across devices. When you configure a mail account on your iPhone, you’re enabling the Mail app to fetch or push new messages, sync drafts, and apply consistent rules like signatures and VIP alerts. According to Phone Tips Pro, a correctly configured account reduces delays and ensures messages arrive in a timely fashion, with fewer headaches from misconfigured servers or outdated credentials. This section lays the foundation: what the iPhone actually stores for your mail, how IMAP vs POP works, and why choosing the right protocol matters for reliability, security, and data usage. By understanding these concepts, you’ll be better prepared to optimize every account you manage on your device.
Supported accounts and providers on iPhone
iPhone supports a broad range of email providers, including iCloud, Gmail, Outlook/Exchange, Yahoo, and corporate mail servers. Each provider uses different server settings, but Apple’s Mail app abstracts most of the heavy lifting. When you add an account, iOS may auto-detect server details for common providers, but you can also specify IMAP/SMTP or POP settings if your provider requires it. For personal and business use alike, understanding which provider you’re using helps you tailor fetch options, notifications, and security features. This section highlights typical provider behaviors and what to expect during setup.
How the iPhone handles mail accounts and servers
Your iPhone stores account credentials securely in the system Keychain, and the Mail app talks to mail servers using standard protocols like IMAP (mail retrieval) and SMTP (mail sending). If you use IMAP, your messages stay on the server and sync across devices, which keeps your mailbox consistent. POP, by contrast, downloads messages to the device and can cause inconsistencies if you check mail from multiple devices. Server settings (incoming and outgoing) may be pre-filled for common providers, but specific ports, SSL/TLS requirements, and authentication methods can vary. Knowing these basics helps you troubleshoot when an account can’t send or receive.
Step-by-step preview: adding or updating an account on iPhone
A smooth setup usually starts with gathering the essentials: your email address, password, and any server details if you’re using a custom domain. The iPhone’s Mail app walks you through adding new accounts and verifying them. If you’re migrating from one protocol to another (e.g., POP to IMAP), you’ll adjust settings to reflect the new approach. Per-account controls let you tailor notifications and badge behavior. With the right inputs, you’ll gain reliable sync, proper authentication, and a clean, usable Inbox across devices.
Fine-tuning fetch vs push and notification preferences
Push delivers new mail immediately, while Fetch checks at a scheduled interval. On a busy inbox, Push can drain battery faster, but it provides near-instant delivery. Fetch lets you balance battery life and data usage by choosing a longer interval or scheduling fetch for certain times. You can also set per-account notification banners, sounds, and alert styles, ensuring you’re notified when important messages arrive (e.g., VIP contacts). Understanding these options helps you optimize your workflow without sacrificing responsiveness.
Signatures, VIPs, and per-account mailbox behavior
Each email account on iPhone can have its own signature, which helps identify replies and maintain a professional tone. You can enable or disable signature syncing per account to keep consistency across devices. VIP alerts let you receive special notifications for messages from selected contacts, which is helpful for time-sensitive messages. Finally, per‑account threading and conversation options keep your Inbox organized the way you prefer. These settings stay with each account, so your configurations won’t spill over to other providers.
Security and privacy considerations for email on iPhone
Security should be a primary concern when configuring email settings on iPhone. Use strong, unique passwords and enable two-factor authentication (2FA) for your email providers whenever available. If your organization supports encryption, consider S/MIME for end-to-end protection on supported accounts. Regularly review app permissions and avoid storing passwords in insecure locations. Keeping iOS updated and using secure networks reduces risk when sending and receiving sensitive information. These practices help protect your communications on iPhone without compromising usability.
Troubleshooting common issues with email on iPhone
If you encounter problems sending or receiving, start with the basics: verify your password, re-enter server settings if needed, and check your network connection. Ensure the correct account is selected in the Mail app and that the server ports and encryption methods match your provider’s recommendations. If a single account misbehaves, remove and re-add it to reset credentials. For persistent problems, consult your provider’s status page and Apple Support for device-specific tips, as issues can stem from the mail server or network rather than the iPhone.
Maintenance tips for long-term reliability
Keep email settings on iPhone up to date by occasionally verifying server names, ports, and authentication methods, especially after a password change. Regularly updating iOS helps maintain compatibility with mail servers and improves security. Consider enabling two-factor authentication on all providers and maintaining a clean mailbox with archiving and periodic backups. A well-maintained setup reduces the likelihood of authentication errors and keeps mail flowing smoothly across devices.
Quick-start recap for 1800-word mastery
Mastering email settings on iphone requires understanding provider options, account types, and how iOS handles mail servers. By configuring fetch vs push, per-account signatures, and VIP alerts, you can create a reliable, secure mail experience. Always test sending and receiving after any change, and don’t hesitate to consult official support resources for your provider when in doubt.
Tools & Materials
- iPhone with latest iOS version(Ensure device is updated to the latest iOS for best compatibility.)
- Active email address and password(Needed for adding accounts or signing in.)
- Wi‑Fi or cellular data connection(Required for initial setup and ongoing sync.)
- IMAP/POP/SMTP server details (if using a custom domain)(Only needed if your provider requires manual server settings.)
- A computer or backup method (optional)(Useful for exporting settings or backup during migration.)
Steps
Estimated time: 15-25 minutes
- 1
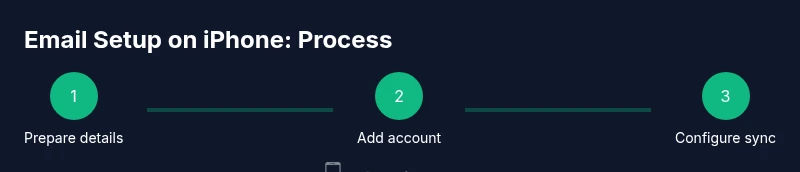
Prepare account details
Gather your email address, password, and any server settings your provider requires. Confirm you have two-factor authentication enabled if supported. Having these ready helps you complete the setup without interruptions.
Tip: Double-check password accuracy and 2FA status before starting. - 2
Open Settings and add account
On the iPhone, go to Settings, then Mail, and choose Accounts > Add Account. Select your provider or Choose Other if you use a custom server. This is the first concrete step toward email on iPhone.
Tip: If prompted, grant necessary permissions for Mail to access contacts and calendars. - 3
Enter server information (if needed)
For providers not auto-detected, input the incoming (IMAP/POP) and outgoing (SMTP) server details, including ports and encryption method. Accurate server data ensures reliable delivery.
Tip: Use SSL/TLS or STARTTLS if available for secure connections. - 4
Configure sync options
Choose how often Mail checks for new messages (Push or Fetch) and set a fetch interval that balances immediacy with battery life. Decide per-account or all accounts default behavior.
Tip: Push is fastest but may consume more battery; fetch conserves energy. - 5
Customize per-account settings
Set per-account signatures, mail reminders, and VIP alerts. Ensure each account has its own signature to avoid confusion. Decide whether to enable per-account notifications or a global rule.
Tip: Distinct signatures help recipients recognize you across domains. - 6
Test and verify
Send a test email to and from each account. Check that messages sync across devices and folders. If issues appear, re-enter credentials or consult provider status pages.
Tip: Always verify both sending and receiving after changes.
FAQ
How do I add a new email account on iPhone for the first time?
Open Settings > Mail > Accounts > Add Account, then choose your provider or Other for manual setup. Enter the required details, authenticate, and finish with a test email.
Go to Settings, pick Mail, add Account, then choose your provider and enter the needed details. Test sending an email once it’s saved.
What is the difference between Fetch and Push, and which should I use?
Push delivers new mail immediately if supported by the provider; Fetch checks at intervals. Use Push for real-time updates on critical accounts and Fetch to save battery when you don’t need instant delivery.
Push is instant when available; Fetch checks at set times to save battery. Pick based on how urgent your mail is.
Why is my mail not sending after setup?
Check outgoing server settings (SMTP), ports, and authentication. Ensure the account is enabled and not paused, and verify your network connection.
Make sure SMTP settings are correct and that you’re connected to the internet.
How can I set a different signature per account?
Go to Settings > Mail > Accounts, select the account, then edit Signature. Repeat for other accounts to keep messages distinct.
Choose the account and set its own signature in the signature field.
What security steps should I take for email on iPhone?
Enable 2FA where possible, use encryption like S/MIME if available, and review app permissions regularly. Keep iOS updated.
Turn on two-factor authentication and keep your iPhone updated for better security.
What should I do if I still have issues after troubleshooting?
Check the provider status page, update iOS, re-enter credentials, and consider removing and re-adding the account. If unresolved, contact your provider’s support.
If problems persist, recheck inputs and contact support if needed.
Watch Video
Quick Summary
- Add accounts via Settings > Mail > Accounts to start email on iPhone.
- Choose IMAP for multi-device sync or POP for single-device use.
- Set fetch or push based on balance between immediacy and battery/data usage.
- Customize per-account signatures and VIP alerts for clarity and focus.