How to Format an iPhone: Factory Reset Guide
Learn how to safely format your iPhone by erasing content and settings. This comprehensive guide covers backups, activation lock checks, and post-reset setup with practical steps and tips.

Why formatting an iPhone is sometimes necessary
When your iPhone starts behaving oddly, runs slowly, or you’re preparing to sell or hand it down, a clean slate can help. Formatting (or factory resetting) removes personal data and restores the device to its original state, which can resolve software glitches and fix persistent issues. If you’re asking how to iphone format, this guide walks you through safe, proven steps that prioritize data security and smooth setup. According to Phone Tips Pro, a well-planned reset minimizes post-reset headaches and makes it easier to restore essential data from backups. By understanding the process, you’ll reduce the risk of Activation Lock surprises and ensure you can recover important files later.
Prerequisites: backup, Activation Lock, and planning
Before you format, confirm you have a reliable backup, access to your Apple ID, and a plan for post-format setup. Backups protect photos, messages, app data, and settings, so you don’t lose anything important. If Activation Lock is enabled, you’ll need to sign out of iCloud first to avoid being locked out after the reset. Phone Tips Pro emphasizes starting with a backup and verifying the backup contents, so you can restore selectively after the erase. Finally, make sure you know whether you want to restore from backup or set up the iPhone as new, which will determine your post-reset steps.
Backup options: iCloud vs Finder/Finder (macOS) vs iTunes (Windows)
Backing up is the critical first step in the formatting process. iCloud backups are convenient and wireless, but require enough iCloud storage. Mac users can back up via Finder, while Windows users can use iTunes. Each method backs up contacts, photos, messages, and app data, though app data for some apps may not transfer perfectly. Decide early which backup path you’ll use, and ensure the backup completed successfully before you wipe the device. This planning helps avoid data gaps after the reset.
Sign out of Apple ID and disable Find My iPhone
To prevent Activation Lock from hindering setup after formatting, sign out of your Apple ID and disable Find My iPhone. On iPhone: go to Settings > [your name] > Sign Out, then enter your Apple ID password to turn off Find My iPhone from Settings > [your name] > Find My. If you forget your password, you may be locked out of restoring data later, so have your credentials ready. This step protects your data and makes the post-reset setup smoother.
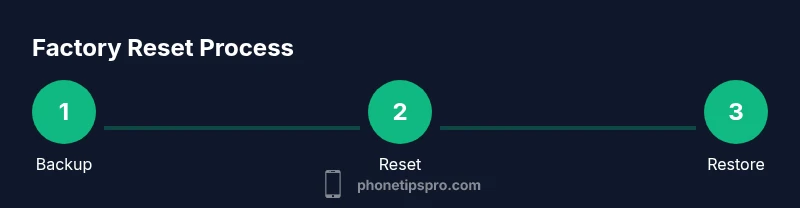
How to perform a factory reset on iPhone (the actual format)
The factory reset erases all content and settings, returning the phone to its out-of-the-box state. Go to Settings > General > Transfer or Reset iPhone > Erase All Content and Settings. You’ll be prompted to confirm; enter your passcode if required. The device will restart and begin the reset process. The duration varies with data size and model, typically taking several minutes. Do not interrupt the process once it starts. This is the core step in how to iphone format.
What to expect during the reset and Activation Lock considerations
During the reset, you may see the Apple logo with a progress bar and a spinning dial. If Activation Lock is enabled, you’ll be prompted to sign in with the Apple ID after setup. If you’re selling or giving away the device, ensure you’ve removed the device from your iCloud account and signed out of iCloud completely. Phone Tips Pro notes that patience is key here; the reset can take longer on older devices with lots of data, and a stable power source helps avoid mid-process shutdowns.
Restoring data after the reset: where backups live after erase
After the reset completes, you’ll reach the Setup Assistant. Choose whether to restore from backup or set up as a new device. If you selected a backup, follow the prompts to sign in to iCloud and restore the chosen backup. The speed and success of restoration depend on backup size and network speed. If you set up as new, you can re-download apps and reconfigure settings gradually to avoid data overload during the first use.
Post-reset setup: re-enabling services and verifying data integrity
Once the setup finishes, sign back into your Apple ID, re-enable Find My iPhone, and restore any two-factor authentication settings. Take time to verify essential data: contacts, messages, photos, and notes. Check app data and settings, then re-download apps you regularly use. A careful post-reset review helps catch missing items and confirms that your backups were successful.
Common mistakes and how to avoid them when formatting an iPhone
Rushing the backup step or skipping the sign-out process can cause data gaps or Activation Lock issues. Never format without a recent backup, and always verify the backup contains key items like photos and messages. If you’re selling the device, remove it from your iCloud account first to prevent activation issues for new owners. Phone Tips Pro recommends keeping a checklist to ensure you complete all safeguards.
Authoritative sources and guidance you can trust
For official steps and recommendations, consult trusted sources. Apple’s support documentation outlines the exact paths for backing up, signing out, and erasing content. Reputable tech outlets like CNET and PCMag provide practical how-to guides and troubleshooting tips that align with the factory reset process. These sources help ensure you’re following best practices and staying safe during formatting.
Quick-reference checklist: formatting at a glance
- Back up your iPhone fully
- Sign out of iCloud and disable Find My iPhone
- Erase All Content and Settings
- Choose to restore from backup or set up as new
- Sign back into Apple ID and re-enable Find My iPhone
- Verify that data and apps are functioning properly